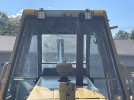
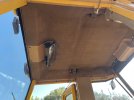
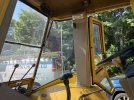
Yep, sodium and calcium chloride, damn stuff. Wish they would ban it and require drivers to slow to f down. Say nothing about the legacy problems State DOT's have here in the Northeast with sodium and calcium chloride solutions that are now in some drinking water supplies. Wonder what the costs are totaled for the rotten frames and quarter panels that eat up our cars and trucks since the 60's. Here comes the salt man! Bang head....
-
Thank you for visiting HeavyEquipmentForums.com! Our objective is to provide industry professionals a place to gather to exchange questions, answers and ideas. We welcome you to register using the "Register" icon at the top of the page. We'd appreciate any help you can offer in spreading the word of our new site. The more members that join, the bigger resource for all to enjoy. Thank you!
You are using an out of date browser. It may not display this or other websites correctly.
You should upgrade or use an alternative browser.
You should upgrade or use an alternative browser.
My CAT 426 Project
- Thread starter edgephoto
- Start date
edgephoto
Senior Member
Not sure where in NY you are. I grew up in Homer. The salt was so thick that blacktop roads were white and there were dust clouds of salt when driver on dry roads.
Here in CT they used a sand/salt mixture. it had very little salt in it. Cars did not get very rusty but they did get super dirty from the reddish sand. Now the state switched to pretreatment and cars are rotting out fast. I believe there is some sort of lawsuit from trucking companies regarding the corrosivness of this stuff.
Here in CT they used a sand/salt mixture. it had very little salt in it. Cars did not get very rusty but they did get super dirty from the reddish sand. Now the state switched to pretreatment and cars are rotting out fast. I believe there is some sort of lawsuit from trucking companies regarding the corrosivness of this stuff.
Finished College at SUNY Cortland - worked and live in the North Country. State is using liquid applications and sodium and calcium chloride solids on roads here. As mentioned above - yes roads are white in winter - dust clouds of salt burn the needles off of pines adjoining the roads. Dead trees in a few years.
edgephoto
Senior Member
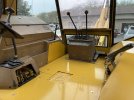
Was able to squeeze in some more time working on my machine. Got the floor plates bolted down, the rear console installed. I topped off the batteries with a charge. When I started the repairs I disconnected the ground cable where it attaches to the frame. I put the washers and nut back on but it got rusty. I did not have what I needed to clean it and there is a huge voltage drop. Gauges were cutting in and out and when the key was turned on the alarm was beeping. Next weekend I plan to get the ground cleaned up and secured. Then I can test all the electrical items, lights, wipers, etc.
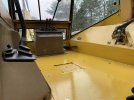
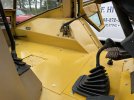


edgephoto
Senior Member
Was able to get some more days in working on the old girl. Wish I could devote more time and just get it done but I am making progress. Got the hood cleaned up, painted and the access doors working correctly.
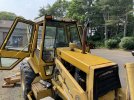
Two weekends ago I reconnected the batteries and when the key was turned to ON the low oil pressure alarm was sounding and the garages were acting odd. It cranked, albeit slow, but started and I let her run for 10 mins or so. I had a huge voltage drop on the battery to chassis ground. Not surprised as the stud was corroded from being disconnected for over a year. I manually sanded it the best I could but it wasn't enough.
This past weekend I cleaned and secured the main ground. That voltage drop was eliminated but now when I turned the key nothing happened. The fuse box is 3 sections, 2 of the fuses had power, 2 had power when the lights switches were turned on but the row of 10 that powers everything else did not have power. I ran out of time to really dig into diagnosing the issue.
I will look at the wiring diagram and make a list of stuff to check. Since all 10 fuses are powered from 1 wire I would assume a relay is what powers up the box. So most likely suspect is another ground which is under the floor. I bet that is my issue. Everything worked before I disassembled to do the repairs.
edgephoto
Senior Member
This past weekend I was able to get back to my machine. The goal was to remove all the broken lighting, parts from broken lights and to make sure all electrical equipment works.
My no power issue was a 10 volt drop at the fuse that supplies power to the relay that powers up the bulk of the fuse box. Cleaning the contacts fixed that. Had a few more fuses with voltage drops that I fixed. Cleaned two more grounds and secured them.
We removed all the old lights, tested the wiring and we did find one brake light switch broken and the switch that shuts off the rear wiper if the window is open was stuck in the closed position. Otherwise everything works.
The new lights finally arrived on Monday. I need to wire brush the rust that was under the old lights and paint those areas. Then I can install the lighting. Once all the lights are mounted and verified working I can reinstall the headliner, trim and seat assembly.
Getting a ton of parts off my bench and out of my garage. This makes me happy. My machine is getting closer to being ready for work
aighead
Senior Member
Are these interior or exterior lights?
I've considered getting LED lightbars for my equipment but I don't know anything about hooking that stuff up.
I've considered getting LED lightbars for my equipment but I don't know anything about hooking that stuff up.
edgephoto
Senior Member
@aighead These are external lights. I am not really adding anything new just replacing missing, broken of and old lights.
I picked up some LED driving lights that will replace the front and rear work lights.
The turn signal and taillights are Cat knock-offs. Cat does not make the old incandescent lighting and the price for the LED replacements is high. I found knock-offs the look and fit so I hope they last.
I want to wire brush the rust that is on the cab where the old lighting mounted and paint it. I was hoping to do that today and tomorrow but looks like I will get rained out.
edgephoto
Senior Member
Today I worked in the hot sun and cooked myself but I got a good portion of the exterior lighting squared away. If Cat didn't lose one bracket I would be done with the turn signals and taillights.
Here is what the lighting looked like before.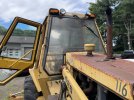
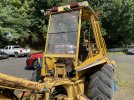
I wire brushed and primed the rust before fitting new lighting.
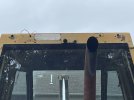
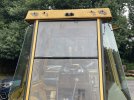
Here is what the lighting looked like before.


I wire brushed and primed the rust before fitting new lighting.


edgephoto
Senior Member
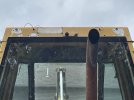
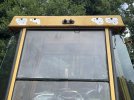
New LED lights fitted.
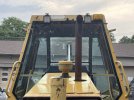
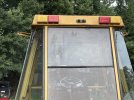
Tomorrow I need to weld up some brackets to hang the rear LED work lights. While the welder is out I can weld a new piece onto the dead pedal and get that painted.
Installing the lighting took way longer than I anticipated but I was checking for voltage drops and correcting any that I found. The nice thing with LEDs is they light up the same brightness as long as you have enough voltage vs. incandescent bulbs which will vary in brightness.
edgephoto
Senior Member
Thanks @orangeman . I just wish I could get more time to work on it. Last weekend I got rained out on Saturday and Sunday I had too many chores to do. This weekend I planned to work on it but family stuff has eliminated that possibility.
I am going to take a day off during the week. I am getting close to having the cab completed. Then I can do maintenance on the drivetrain. Last thing I need to do is the leaking axle seal.
I am going to take a day off during the week. I am getting close to having the cab completed. Then I can do maintenance on the drivetrain. Last thing I need to do is the leaking axle seal.
My project has been a Allis 715 Loader Backhoe with full Cab. It is built like a Navy battleship and the Perkins 4-236 which Caterpillar used in its first production backhoe launch is very volumetrically efficient.
After working through a few minor electrical issues am pleased to report that it runs well. Need to replace the exhaust manifold and have a new Perkins OEM manifold to replace it but would like to ceramic coat the new one myself (at home) before fitting it to the block. Replaced the old crack worn old seat with a Mack Truck Bull Dog Air Ride seat which fit perfect - even the bolt holes for the bottom base plate where in the right place. Yahoo! The Mack Seat is made by Bostrom and has a very heavy frame to it.
Will also need to clean up the external paint mostly on the cab to get here looking good. Once the unit is finished, (needs a few of the cab glass replaced) it will be dedicated to snow moving in our 350' long drive and for topsoil work here on the property.
Am also developing plans for a stainless steel muffler as the prior owner slipped in a round non OEM replacement. From my years of working on these old AC backhoes - there were a number of them bought by our School Districts and Conrail had some on the rail lines. A new AC 715 Loader Backhoe in the early 80s with full cab was pushing $43,000 new. That was more than some folks where paying for a house back then!
Hope everyone is having a super great day! ~ Orangeman
DMiller
Senior Member
Had been looking at the old AC 700 and 800 series TLBs, seems the line lived on under several make names just badge and small skins or power train changes. Hard to improve on what really worked well.
edgephoto
Senior Member
edgephoto
Senior Member
I have to trace two wires in a loom that is not original and see what they are. Once I sort that out the seat will go in and the cab is more or less done. I do have one window to replace in the back but I have other things to do first. Then I need to perform all the maintenance, oil and filter change, fuel filter change, cooling system service and new thermostat and other fluid changes.
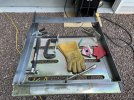
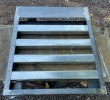
I also need to do something about the grill. The original is no longer usable. A replacement from Caterpillar is close to $900. It is nothing more than a stiff rubber decoration. Not worth the cost. I decided to fabricate some out of steel. I templated it and stopped by the steel distributor and walked around for inspiration. Once I decided on my design I bought the steel. I spent $80 and have more than enough material. This weekend I will start working on my new grill.

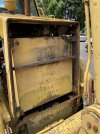
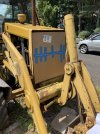
I also need to do something about the grill. The original is no longer usable. A replacement from Caterpillar is close to $900. It is nothing more than a stiff rubber decoration. Not worth the cost. I decided to fabricate some out of steel. I templated it and stopped by the steel distributor and walked around for inspiration. Once I decided on my design I bought the steel. I spent $80 and have more than enough material. This weekend I will start working on my new grill.


edgephoto
Senior Member
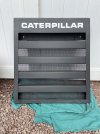
Well I spent a day a few weeks back fabricating a new grill. Then I painted it matte black. I found a guy on eBay that was selling Caterpillar decals. He has black listed but he made me them in white and it fit the grill perfectly. On Monday I went and put the grill on. Fit perfectly. I am happy with it.


edgephoto
Senior Member
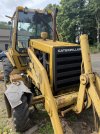
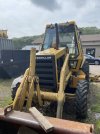
It was cranking slow so I sent some time diagnosing it. 2.5-2.7 volt drop inside the solenoid. So I bought a new starter but am hoping to return it. I will remove the starter and see if I can clean up the contacts inside the solenoid. If not, I have a new unit in hand. It was cranking fine last year but I have not run it in over a year because I was working on getting her back together and ironing out lights and other electrical gremlins. Now I need to run her and change oil, coolant, etc.
oarwhat
Senior Member
I've flipped the contact disc in the solenoid many times.

