• Thank you for visiting HeavyEquipmentForums.com! Our objective is to provide industry professionals a place to gather to exchange questions, answers and ideas. We welcome you to register using the "Register" icon at the top of the page. We'd appreciate any help you can offer in spreading the word of our new site. The more members that join, the bigger resource for all to enjoy. Thank you!

Allis; Is at least out of the mud

DMiller

Senior Member
Joined
Feb 21, 2010
Messages
16,579
Location
Hermann, Missouri
Occupation
Cheap "old" Geezer
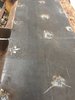
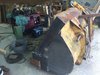
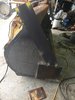
Have the bucket inside for now as wet weather threat for the weekend. Did manage to grind into and overlay the cracked welds in the inner bottom supports. Laid in a little weld in my own gas axe gouges and in the arm pin retainer heads to refill where the square pin heads wore for years too. Need a day with decent weather to drag back into the rocks and hack those remnant end bits off, I get a little deeper with fixes as I go.

IMG_1808a.jpg
 

DMiller

Senior Member
Joined
Feb 21, 2010
Messages
16,579
Location
Hermann, Missouri
Occupation
Cheap "old" Geezer
Will be adding some strake steel supports to sit the new moldboard lip upon to tack it in place after get the corners cleaned off. Once the moldboard is where it need be(square to supports) then I will situate the cutting edge and center. Get it laid in then the bottom sheet gets installed and bucket flipped over. Will be turned over at least twice so can section out the sidewalls add the new inserts and wear plates then roll back over for the wear shoes on the bottom and side edges. Will be a few days!! Aint pretty but is what I have to work with!
 

Metalman 55

Senior Member
Joined
Feb 6, 2013
Messages
1,301
Location
Ontario
Keep those pictures coming DM. Do you have anyone local that can sandblast the work area on the bucket for you? On mine it sure made the job a lot easier.
 

DMiller

Senior Member
Joined
Feb 21, 2010
Messages
16,579
Location
Hermann, Missouri
Occupation
Cheap "old" Geezer
I could only wish on the blasting. I can rent one, $175/day plus media and do not have compressor to feed it so would have to go there too so will have to make do rusty or at least rust converter and weld thru primer for the inner bottom. These are the pin retainer bosses and the backside of my MP:
IMG_1804a.jpg IMG_1805a.jpg IMG_1809a.jpg IMG_1810a.jpg
 

wosama931b

Senior Member
Joined
Sep 24, 2011
Messages
444
Location
Fayetteville, NC
Occupation
Real Estate Broker/ Ret.
Hello D Miller, I hate to see that new garage door get dirty , you need a large wire grinder to clean up parts .
I did a repair on my bucket , welder put a new back edge on, it had a air space also , have fun , sam .
 

DMiller

Senior Member
Joined
Feb 21, 2010
Messages
16,579
Location
Hermann, Missouri
Occupation
Cheap "old" Geezer
Another view of the pin size/style:
IMG_1811a.jpg

I have a cup brush set for both the 4.5 and the 7" grinders, just not in the pictures. I am saving that work for once back OUTSIDE!! Yes the shop is fairly new still, and clean but that as all know will not last long!
 

DMiller

Senior Member
Joined
Feb 21, 2010
Messages
16,579
Location
Hermann, Missouri
Occupation
Cheap "old" Geezer
Spoke to a fella yesterday that does work at the facility I work in, he is a grade contractor and machine operator. He stated the 953 series loaders have a similar set up on the buckets with a air spaced double floor, he did not know why either. Makes for a nice flat bottom for grade work is one comment he made as you know when the shovel is flat to surface.
 

gtermini

Well-Known Member
Joined
May 29, 2015
Messages
198
Location
Amity, OR
I could only wish on the blasting. I can rent one, $175/day plus media and do not have compressor to feed it so would have to go there too


If you have a decent pressure washer, you might look into a sandblaster attachment for it. For about 1 day's rental you could own a setup.

https://www.amazon.com/Pressure-Washer-Industrial-Sand-Blast/dp/B004GQLDR8 plus a nozzle sized for your washer


Not near as quick as a pressure pot, but you can work at your own rate if time's free.

Greyson
 

DMiller

Senior Member
Joined
Feb 21, 2010
Messages
16,579
Location
Hermann, Missouri
Occupation
Cheap "old" Geezer
Kinda like it all but the wet part. Will have some areas that will suck in that water and could be problematic when go to repaint as the inner bottom cavity as I know won't be able to fully seal it tight.

This is a chunk of the old cutting edge showing the lip of the bucket moldboard I gave up on, are two pieces of the edge with this the worst. Was little left to actually work with considering the need to cut it back from the weld. Appeared to have been rubbed raw thru the original weld and rolled back off the edge at the weld line for the grader edge add on.
IMG_1814a.jpg
 

Metalman 55

Senior Member
Joined
Feb 6, 2013
Messages
1,301
Location
Ontario
20160923_121806.jpg That sandblasting attachment looks good to me. You could always burn a few "vent holes" in the places that trap water & give it a few days to drain/dry out, then weld the holes back up.

Sandblasting sure give an opportunity to do a premium job.

Looks like the old cutting edge was off of a skid steer?

So, you have plates to go on both on the bottom & top surface of the bucket then? What thicknesses are you planning to use?

Here is my 941 bucket once it was blasted.
 
Last edited:

DMiller

Senior Member
Joined
Feb 21, 2010
Messages
16,579
Location
Hermann, Missouri
Occupation
Cheap "old" Geezer
Bucket moldboard flows over the cutting edge on original design and will fit a panel to mimic that. Will be 3/16" inside 3/8" AR bottom sheet sandwiched around the 1"x10"x 78" cutting edge. Pretty certain the edge previous repair was grader edge with either medium duty backhoe or small loader teeth added to it, all weld ons. Overall I think the Cat layout is a better choice but did not want to have to re-engineer mine to that level. That curved weld line is the inside sheet remnant from the bucket, on the old AC's the sheet ran to within 6" of the cutting edge lip where was welded at rear of edge to underside and to the top at the front then the bottom sheet applied over that with a rough two inch overlap. Still considering a blaster of some sort, just may not make it for this piece, budget got a little crimped recently.
 

DMiller

Senior Member
Joined
Feb 21, 2010
Messages
16,579
Location
Hermann, Missouri
Occupation
Cheap "old" Geezer
Well it did not warm up much as they said on the news of last night but I moved forward. You can all laugh real hard but I got angry at myself, kept flogging on how to salvage out as much of the side panels as could then just said the hell with it and hacked the bent up pieces of scrap out.

I did get fairly far along tacking pieces into place.

IMG_1815a.jpg IMG_1815a.jpg IMG_1816a.jpg IMG_1817a.jpg
 

Attachments

  • IMG_1819a.jpg
    IMG_1819a.jpg
    272.1 KB · Views: 49

DMiller

Senior Member
Joined
Feb 21, 2010
Messages
16,579
Location
Hermann, Missouri
Occupation
Cheap "old" Geezer
End caps are just 1/4" as were the originals, they will get 1/2" AR leading edged. Will be a 1/2" rub edge along side at bottom also to mate with the rub shoe 1/2" runners. I am thinking the bucket floor at one time may have been 1/4" but all is down to 3/16" from time.
Next week hope to get the zipper closed across the front floor extension, get the relief cuts made for the cutting edge and get it cut to length, situated and with the off falls to be the side uprights. Once cutting edge fit and fixed to moldboard the floor sheet will go on. at least 15 maybe 18 holes to punch thru for pocket welds with a full radius weld. Last pieces to go on will be the pin cover heels and the teeth from the 955.
 

DMiller

Senior Member
Joined
Feb 21, 2010
Messages
16,579
Location
Hermann, Missouri
Occupation
Cheap "old" Geezer
If any are interested, the old gent I bought my cutting edges from has offered me the remaining four he has. 1" x 10" x 96" rusted but still new. Pre-punched holes I believe are for Case series tractor ground engagement pieces. PM me if any interest. His big plan was to use them as frame for a hydraulic press, has had them he noted for three decades.
 

DMiller

Senior Member
Joined
Feb 21, 2010
Messages
16,579
Location
Hermann, Missouri
Occupation
Cheap "old" Geezer
Here they are:

IMG_1846a.jpg IMG_1847a.jpg

Are CASE Wheel loader edges, confirmed with the guy that had them. Bought them at a MODOT(Missouri Highway Department) sale some years back. Had them buried in the barn and tired of trying to work around them so My Turn!!.
 

DMiller

Senior Member
Joined
Feb 21, 2010
Messages
16,579
Location
Hermann, Missouri
Occupation
Cheap "old" Geezer
A little further along. Lots of stitch welds going back and filling in between. Eyes not so sharp as to the puddle anymore but welds still passable for a antique like me! Will move to set floor plate next then flip the bucket for finish of long welds cheek plates and side cutting edges then flip it back over for skid shoes and pin heels.

IMG_1854a.jpg IMG_1857a.jpg IMG_1859a.jpg IMG_1860a.jpg
 

DMiller

Senior Member
Joined
Feb 21, 2010
Messages
16,579
Location
Hermann, Missouri
Occupation
Cheap "old" Geezer
Too wet for fence work today plus nursing some 'Extra' poison ivy I got into, between that and Green Briar or the multiflora crap I am not certain that nature hates us!! So I got the gas axe fired up cut my pocket holes rust converter on the inside of the bucket then set and tacked the floor sheet in place. Lots of rod to use tomorrow IF does not dry up enough to stretch some wire.
IMG_1873a.jpg
 

DMiller

Senior Member
Joined
Feb 21, 2010
Messages
16,579
Location
Hermann, Missouri
Occupation
Cheap "old" Geezer
Well not the prettiest root pass welds I have ever made and due to go back for second pass but looking better. A lot of small considerations to attend to but should finish up before I go in for surgery. Probably add lift eye provisions on side edge reinforcements, have the teeth to situate and weld in, then flip it back over to do more work under. Was hinted by a comrade that I may not need the skid shoes on the floor plate with it upgraded to 3/8" AR. His take was OE was 1/4" with 1/4" skid shoes, I could not remember that far back!
 

Attachments

  • IMG_1876a.jpg
    IMG_1876a.jpg
    209.2 KB · Views: 22
  • IMG_1880a.jpg
    IMG_1880a.jpg
    187.3 KB · Views: 21
  • IMG_1881a.jpg
    IMG_1881a.jpg
    230.1 KB · Views: 22
  • IMG_1882a.jpg
    IMG_1882a.jpg
    199.7 KB · Views: 22

DMiller

Senior Member
Joined
Feb 21, 2010
Messages
16,579
Location
Hermann, Missouri
Occupation
Cheap "old" Geezer
This one did not copy over, was this afternoon. Corner cutting bits are just sitting on the edges, need be dressed a tad before set them permanently
.IMG_1885a.jpg
 
Top