• Thank you for visiting HeavyEquipmentForums.com! Our objective is to provide industry professionals a place to gather to exchange questions, answers and ideas. We welcome you to register using the "Register" icon at the top of the page. We'd appreciate any help you can offer in spreading the word of our new site. The more members that join, the bigger resource for all to enjoy. Thank you!

Grizzly Trucks

diamondtguy

Senior Member
Joined
Feb 4, 2011
Messages
1,473
Location
Mapleridge..BC
Occupation
machine fitter/fabricator
I found these pics on Mary's phone.I suspect they are from last September.Engine is still sitting on the ground and the trans and transfer case are in the shop..I am ready to reinstall everything and now that the snow is gone I can proceed..
 

diamondtguy

Senior Member
Joined
Feb 4, 2011
Messages
1,473
Location
Mapleridge..BC
Occupation
machine fitter/fabricator
Got the right side fender fit and marked out.Will drill it out tonight.Also mounted the winch solenoid pack.It was the only place I could mount it with out remaking all the cables...

grizzly 001.JPG grizzly 002.JPG grizzly 003.JPG grizzly 004.JPG
 

diamondtguy

Senior Member
Joined
Feb 4, 2011
Messages
1,473
Location
Mapleridge..BC
Occupation
machine fitter/fabricator
Well hibernation time isn't over..Started dumping here Fri morning..Its let up a little but still coming down..jan 2017 003.JPG jan 2017 005.JPG
 

Hank R

Senior Member
Joined
May 28, 2014
Messages
2,100
Location
Princeton B.C. Canada
Occupation
Retired Truck driver and School bus driver
We got about the same here today and just coming down now should get 10 cm by morning.
 

diamondtguy

Senior Member
Joined
Feb 4, 2011
Messages
1,473
Location
Mapleridge..BC
Occupation
machine fitter/fabricator
Stuck in the garage today so I decided to do a simple job of bolting the t/case on the back of the 5spd.Pretty straight forward..NOT..
I put a new input shaft in the t/case so I knew that part was good.The t/case had a 1/2" dowel pin in it so I drilled the trans for it carefully.My layout was my only concern..First attempt had it go into with in 3/16 and stop.Pulled it apart,found nothing and put a chamfer on the dowel hole incase it was a little off.2nd attempt went the same way.Stopped 3/16 from the end.Pulled it apart and started looking for problem.Eventually found 4 little witness marks on the trans from the seal retainer bolts..
It wasn't going to work...Short story...remachine front seal retainer down as much as possible.Change the 4 bolts to socket head and counter bore the retainer for them.This netted me .100 more .I will have to make a .125 thick spacer for it tomorrow..I am not at work so no water jet.Band saw,drill and file...
Not a problem I expected but happy to have all the stuff sitting on the shop floor when I did...
Total depth needed for the T/case retainer was 1.00 not counting the bolt heads.Total depth on the trans was about .800 and it tapers back after the counter bore and the taper gets in the way of the bolts..
Oh well...should have it all bolted up tomorrow..
 

Attachments

  • grizzly 001.JPG
    grizzly 001.JPG
    1.7 MB · Views: 42
  • grizzly 002.JPG
    grizzly 002.JPG
    1.6 MB · Views: 38
  • grizzly 005.JPG
    grizzly 005.JPG
    1.7 MB · Views: 39
  • grizzly 006.JPG
    grizzly 006.JPG
    1.7 MB · Views: 40

diamondtguy

Senior Member
Joined
Feb 4, 2011
Messages
1,473
Location
Mapleridge..BC
Occupation
machine fitter/fabricator
grizzly 001.JPG grizzly 002.JPG grizzly 003.JPG grizzly 004.JPG Finished the t/case stuff today.Cut a 1/8 spacer from aluminum and it all bolted together fine.Also set up the t/case shifters.T/case shifter sticks will have to be dropped when I install it but the linkage can stay put..Everything seems fine now..
 

diamondtguy

Senior Member
Joined
Feb 4, 2011
Messages
1,473
Location
Mapleridge..BC
Occupation
machine fitter/fabricator
Weather was decent today so I finished off some little things..Ran the cables for the winch.I ended up drilling a hole in the bumper to access the main ground on the winch,just to tight in behind to get to it properly.Yes I scratched the bumper doing it..grizzly 001.JPG grizzly 002.JPG grizzly 003.JPG grizzly 004.JPG [ATTACH=furStill have a little issue to deal with is the starter was originally on the right side along with the battery..All the cables are on the right side of the truck..New location will have the starter on the left side.The cables are all good so I don't see the need to pull them and replace them.Some creative routing and junction block placement is in the works..

Also pulled the hydro boost out as it was leaking out of both ends.I have a new seal kit for it.Check out the massive silicone seal to the firewall..I will make a foam/rubber seal for it..
 

diamondtguy

Senior Member
Joined
Feb 4, 2011
Messages
1,473
Location
Mapleridge..BC
Occupation
machine fitter/fabricator
Addressing a few problems/issues I new about ...The brake pedal was only 5 1/2 " above the floor.Way to low for my liking.It has already been massaged once to fit the truck so cutting a 1 1/4 out of it didn't bother me.I tig welded it,blasted it and gave it a new coat of paint.I am well versed in pedal ratio's and did all the measurements.After cutting it was still around 5-1 which is quite high for power brakes.The truck does stop well..

Steering column.....I thought it was a GM unit but its a Ford truck tilt column.It has no ign switch in it..Problems...Its a auto column with shifter on it,turn signal switch is broken.Tilt mech is broken.I stripped the column to its core and went after the broken tilt first..It wont stay engaged in any position other than the lowest..I suspected a broken pawl but it was even simpler.The pin on the pawl had crept out half way and the pawl had lost its home and wasn't aligned anymore..I found a new turn signal switch.On Fords part of the tilt assembly is in this switch...So its a tilt only switch..I have the manual trans column out of the 78 Ford still so I will rob the tin off the column and hopefully build a nice manual trans/tilt column out of all the parts..

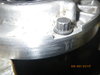
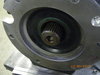
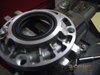
Hydro boost...I gutted the unit and replaced all the seals and O-rings..Both end seals were long finished which is why it was drooling everywhere..

On the bright side.....I am running out of things to fix....Still havin fun tho..Second pic is the pedal as removed.grizzly 001.JPG grizzly 002.JPG grizzly 004.JPG grizzly 003.JPG
 

diamondtguy

Senior Member
Joined
Feb 4, 2011
Messages
1,473
Location
Mapleridge..BC
Occupation
machine fitter/fabricator
Quiet week again as I have been back at work..I got the steering column all fixed up (less column shifter) and reinstalled.I also made all new mounts for the column and managed to move it up about 3/4 of a inch.Brake pedal is back in along with the clutch pedal.I also reinstalled the hydro boost.I made a new ring for the steering column boot as well...
The black paint on the firewall is spray bomb and just scrapes of with a putty knife.It didn't stick...I am slowly removing it as I work on the firewall....
Time to get the engine back in....grizzly 002.JPG grizzly 005.JPG grizzly 006.JPG grizzly 007.JPG
 

diamondtguy

Senior Member
Joined
Feb 4, 2011
Messages
1,473
Location
Mapleridge..BC
Occupation
machine fitter/fabricator
More not so eventfull things....Decided to wire up the new LED cab lights...Should be fairly easy as it had lights before.Wired up one light and tried it.Flickering and not happy..Fiddle with the ground connection and light works fine.Wire up second one and they both go dead...The harness is now dead.Spend an hour tracing things and find a loose connection under the dash.All is well and the lights look good.
Got my aluminum today and quickly fit it up forgrizzly 002.JPG grizzly 003.JPG grizzly 004.JPG my tailgate..I hope to weld it up tomorrow as my 68 is supposed to come home tomorrow and work space in the shop will be bench top only...
 

diamondtguy

Senior Member
Joined
Feb 4, 2011
Messages
1,473
Location
Mapleridge..BC
Occupation
machine fitter/fabricator
Pretty much finished the tailgate today..Just have to do the rear brackets for the cables (it had chains before) and figure out how to attach the metal latches to the aluminum (previously welded on)..

tailgate 005.JPG
 

diamondtguy

Senior Member
Joined
Feb 4, 2011
Messages
1,473
Location
Mapleridge..BC
Occupation
machine fitter/fabricator
tailgate 001.JPG tailgate 003.JPG Thanks guys....struggled a bit with the latches as they were originally welded on the steel gate.I had to bolt them on and put a bracket on the back for the cables.Truck originally used chains on the gate for stops when you lower the gate.I am using stainless cables and wanted strong mounts and I wanted the bolt for the cable eye in double shear..People do like to drop tail gates..My bolts for the latch were in the way to put the cable brackets where they belong.So I moved them out a bit and splayed them so the cables are not kinked.....
It all sounded good in the shop..When the weather brakes I will put the gate on the truck and see how I did..
Gate will be getting sand blasted and epoxy coated.I will put drain holes in it after its blasted..
 

diamondtguy

Senior Member
Joined
Feb 4, 2011
Messages
1,473
Location
Mapleridge..BC
Occupation
machine fitter/fabricator
I wish Art would jump on board here..I met him at the Alberni truck show a few year ago.I believe he bought his truck new and has done a extensive amount of work to it..Most of it all the body panels have been replaced in $tainle$$/aluminum...He has pretty much remade the loggers box on it as well...Lots of work..
Actually I would like it if any of the Grizzly owners posted here..port alberni 005 (2).JPG
 

diamondtguy

Senior Member
Joined
Feb 4, 2011
Messages
1,473
Location
Mapleridge..BC
Occupation
machine fitter/fabricator
Yes they have grown on me as well..I appreciate them far more now than I did in the 90's when the were being built down the street from me.My friends all have a interest in my progress as well.I look forward to touring around in it....
I am still amazed at the view count of this thread.....
 

diamondtguy

Senior Member
Joined
Feb 4, 2011
Messages
1,473
Location
Mapleridge..BC
Occupation
machine fitter/fabricator
Sneak peek....Due home in a day or two..This is my 68.I have had it since I graduated in 1977..Rotisserrie restoration by me.Paint/body work by Travis Brown (he did my 67).This car has always been really nice since I first restored it in 1981...This time I took it to a whole different level.I have put just under 100,000 miles on this car and its been off the road for 10 years...So ya....I drive themthumbnail_cid_696_resized.jpg
 
Top