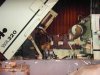
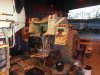
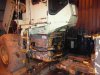
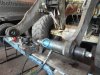
scotty, if you follow the service book its sort of hard work, in later times there was a revised method to pull /push sprockets for a single man to do it by himself, the first job to do is removal of the outer carrier bearing hub, this involves un-bolting the end cap , removing the dead shaft nut and the plate including any shims behind it, facing you will be 2 dowels and the D/shaft stub, screw on your nose adaptor (early 1"1/2 x 12 later 1"3/4 x 12) until the end of the adapter is about 1/8" of an inch from the dowels (a small gap) then tighten the hub adjuster nut with the C spanner and a length of pipe (5 ft tube and nut locks removed) fit your cylinder complete with the pin nose into the adaptor on the dead shaft and fit up your legs to the rim, then pump the cylinder out until the outer hub pops off with the dowels now touching the adaptor and strip off the tooling, place an oil tray under the sprocket to catch oil from the hub as you pull it off the shaft, you will now see a bearing with the locked rim nut, tap the lock ears free, then you need to find a spacer plate or collar that will go into and stop end the carrier hub via the dead shaft adaptor, smear some grease on the collar face that is going to touch the hub and tighten the adaptor on to the D/shaft until firm then undo 1 full turn max, put a bar through the end of the adaptor so it will stop it turning, then fit your C spanner to the hub nut and start the engine and in 1st speed undo the nut until you can drop the Horse shoe fitting between the nut (done back up) and the bearing to force the bearing all the way off, if your engine will not run you have a bit of work on with the 5 foot tube, the next bit you DO NOT MESS UP as damage or Blood might fly, you remove the Big nut and the tin lock from the hub, then re-fit the big nut to the hub leaving a small gap between the nut and sprocket (3/16th is ok a 1/4" is to loose) then with the spacer collar and the adapter done up firm and eased off about 1/2 a turn fit up your cylinder and pull legs to the rim and pull the sprocket free, be WARNED before you start pumping anything look at the NUT and make sure its good and always pin the cylinder through the rod nose to the dead shaft.
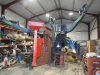
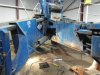
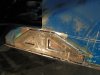
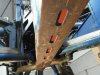
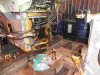
I still would like to see a few snaps tctractor
p.s. the standard rod out length is around 6" make sure you are not at the rod out limit.