dwloop
Well-Known Member
GWS,
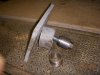
Did you make the bushing and washer youself, have it made, or buy them somewhere?
Dave
Did you make the bushing and washer youself, have it made, or buy them somewhere?
Dave

GWS,
Did you make the bushing and washer youself, have it made, or buy them somewhere?
Dave
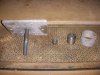
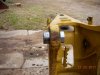
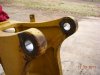
Looks good. What suggestion did you finally use on removing the bushings? I will be doing the same sometime in the future and any insight is great.
Thanks.
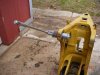
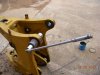
I checked the wear on the bushings in the frame and top plate against the bushings on the swing cylinders. The gap averages about .018 gap. I think bushings on this model usually runs about .010 clearance so I'm looking at .008 wear. Is this enough to warrant the cost and work needed to replace them for swing cylinders?
Tough decision, but it is apart at the moment. Because of geometry a little slop in this area adds up pretty quickly. I’m somewhat of a perfectionist and I can tolerate all of the other loose joints in my hoe except for this one, but that’s just me.
You do very nice work BTW.
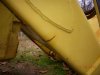
I thought I could hold it with my mid size tractor loader but found out how wrong that was when the boom stood the tractor on it's nose the minute I pulled the pins.

I bet that was an interesting moment... I have had a few like that.
Good looking work!!
Dave