flyman
New Member
I'm getting rrr sound, "just whines no cranking or clicking" when turning the start switch.
It seemed the starter wasn’t engaging the flywheel.
Then did a bunch quick turning of the switch, back and forth, got it working.
Ran the machine a few hrs. Turned it off, tried starting it again. Getting the whine sound. No luck starting.
Was thinking the pinion is probably not snapped into engagement with the flywheel ring gear.
Took the side covers off, smacked the starter with a hammer while someone turned the switch. No luck.
Pretty sure the starter motor isn't locked.
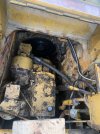
With the loader arms down, pulled off the belly pans. Pulled out the starter.
Found
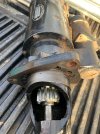
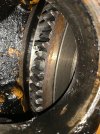
Starter piston teeth (helix ring gear/ bendix drive) chipped away
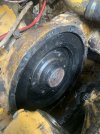
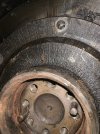
Ring Gear bad teeth (flywheel ring gear) are chipped away
My assumption, the starter continued turning, flywheel was stuck, jams up.
To do next...
Check to see if the engine will turn two complete revolutions of the crankshaft using the fan by hand (using a wrench on the front pulley);
make sure the motor is not hydro-locked, making sure the crankshaft moves, even though fan moves.
Do I have to pull the motor to replace the Flywheel? If yes, any tips, reference how to do this? Or should I even try to weld teeth on the Flywheel through the opening and fix the starter bendix drive, test it?


