• Thank you for visiting HeavyEquipmentForums.com! Our objective is to provide industry professionals a place to gather to exchange questions, answers and ideas. We welcome you to register using the "Register" icon at the top of the page. We'd appreciate any help you can offer in spreading the word of our new site. The more members that join, the bigger resource for all to enjoy. Thank you!

Guy Stops by the Shop:

1693TA

Senior Member
Joined
Feb 27, 2010
Messages
2,687
Location
Farmington IL
Occupation
FAA Radar Engineer, (Retired)
It appears to be the same brand and is close to the same depth front to back as mine. There is plenty of room between the front of the tank, (short vertical rise) and the ball for connecting. I'm calling the back of the tank the part butting against the bed front panel, and the front closest to the gooseneck ball in the bed. That little generator will set on the recess of the "L" shape well but I'll need to affix it somehow which may be just a strap, or two.
 

cfherrman

Senior Member
Joined
Jun 3, 2022
Messages
1,809
Location
Hays, Kansas
We've used an L tank in the bed of a pickup with a gooseneck ball for 20 years, never been a problem. Maybe if a guy had one of those new 5.5' short beds it would be an issue.

It depends on the tank and the bed. My work truck (not mine) they got a 100 gallon for it and it's going to cover up the ball, instead of getting the correct tank we are just going to remove the ball which is stupid but at least we don't use the ball much. Truck is just a regular short bed.

The tank I bought for my truck the 60 gallon was sold out so I bought the 90 and it was too wide to fit in-between the wheel wells, $200 and a welder later it did, now it's the same size as the 60.

Always measure.
 

1693TA

Senior Member
Joined
Feb 27, 2010
Messages
2,687
Location
Farmington IL
Occupation
FAA Radar Engineer, (Retired)
It depends on the tank and the bed. My work truck (not mine) they got a 100 gallon for it and it's going to cover up the ball, instead of getting the correct tank we are just going to remove the ball which is stupid but at least we don't use the ball much. Truck is just a regular short bed.

The tank I bought for my truck the 60 gallon was sold out so I bought the 90 and it was too wide to fit in-between the wheel wells, $200 and a welder later it did, now it's the same size as the 60.

Always measure.
Agree; but I've never had a short bed truck. These tanks actually fit right up to the interior wheel arches leaving about an inch between each bedside and about six inches from tank sidewall to bed interior sidewall. I think with the little RV generator I carry there will be about 24" to 26" of clearance between the hose reel, and the generator enclosure I can sneak a deck box into and that will make use of the entire "L" section of the tank.
 

cfherrman

Senior Member
Joined
Jun 3, 2022
Messages
1,809
Location
Hays, Kansas
Good deal and when you get the tank cheap or free it doesn't matter much. If your buying it new I'd get a short bed one just for conversion or resale unless you really need the extra 40 gallons, they are also typically $200 cheaper too.

Tank and a toolbox in a short bed makes the bed not hold much anymore but most trust are short beds nowadays.
 

1693TA

Senior Member
Joined
Feb 27, 2010
Messages
2,687
Location
Farmington IL
Occupation
FAA Radar Engineer, (Retired)
Dozer has the largest fuel tank of any equipment I own and that holds 100 gallons. Where the machine will be kept is remote so fuel will need transported to it and I think this will work better than the smaller tank requiring two trips. I don't really have any seat time in the tractor yet so cannot portray any realistic consumption rates, but this will carry enough to top off the tractor and possibly a farm tractor there with less running for fuel. May, or may not be accurate at this writing and time will allow baseline(s) establishment.
 

1693TA

Senior Member
Joined
Feb 27, 2010
Messages
2,687
Location
Farmington IL
Occupation
FAA Radar Engineer, (Retired)
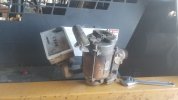
Attempting to get a couple of snapped fasteners extracted from an aluminum casting. Got the fasteners drilled through and now soaking in 50/50 atf acetone mix. Tried steady pressure while impacting the side and shocking the fastener but no joy so far.

A GasBoy pump given to me for use on my bulk tank. Pump and totalizer work well moving fuel so may as well repair the broken fasteners to ensure weather tight integrity.

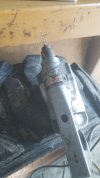
I've had this 1/4" Milwaukee drill almost 50 years and only use it for pilot drilling as easy to hold and not variable speed:

20240117_093213.jpg

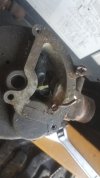
Two drilled fasteners. Although doesn't look it from photo, both holes are centered through their fasteners:

20240117_093219.jpg


In a pinch the old 1845C fender serves as a workbench nicely:


20240117_093229.jpg
 

1693TA

Senior Member
Joined
Feb 27, 2010
Messages
2,687
Location
Farmington IL
Occupation
FAA Radar Engineer, (Retired)
Can't get those snapped fasteners extracted for nothing. Going to purchase a different type extractor set tomorrow that you hammer down into the drilled hole and they dig into the fastener. I've tried the screw types, and the four blade types with no results.

If they don't come loose with this other type, I'll core them and use a "Helicoil" in the aluminum casting as I'm tired of fu*king with it at this time. I went ahead and mounted the pump onto the tank with a draw tube 1/2" from the bottom, and mounted up the new filter base, and water separating filter. Need to grab a galvanized 3/4" NPT elbow tomorrow and then attach the new fuel hose and auto shutoff nozzle:

20240201_165214.jpg

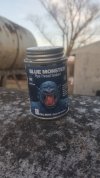
Used this blue pipe dope rated for fuels:

20240201_165220.jpg

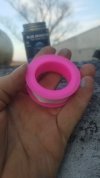
Just because I couldn't bring myself to use teflon tape that was obviously "Feminine Rated":

20240201_165226.jpg
 
Last edited:

mks

Well-Known Member
Joined
Sep 8, 2020
Messages
205
Location
Southwest Cook County Illinois
Occupation
None currently
I don’t have extensive experience but I center drilled a broken exhaust manifold bolt nicely (luck). No broken bolt tool worked. I then went up in bit size until I saw evidence of the internal threads in the manifold. I then was able to use a pick and similar tools to pry what was left of the stud threads away from the internal threads.
I recently have seen a machinist demo this in a mill.
 

OzDozer

Senior Member
Joined
Jan 18, 2007
Messages
2,207
Location
Perth, Western Australia.
Occupation
Semi-Retired ..
Put some heat into that casting around the broken stud, heat breaks up the alloy corrosion bond very quickly.
Hit it with some panther pee as it's cooling to help break the bond with a variation in expansion/contraction.

I like the Ridgid screw extractors with the tapered sides, they don't keep expanding the stud as you try to unscrew it, unlike the "reverse thread" type of extractors.
 

1693TA

Senior Member
Joined
Feb 27, 2010
Messages
2,687
Location
Farmington IL
Occupation
FAA Radar Engineer, (Retired)
I've tried heat a couple of times along with high frequency vibration as rotational force applied while cooling and applied "panther pizz" a couple of times. Don't want to abuse it as the end bell for the motor is not available for this style so remaining a bit ginger in force. The snapped fasteners are not bottomed. Holes I bored are centered through them and are clear through. I can go through them with a larger twist drill coring them out easily, but want to attempt one final extraction with these new tools. Also have a couple of snapped stainless fasteners through the aluminum cover in a foot pedal switch on my manlift basket to remove, so going to purchase the complete set rather than a single tool.

Fought this similar battle with my 62 Mack B-673 tractor a few years ago extracting the steel brake pins from the aluminum spiders. Lot of heat, panther pizz, and a press got them all freed up. Then bored and sleeved the spiders back to original so won't happen again.

Those tapered sides extractors have always worked well for me also. I'm going to try this type tomorrow:


1693TA

Senior Member
Joined
Feb 27, 2010
Messages
2,687
Location
Farmington IL
Occupation
FAA Radar Engineer, (Retired)
I don’t have extensive experience but I center drilled a broken exhaust manifold bolt nicely (luck). No broken bolt tool worked. I then went up in bit size until I saw evidence of the internal threads in the manifold. I then was able to use a pick and similar tools to pry what was left of the stud threads away from the internal threads.
I recently have seen a machinist demo this in a mill.
With exhaust studs I've always had good luck getting the ears of the manifold red and keeping it there for a few seconds playing the torch around the perimeter of the broken fastener and then allowing to cool a couple of minutes, then repeating. The third time around the perimeter staying directly off the fastener and twisting force applied will usually walk them out. Stud extractors work well if there is enough of a "nubb" to grab hold of.
 

1693TA

Senior Member
Joined
Feb 27, 2010
Messages
2,687
Location
Farmington IL
Occupation
FAA Radar Engineer, (Retired)
I enjoy welding nuts to snapped bolts
I've sure done that a bunch too. These are nothing special; 5/16-18 countersunk head and only about 1/2" length, (under head taper). Had they been busted flush with the top I probably would have went that way but these are a below and I really don't want to hurt that casting.

However from the get/go, I didn't think they would put up this much of a fight.
 

OzDozer

Senior Member
Joined
Jan 18, 2007
Messages
2,207
Location
Perth, Western Australia.
Occupation
Semi-Retired ..
Any time you have steel fasteners installed into alloy castings, you're going to have major thread corrosion after just a few short years. I hate them with a passion.
If only some generous manager had said, "Hey guys, put a smear of Never-Seez on those bolts", when they were assembled.
I have NEVER found even the faintest sign of any anti-seize on any factory fastener, ever.
 

1693TA

Senior Member
Joined
Feb 27, 2010
Messages
2,687
Location
Farmington IL
Occupation
FAA Radar Engineer, (Retired)
Any time you have steel fasteners installed into alloy castings, you're going to have major thread corrosion after just a few short years. I hate them with a passion.
If only some generous manager had said, "Hey guys, put a smear of Never-Seez on those bolts", when they were assembled.
I have NEVER found even the faintest sign of any anti-seize on any factory fastener, ever.
I use, (and subsequently wear) a lot of anti-seize when installing fasteners; especially stainless steel as it galls so easily if not used.
 

1693TA

Senior Member
Joined
Feb 27, 2010
Messages
2,687
Location
Farmington IL
Occupation
FAA Radar Engineer, (Retired)
Those extractors worked slick. Probably won't go back to the other types again as these really dig into, but don't swell the broken fastener at all. Now have to order the correct length countersunk machine screws to affix the cover and I'll be done.

Mounted the pump, piping, filter, along with the original 12' hose and nozzle that came with the transfer tank and it all works well. Didn't measure flow and have a totalizer to incorporate yet, but need to set the tank a couple of places to ensure where it works best. That length of hose will not be any kind of long enough for easy access regardless. I'll install the new 20' section I have and be comfortable in reach. Also have a new "At-A-Glance" fuel level gauge to incorporate so can call for fuel before running out. A new vented fill cap assembly is ordered with scheduled arrival mid week to wrap this one up.

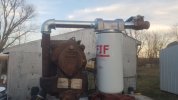
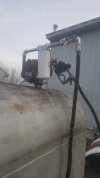
In this photo I have oriented the pumping unit 90 degrees from earlier and this now makes the discharge hose protrude further than needed. I'll probably remove the six inch nipple and replace with a close nipple to bring the ball valve shown abutting the filter base. The ball valve may be redundant, but I always incorporate one in liquid lines and I know nothing of this pump, yet. This will tuck the hose right against the tank sidewall. I was concerned about cantilever leverage upon the piping with everything hanging in free space but the stuff is actually quite robust and don't think a problem once that hose is tucked closer.

20240204_163704.jpg

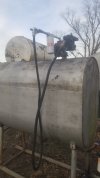
The fuel level gauge will go into the 2"NPT bung that looks like a dark spot in the photo. This is actually the fill port now and plugged with a square capped plug. The 2"NPT vented fill cap/port will install on the end where the homebrew abomination for a vent now resides on the left:

20240204_163648.jpg

The white tank in the background will be for non ethanol gasoline for use in the small engines around here. It will be gravity flow so no need for a pump.
 

1693TA

Senior Member
Joined
Feb 27, 2010
Messages
2,687
Location
Farmington IL
Occupation
FAA Radar Engineer, (Retired)
Well dammit. The totalizer I have which is a "Tuthill" copy is not flow reversible. I need left to right flow and the meter I have is right to left. I've sent a correspondence to the vendor asking if this can be reversed in flow. It does have the option to return. I asked about this before purchase but couldn't get an answer except it is returnable if not satisfactory.

Not really needed but I'd like to have regardless.
 
Top