Hoghart
Active Member
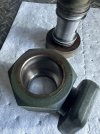
I did see a loop on the “top” of the shanks. I guess that’s my best chance.Most of the larger ripper shanks have a loop of round bar or something welded on the top so a chain or clevis can be used to hold it vertical.

I did see a loop on the “top” of the shanks. I guess that’s my best chance.Most of the larger ripper shanks have a loop of round bar or something welded on the top so a chain or clevis can be used to hold it vertical.
Thank you Nige. You are truly a wealth of information.Hook a sling to the upturned ripper shanks and lift them out of the ripper carriage one by one.
Dig a tranch the width of the tractor and about 3-4ft deep then place the ripper shanks into it.
Reverse the tractor so that the ripper carriage is over the trench, then lower a sling through each ripper pocket in turn. Attach the sling to a ripper shank (take care to ensure the shackle will pass through the hole in the ripper carriagre pocket) and raise it into position in the pocket of the ripper frame. Install pin.
Repeat the procedure for the other two ripper shanks. Although TBH I would only put a single shank in the centre pocket to start with a see how you go with it. Then maybe 2 shanks, one on each side, before you consider insalling all three ripper shanks. Just because there are three pockets in the ripper carriage does not mean you have to put three shanks in it.
you may be correct, I know the beam goes pretty high. Having some help will be critical.You may have enough room to lift the ripper beam high enough the shank will clear. Could back up on some blocks if need a little more room. Having some help to guide the shank would help greatly.


thank you! that helps a lot.Over lunch I search my parts manuals and found what you're looking for. See attached. The hourmeter appears to be held in place by the set screw as I thought. From looking at this, you should be able to easily rotate so it's visible.
Edit: With the part number, I found a couple hourmeters on the interwebs. I'd say you're good to adjust it as you want.
Or even just take it off so you don't add wear and tear to your engine when using your dozer.
View attachment 334798
View attachment 334799

I figured that was probably the method to follow. Haven't done anything but idle, moving hydraulics, since I received it. The fuel pump that you recommended changing is delivering Friday, so will try to put a few hours on it this weekend.Take note of the numbers, run it for a couple hours working the dozer at normal pace, and then look at the readings. I understand that meter is run off engine RPMs as opposed to the electric versions that just measure hours when the power is on. Using the RPM type of hourmeter means if the machine is sitting a lot at low idle, the hours will be much lower than if it was at high idle under load....which translates to a better measure of actual engine wear.
I'm sure there is an expert or two here that will have a definitive answer as opposed to my guess.
I think only the factory have access to that information. Military machine build information was never openly published in the way that the info was for commercial machines AFAIK.One more question for the message board: Can anyone give me the original build date, or year, of this tractor?
61G1239
Our local Cat dealer was not able to. They had an old book with the 94N serial numbers broken down by year, but nothing on the 61G


Actually other way around Nige.After I posted I found other information that agrees with the photo above. 94N5192 build was early 1973, not 1972. What 61G S/N that corresponds to I have no idea. I believe that 61G production had already ended when 94N5192 was built.
It is interesting that the book gives the impression that the transmission update was effective from 94N5660 the same time as the introduction of the 3306 engine, when in fact the transmission was updated from 94N5192 which was slightly earlier.
That looks very much like a Cat book from that time period. I'm glad someone in the dealership thought it was worth hanging on to.