• Thank you for visiting HeavyEquipmentForums.com! Our objective is to provide industry professionals a place to gather to exchange questions, answers and ideas. We welcome you to register using the "Register" icon at the top of the page. We'd appreciate any help you can offer in spreading the word of our new site. The more members that join, the bigger resource for all to enjoy. Thank you!

Cat 246B Battery Light Troubleshooting Help

Blue Falcon

New Member
Joined
Mar 15, 2023
Messages
4
Location
WA
Long time reader, first time posting.

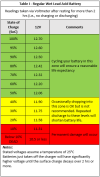
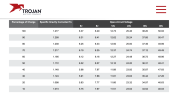
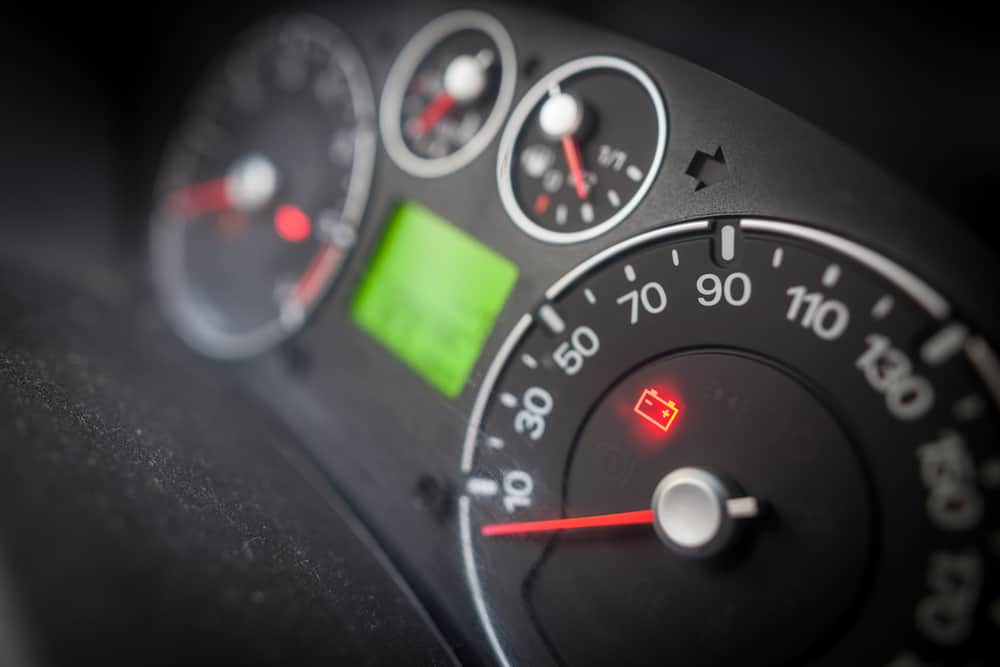
I own a 2007 Cat 246B and recently finished up a service on the machine, previous owner had it sitting a while. All new fluids & filters. Put a few hours on it with no issues. Fired it up the other day and it gave me an odd start up. Started right away but ran rough for a half second then smoothed out and the battery light came on and is still on. Checked all my connections, they looked good but I cleaned them up anyway. I have good battery voltage (12.2) and from what I've read good running voltage (14.5). Any ideas of other things I can check to try and get this battery light fixed? Any help is greatly appreciated.
 

ThreeCW

Well-Known Member
Joined
Dec 15, 2019
Messages
227
Location
near Calgary, Alberta
Your running voltage sounds fine at 14.5 volts but your static voltage at 12.2 indicates your battery is at about a 60% state of charge. A fully charged lead acid battery has a static voltage of 12.7 volts.

Despite the 14.5 running voltage, I wonder if a weak battery is contributing to your problem.
 

Attachments

  • 02F55D69-E39B-4497-9E96-F6D97E186A6A.png
    02F55D69-E39B-4497-9E96-F6D97E186A6A.png
    30.9 KB · Views: 5
  • 7EC6D475-F7CA-4B8C-9C36-A8E54485A4B3.png
    7EC6D475-F7CA-4B8C-9C36-A8E54485A4B3.png
    103.7 KB · Views: 4

Blue Falcon

New Member
Joined
Mar 15, 2023
Messages
4
Location
WA
Thank you for the help, much appreciated. Ill look into that schematic and see if maybe I can find a date on the battery when it was installed. Should mention Its not the original battery and may not be a “heavy duty equipment” battery like I've seen in others. The machines only got 400 original hours so im a little skeptical of it being something in the circuit between the alternator and the warning light but ill take a look. Still starts up no problem and runs great. Another piece of info, I had the cab raised up & down many times while servicing it and cleaning out the undercarriage. Not sure if I could have damaged something while doing that.
 

ThreeCW

Well-Known Member
Joined
Dec 15, 2019
Messages
227
Location
near Calgary, Alberta
Once you are up and running … and producing 14.5v, the battery should be out of the equation. But sometimes with electronics you still need to troubleshoot, even the logic does not support it.

If you have a known “good” 12v battery, you could try switching the batteries to see if the problem repeats its self.
If it does not repeat, then the battery would likely be the cause of your problem.
 

ThreeCW

Well-Known Member
Joined
Dec 15, 2019
Messages
227
Location
near Calgary, Alberta
Here is a pretty good article that should help you with troubleshooting your “battery light on” problem:


Blue Falcon

New Member
Joined
Mar 15, 2023
Messages
4
Location
WA
Well, I found the culprit. Thinking back when I did the service on the machine. I had to cut a zip tie that held this wire bundle tight against the back of the cab. Forgot to replace that zip tie. When I put the cab bolts back in and torqued them it pinched the bundle and shredded 2 wires. So next steps, what would you guys recommend for a fix? I have very little electrician experience. My worry is moisture getting in over time and corroding because that bundle of wires is exposed to the elements.


686523F4-2444-443D-917C-671C06AAFD58.jpeg
 

Arny L

Senior Member
Joined
Sep 23, 2020
Messages
291
Location
canada
You would have to carefully open the harness up, 3 inches on either side of damage, if possible, and do a good inspection of all wires, the ones that are severed or close to severed, will have to be cut. Find some automotive wire of the same gauge, and color if possible. Cut a new wire about 3 inches long, bare the ends about three quarters to an inch, on each end. Cut the damaged wire back to a good piece, bare it three quarters. Split the copper strands into 2 separate strands, twist each strand very tightly, do the same on the new piece of wire. Intertwine the 2 strands of old and new, twist together tightly, making sure the splice is horizontal, solder together with electrical solder. Cut a piece of shrink tube to cover the solder joint, over lap the solder joint by a half inch both sides. Heat shrink the tube until sealant comes out both ends. Repeat on the other side. Dont forget to slide heat shrink on before you solder the last joint. Tape the entire harness up after repair, and make a note of where the repair was made. The alternative way is using heat shrink butt connectors. Same procedure. but crimping the splice, instead of solder. I have used liquid electrical tape as well for wires that are just nicked, but its risky if the repair is exposed to weather. U tube probably has a video on this procedure if your still a little unsure.
 

Blue Falcon

New Member
Joined
Mar 15, 2023
Messages
4
Location
WA
You would have to carefully open the harness up, 3 inches on either side of damage, if possible, and do a good inspection of all wires, the ones that are severed or close to severed, will have to be cut. Find some automotive wire of the same gauge, and color if possible. Cut a new wire about 3 inches long, bare the ends about three quarters to an inch, on each end. Cut the damaged wire back to a good piece, bare it three quarters. Split the copper strands into 2 separate strands, twist each strand very tightly, do the same on the new piece of wire. Intertwine the 2 strands of old and new, twist together tightly, making sure the splice is horizontal, solder together with electrical solder. Cut a piece of shrink tube to cover the solder joint, over lap the solder joint by a half inch both sides. Heat shrink the tube until sealant comes out both ends. Repeat on the other side. Dont forget to slide heat shrink on before you solder the last joint. Tape the entire harness up after repair, and make a note of where the repair was made. The alternative way is using heat shrink butt connectors. Same procedure. but crimping the splice, instead of solder. I have used liquid electrical tape as well for wires that are just nicked, but its risky if the repair is exposed to weather. U tube probably has a video on this procedure if your still a little unsure.
Thanks for the help. I think im going with butt connectors and heat shrink after talking to a buddy of mine with more experience recommended the same method as you. I think I was lucky enough that these 2 exposed wires were the only ones damaged. I was able to cut the mesh back to give myself room to work, this is how it sits now.

76422D8A-EBE9-419A-B741-C17A18A9C77F.jpeg
 

Arny L

Senior Member
Joined
Sep 23, 2020
Messages
291
Location
canada
That looks good, Just check all those wires for any copper exposure, or you will be revisiting it again in a year. Use the butt connectors that are already fitted with heat shrink. Or like HeyMccall said crimped and soldered
 

ThreeCW

Well-Known Member
Joined
Dec 15, 2019
Messages
227
Location
near Calgary, Alberta
The problem with butt connectors is that they will increase the diameter of that cable bundle. You will want plan your connections to stagger the butt connectors so that no two butt connectors are laying side by side.

Also consider putting a chuck of hydraulic hose wrap or equivalent over that repair before you cinch it down with zip ties.

I am also in agreement with using the shrink wrapped butt connectors. Make sure you use butt connectors that are properly sized for your wire size.
 
Top