• Thank you for visiting HeavyEquipmentForums.com! Our objective is to provide industry professionals a place to gather to exchange questions, answers and ideas. We welcome you to register using the "Register" icon at the top of the page. We'd appreciate any help you can offer in spreading the word of our new site. The more members that join, the bigger resource for all to enjoy. Thank you!

289c front track frame repair

Mobilewrench

Senior Member
Joined
Feb 26, 2020
Messages
380
Location
Kona, hawaii
I had a tensioner (I thought) problem on a 289c this week. When I removed assembly I found the rod was extended out about 4 inches with no grease coming past the seals. Looked in the front frame assembly and saw that rod had punched a hole through the alignment pocket.
 

Attachments

  • 20240125_142833.jpg
    20240125_142833.jpg
    1.5 MB · Views: 10
Last edited:

Mobilewrench

Senior Member
Joined
Feb 26, 2020
Messages
380
Location
Kona, hawaii
I didn't even know that could happen.
I saw ahart had posted on a thread (299d3 track tensioner, how to unstick?) That he had run across that entire plate being knocked out. I think I have his picture here.
 

Attachments

  • IMG_1260.jpeg
    IMG_1260.jpeg
    1.7 MB · Views: 5

Mobilewrench

Senior Member
Joined
Feb 26, 2020
Messages
380
Location
Kona, hawaii
I don't think that he said what his fix was for it. But maybe he will see this and let me know.
I never stop to take pictures while working on anything so I have never posted a repair process here before. This time I did take pics just so I could explain to the client what I did.

Yesterday I was kind of of the opinion that the repair price was going to so close to the replacement cost that it wasn't worth the effort. But then I saw ahart's pic about a different type of failure. And found out that the replacement part was about two weeks away. I ordered the part so the client will have it on hand. I see that cat has updated the part (I think ahart called it the telescoping frame) so hopefully they have addressed the shortcomings. I think the new part costs about $1800 with shipping.
So I will show you what I did.
 

Mobilewrench

Senior Member
Joined
Feb 26, 2020
Messages
380
Location
Kona, hawaii
20240126_094903.jpg
First I cut a whole in the assembly to get to the backside of the plate and removed all the shrapnel from where the rod pushed through. I also found some nasty cracks in the bottom corners of the pic that don't really show here.
 

Mobilewrench

Senior Member
Joined
Feb 26, 2020
Messages
380
Location
Kona, hawaii
I think you can see the cracking on the assembly that I was talking about. Right in the corner where the shadow is.
I welded that in. Don't ask me why I took the time to weld up the cutting edge bolt hole but not the other hole. I just don't know.
 

Mobilewrench

Senior Member
Joined
Feb 26, 2020
Messages
380
Location
Kona, hawaii
You can see the repair on the cracking on the assembly that I was talking about. Both sides.
I welded my cutting edge in. Don't ask me why I took the time to weld up the cutting edge bolt hole but not the other hole. I just don't know.
 

Attachments

  • 20240126_105513.jpg
    20240126_105513.jpg
    2.2 MB · Views: 10

Mobilewrench

Senior Member
Joined
Feb 26, 2020
Messages
380
Location
Kona, hawaii
Since I learned that it was possible for that entire plate to be torn out I decided to use a small scrap of ½ mild steel as a backing plate and welded a broken thumb pin from a pc88 that happened to still be in the back of my truck. 20240126_110237.jpg
 

Mobilewrench

Senior Member
Joined
Feb 26, 2020
Messages
380
Location
Kona, hawaii
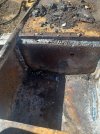
That fit nicely against the forward most plate of the telescoping assembly. It did leave me with a nominal ¾ gap between the end of the pin and the cutting edge I just welded in.

Gonna take a step back here.
Normally, I would have made an a frame out of box tubing from the center of the cutting edge that I welded in to the corners of front part of the frame. Or I would have used some heavy sidewalled box tubing to do the same job as the broken pin. I didn't have the patience today to figure out the angles for the a frame. I didn't have a lot of options in heavy walled box tube and even if I did, it would have to be cut at an angle so I could fit it between parallel plates. Then I would have to try to fill in a gap on the underside. I bet more than a few of those reading this wouldn't consider that a problem. Wish I had your skills.

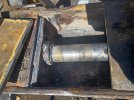
Anyway... that broken pin was just begging for a new opportunity to be of service. If it wasn't, It wouldn't have broken perfectly square.

As for the ¾ gap? Well it just happens that last week I had to relocate pins on an npk h7x last week. Guess what thickness the side plates were? Yep.20240126_111334.jpg
 

Attachments

  • 20240126_111250.jpg
    20240126_111250.jpg
    3.2 MB · Views: 4

Mobilewrench

Senior Member
Joined
Feb 26, 2020
Messages
380
Location
Kona, hawaii
This all may seem like belts and suspenders to some of you. But I was concerned about a lot of things here. Not the least of which is; I am a competent welder.... I am not a talented welder. Also, this skid is used primarily to run an 84" mower in hilly conditions. So that is a ton of weight on the front of the machine about 4 foot from the front track idler. So every time an operator comes to a sudden stop while heading downhill the entire machine nosedive and an incredible amount of force is applied to the recoil spring, the tensioner assembly and any thing that holds them. Also, I knew I was losing some structural integrity by cutting the hole in the bottom plate of the telescoping assembly.
 

Mobilewrench

Senior Member
Joined
Feb 26, 2020
Messages
380
Location
Kona, hawaii
Then i just welded the plate that i cut out to make an access hole in step one. Welded up all of the external cracks that I took care of on the inside. There were a lot.
The only thing left was to make up the difference between my cutting edge and where the tensioner rod was supposed to sit.
A nominal ½. I decided to use d8 cutting edge washers. Welded two together and then welded the pair to 20240126_122131.jpg20240126_134644.jpgthe face of the ½ cutting edge.
Painted everything just because it makes it easier to see cracks.
Put it back together. 20240126_113550.jpg20240126_113559.jpg
 

Mobilewrench

Senior Member
Joined
Feb 26, 2020
Messages
380
Location
Kona, hawaii
Quick shout out to my helper, Nate. You can see him two pics up. Kid knows what tool I need next before I do. Looks like a ridiculously buff baby new year. Or Art Garfunkle on steroids.
Either way... Ladies, Ladies?
 

Mobilewrench

Senior Member
Joined
Feb 26, 2020
Messages
380
Location
Kona, hawaii
So, that is how I did it. The amazing thing is that I believe that it is structurally sound and actually had a zero dollar material cost. And start to track tensioning took about 3 and a half hours.
 

ahart

Senior Member
Joined
Nov 7, 2020
Messages
840
Location
Indiana
That’s essentially the same repair, we cut the whole top off of the telescope frame so that the plate can be welded in more completely than cat does from factory.
 
Top