-
Thank you for visiting HeavyEquipmentForums.com! Our objective is to provide industry professionals a place to gather to exchange questions, answers and ideas. We welcome you to register using the "Register" icon at the top of the page. We'd appreciate any help you can offer in spreading the word of our new site. The more members that join, the bigger resource for all to enjoy. Thank you!
You are using an out of date browser. It may not display this or other websites correctly.
You should upgrade or use an alternative browser.
You should upgrade or use an alternative browser.
My D6D
- Thread starter .RC.
- Start date
Pony
Senior Member
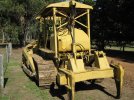
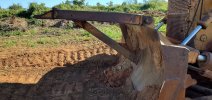
Yep, that's the tree spear we all know and love.
Bit hard to fit on a 6 way blade unfortunately.
Bit hard to fit on a 6 way blade unfortunately.
.RC.
Senior Member
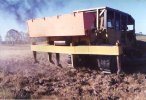
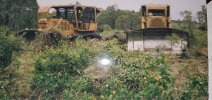
Here is an unusual one.
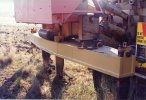
They are D7 ripper tynes mounted on opposite sides of the blade of each machine. They were pretty effective. I only saw one tree pull them up in the forest country. Also be good for pulling trees away from fence lines.
Downside was they were also good at collecting vines in the thick scrub they were pulling, back in the day.

Queenslander
Senior Member
.RC.
Senior Member
Quite an interesting crane setup in the back of his ute as well.
.RC.
Senior Member
.RC.
Senior Member
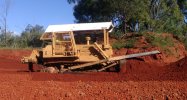
Some general land clearing dating back a fair while ago now.
Eagle eyes might notice the 6C in the last three pictures, well if you look hard in the bogged photo, the blade lift rams are attached lower to the blade then they usually are. The contractor had another set of balls attached lower as the 6C/D did not lift the bull tilt blade very high compared to other models.
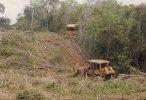


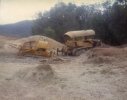
Eagle eyes might notice the 6C in the last three pictures, well if you look hard in the bogged photo, the blade lift rams are attached lower to the blade then they usually are. The contractor had another set of balls attached lower as the 6C/D did not lift the bull tilt blade very high compared to other models.


Last edited:
Glum
Active Member
Not sure yet how I am going to get the old one off the taper, I do not have a puller anywhere near big enough. I will have to make something.
Use your C spanner and pipe to pull the big nut anti clockwise as far as you can, find a helper with a good eye and you each beat the tabs on the holder simultaneously with your biggest hammers (don't damage the holder or each other's kneecaps), repeat till it pops. Leave the outer nut on with some clearance to stop the holder going flying.
.RC.
Senior Member
Queenslander
Senior Member
Looks good.. make sure to give it some serious dental work to stop it sliding up the tree.
View attachment IMG_4372.jpeg
View attachment IMG_4372.jpeg
.RC.
Senior Member
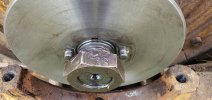
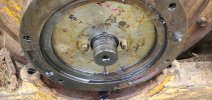
I got caught up with the tongue a bit today, but found some time to try to install the replacement outer support.
With glum's idea of tightening the adjustment nut, and then hit the holder with a hammer, I did that a few times, hitting the locking lug and it popped loose after a bit of effort.
I measured the small end of the two tapers and the new one is slightly smaller, maybe a quarter of a mm or a bit more.
Also a complete surprise is the effectiveness of those shields that protect the duo cone seal. It was spotless in there, which amazed me.
With this new part I also had to hit the inner bearing holder into the support with the soft hammer. It was just a good fit, the other aftermarket part it would slide in with a tad of sideways movement when in position.
Putting it back on I have probably gained 3-4mm sideways stickout witht he new part. I have some more shims here at home, so will go back tomorrow and install them and finish the job. I think I will get enough to stop the rubbing on the sprocket.
Photo of the old part, and then the new part installed.


D6 Merv
Senior Member
- Joined
- May 10, 2007
- Messages
- 658
- Location
- Coromandel Peninsula. New Zealand
- Occupation
- Self employed bulldozing contractor with a D6D D4E
there was a updated part number for the deadshaft nut too on D6D.
Don,t know it offhand but know there was a service magazine telling about it in the 80s
Don,t know it offhand but know there was a service magazine telling about it in the 80s
.RC.
Senior Member
Well I finally got it all back operating today. Had a delay as I found the solid rod push arm that holds tension against the ider was bent. So that had to come out and straighten it. The chain no longer rubs on the sprocket and is back to about it was prior to the final drive rebuild so I am going to leave it as is.
As it is still not located where it should be but I do not care as it is good enough for an old machine with plenty of welds on the diagonal brace.
As it is still not located where it should be but I do not care as it is good enough for an old machine with plenty of welds on the diagonal brace.
.RC.
Senior Member
Now for something totally different, because I did not know where to put this, it does involve a D6 though.
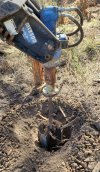
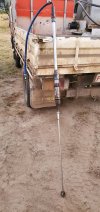
Doing some fencing at the moment. Not liking that bloke Manuel Labour, some years ago I thought there had to be an easier way to ram up fence posts. Some research bought up these things called air tampers, available pretty cheap from China in various sizes.
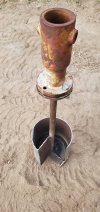
Some experimentation later I found a modified D6 sized tamper perfect for ramming up fence posts just an air compressor to power it. Also sick of cleaning out the holes with a shovel after digging them, today I quickly wacked up a proof of concept hole cleaner that I sort of copied from a photo on the internet. It is a bit rough as I never had any 250mm pipe, so had some 8" pipe and cut and spread it out a bit. Certainly makes life easier.


JAJ
Well-Known Member
What type of fence posts are you putting in, timber ones or concrete?
That tamper looks like a similar idea to what we use to drive our posts in. We use star posts for our fences with 3” pipe strainers and end assemblies, we drive them all in with a “Picket Post Driver”. I think there is Chinese knock off’s now as well of the Aussie original.
That tamper looks like a similar idea to what we use to drive our posts in. We use star posts for our fences with 3” pipe strainers and end assemblies, we drive them all in with a “Picket Post Driver”. I think there is Chinese knock off’s now as well of the Aussie original.
.RC.
Senior Member
Putting in rosewood posts, with a steel post between rosewoods. Some people around here have tried concrete posts. I do like the concrete post idea a lot, but these thin ones they use are brittle and just snap like carrots and at over $20 a post, last thing you want to see is are snapped off concrete posts.
We used to use iron bark split posts with our own timber, but all the good timber is mostly gone now. I have fences here only 40 years old and the timber posts are all snapping off.
I have a Christie Engineering post driver here I use for putting in the steel posts.
We used to use iron bark split posts with our own timber, but all the good timber is mostly gone now. I have fences here only 40 years old and the timber posts are all snapping off.
I have a Christie Engineering post driver here I use for putting in the steel posts.
.RC.
Senior Member
Queenslander
Senior Member
Not going to bend in a hurry.
Charlie Mcphie
Member
That iron post looks a little superfluous

