• Thank you for visiting HeavyEquipmentForums.com! Our objective is to provide industry professionals a place to gather to exchange questions, answers and ideas. We welcome you to register using the "Register" icon at the top of the page. We'd appreciate any help you can offer in spreading the word of our new site. The more members that join, the bigger resource for all to enjoy. Thank you!

Fiat 70CI. Repairs, modifications and stories.

Jeembawb

Well-Known Member
Joined
Apr 1, 2012
Messages
173
Location
Muckay, Australia
Hey Jeembawb, I've probably missed something in one of your earlier posts, but why did you deem it necessary to lift the front of the tractor to work on the rear end?
Cheers, Greg

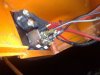
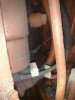
The rear will get jacked up slightly soon too - but no need until the trans/final drive cover comes off because it makes it unnecessarily higher to work on & to lift stuff off with the forklift. When the trans/ f/d cover comes off the tracks need to be off the ground to be able to rotate the final drive to undo the bolts for it. Gunna do a little work on some of the grousers too while its up.

Jimbob
 

Queenslander

Senior Member
Joined
Apr 5, 2009
Messages
1,255
Location
Australia
I've always left the tractor on the ground and used a bottle jack to push up on a grouser to move the tractor.
Put some boards/rails under the blade and it will slide along.
Bit easier to work on when you have to reach into the bowels of the machine.
Cheers, Greg
 

Jeembawb

Well-Known Member
Joined
Apr 1, 2012
Messages
173
Location
Muckay, Australia
Day 4 - Seat & Tank Off

Ok - starting to see some progress now. The seat (not much of one) & the fuel tank are off & work is progressing on removing the fenders. Thing is, they are non std fenders that have been made from 10mm plate that sort of go the whole length of the rig. I guess someone has spent a bit of time & money on plate steel on this rig in the past & I dare say it is a bit heavier than std too - all the armour is non std & heavy duty.
 

Attachments

  • SeatandTankOff.jpg
    SeatandTankOff.jpg
    95.9 KB · Views: 1,096

Tarpon140

Active Member
Joined
Oct 31, 2012
Messages
25
Location
Australia
Correction: the 312c was in the next series.

In Chronological order (gleaned from Italian Fiat forums):
1. First of all there was a Fiat 601 model made from 1949 to 1950.
2. This was followed by a 25C gasoline model from 1951 to 1953. The two models are similar and have the fiat 600 22hp, 4 inline cylinders.
3. In 1953 a diesel 25c was produced until about 1959. It is powered by the Fiat 605.000 or 605D.000 and is a 25hp diesel engine with 4 inline cylinders.
4. The 25 series was followed by the 311C / 331C and 351C series. They were produced from 1959 to 1961 in Torino, and were powered by the Fiat 605. The engine capacity was increased to 27hp (diesel).
5. The 59/61 series was followed by the 312c / 332c and 352c series from 1962 to 1966. They were powered by the Fiat of 605,018 or 605D.018 and were 35hp.
 

Jeembawb

Well-Known Member
Joined
Apr 1, 2012
Messages
173
Location
Muckay, Australia
I've always left the tractor on the ground and used a bottle jack to push up on a grouser to move the tractor.
Put some boards/rails under the blade and it will slide along.
Bit easier to work on when you have to reach into the bowels of the machine.
Cheers, Greg

Thanks Greg

Gonna do a little cleanup work underneath while I'm at it & I can always make a false floor out of pallets - know what you mean about having to climb aboard when it's jacked up

Jimbob
 

Garrie Denny

Senior Member
Joined
Jul 20, 2011
Messages
507
Location
Gin-Gin,Queensland
Occupation
see above
Keep up the good work jeembawb, ill be following this with interest especially when you get into the interesting parts (clutches) keep up the photos there brilliant all the best Garrie (Gin-Gin)
 

Roycehg

New Member
Joined
Aug 27, 2012
Messages
4
Location
Australia
Fastener thread types on Fiat AD7

Thanks Greg

Gonna do a little cleanup work underneath while I'm at it & I can always make a false floor out of pallets - know what you mean about having to climb aboard when it's jacked up

Jimbob

Hey Jimbo since you are doing a bit of restoring on your machine, are the fasteners metric fine thread? I will be doing some rebuild work myself and I have noticed the that the bolts on my machine are not metric coarse or UNC??
 

maurice.j

New Member
Joined
Dec 20, 2012
Messages
1
Location
hobart
Does anyone know were to get a gasket kit for the back end of a Fiat 70CI , I'm doing up the streering clutches
 

JDDozerman

Well-Known Member
Joined
Sep 4, 2011
Messages
105
Location
Jacksonville,Missouri
Occupation
Disabled Farmer
Great thread, I don't own a 70CI, however, I did just recently purchase a really nice Fiat Allis 14C dozer, and I just love it! I also have to agree that it seems a LOT of people do think we are :crazy for owning them, but I say "don't knock it, till you've tried it"!!! My machine happens to be quite a "brute", plus it looks great, runs great, and does everything I ask of it, so I'm VERY happy, which is ALL that really matters anyway! I look forward to hopefully meeting up with others who own a 14C, or even owned one in the past, and exchanging information about them, that would be really :scool, and I would sure like to learn as much as I can about my new dozer! I really enjoyed reading this thread, and look forward to following it as well. Cheers! :drinkup, to all Fiat Allis owners, for having the kahuna's to own something a little less "popular"! I'm darn proud to own mine, and I ain't afraid to admit it! :salute

JD Dozerman
 

Jeembawb

Well-Known Member
Joined
Apr 1, 2012
Messages
173
Location
Muckay, Australia
Hmmmn, I am thinking it would be an idea to change the title and purpose of this thread to be all about fiat dozers if that's even possible? Especially seeing as I have recently bought home a fiat 451c dozer that I have been busy taking photos of while I pull it down to do clutch etc - I am so surprised how similar they are to the 70ci. They are from the same era I guess - even the same bloke in the photos in the manual!

Maurice, I reckon Andrew at South Burnett tractors would be able to say if available but I would probably just make them old school style and mix that in with a bit of new school with a tube of silicone :Cowboy
 
Last edited:

ianoz

Senior Member
Joined
Jun 12, 2009
Messages
311
Location
australia
Hi Guys , We are about to fire our 70CI up after doing the head stud change .It's been a while since it went ,Just want to confirm that it is negitive earth system .
Have hooked the batteries out that way , and getting the solinoid clicking in but no starter motor turning . Any suggestions ?
 

ianoz

Senior Member
Joined
Jun 12, 2009
Messages
311
Location
australia
By the Way , Worked out the Starting problem . Dash was not bolted down ,so was not earthing properly .
 

Jeembawb

Well-Known Member
Joined
Apr 1, 2012
Messages
173
Location
Muckay, Australia
Hi Guys , We are about to fire our 70CI up after doing the head stud change .It's been a while since it went ,Just want to confirm that it is negitive earth system .
Have hooked the batteries out that way , and getting the solinoid clicking in but no starter motor turning . Any suggestions ?

Good on ya Ianoz - thats a big job them headstuds - did you have to drill any out etc - I've done one that i had to drill out three of them and I have another to do when the studs come in from Italy so if you have any tips that may be handy would be appreciated - I made up extended drill bits & drill bit holders & tap extensions but she was still a big job.

On the electrics for the starter motor: the solenoid thing on the starter motor is just the plunger to engage the gear as well as being a switch to engage the big alloy "relay" under the dash where all the power to turn the stater is switched. Make sure it has a good earth - important - I got a good deal on one of my dozers because of a bad earth on this (poor bloke had spent heaps replacing bits). One of the big cables goes to the starter and the other to the battery of course (One of mine runs thru a battery isolator on this side but the other one i got has the Isolator on the negative side which may be smarter I think now - & oh yeah they are negative earth).

I found some pics on my phone where I did a half proper job of wiring my first one - no key starter - just a push button & an isolator - I like it simple:

If you have any questions about which wire goes where (it's not totally apparent from the photos) I can scratch around in my memory box or have a look tonight. One bit the photos don't show is a 40 amp auto reset circuit breaker.
 

Attachments

  • DashPanel.jpg
    DashPanel.jpg
    87.9 KB · Views: 634
  • Relay.jpg
    Relay.jpg
    93.7 KB · Views: 638
  • Starter.jpg
    Starter.jpg
    89.5 KB · Views: 634

ianoz

Senior Member
Joined
Jun 12, 2009
Messages
311
Location
australia
Mate , I think we have a couple of spare new studs .Can check with my son to confirm .Know there is at least one .
 

Jeembawb

Well-Known Member
Joined
Apr 1, 2012
Messages
173
Location
Muckay, Australia
Glad you found the issue Ianoz - Not sure about water pump removal - was a while ago - I am thinking either a hidden bolt maybe or a decent clout. From memory it is just a ring of around 6 or 8 bolts, but I do think it "locates" pretty tightly into the block. Do you have a new one or are you going to rebuild? I guess that depends on what you find. Going by your PM that just popped up with bubbles with water pump belt attached it could be impeller cavitation issue I guess - head gasket bubbles should find their way to the top without the water pump.

Jimbob
 

Jeembawb

Well-Known Member
Joined
Apr 1, 2012
Messages
173
Location
Muckay, Australia
We have a rebuild kit for the water pump that came with the machine .

Be careful with that ceramic or carbon "seal" when fitting it - & there should be a certain amount of preload on it so when you turn the impeller / pulley there should be a resistance maybe not quite as much as a viscous fan on a toyota. You might know more about the old school water pumps than me though - My Dad did truckloads of them in his day but so I borrowed some of his remeberences & it all turned out good. There is something to be said for using soluble oil in these cooling systems - it was good for the water pump seals & would be good for the head stud corrosion too.

Jimbob

Also there was two different models of waterpump - one was a modified one from a certain serial number on.
 
Top