• Thank you for visiting HeavyEquipmentForums.com! Our objective is to provide industry professionals a place to gather to exchange questions, answers and ideas. We welcome you to register using the "Register" icon at the top of the page. We'd appreciate any help you can offer in spreading the word of our new site. The more members that join, the bigger resource for all to enjoy. Thank you!

The Great Gradall Project

CraneInnovation

Well-Known Member
Joined
Jul 24, 2013
Messages
143
Location
United States
Occupation
Structural Engineer
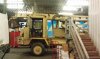
Well, I bought that Gradall and figured I would start a thread with pictures of my restoration attempts. As I've said before, heavy equipment maintenance is new to me, so know-it-all comments are actually appreciated.

Funny story. I live 45 minutes from where the machine will be stored. I left my home in Portsmouth, NH to drive to Hudson and stopped to get gas about five minutes in. Guess what pulled into the gas station one light cycle ahead of me? MY Gradall coming down from Maine! What are the odds.... Truck driver burst out laughing when I said hello.

IMAG1936.jpg


In Hudson, my friends at Fleet Ready are giving it a home. I'm blessed to have such sharp guys available to coach me through the rebuild process.

IMAG1937.jpg


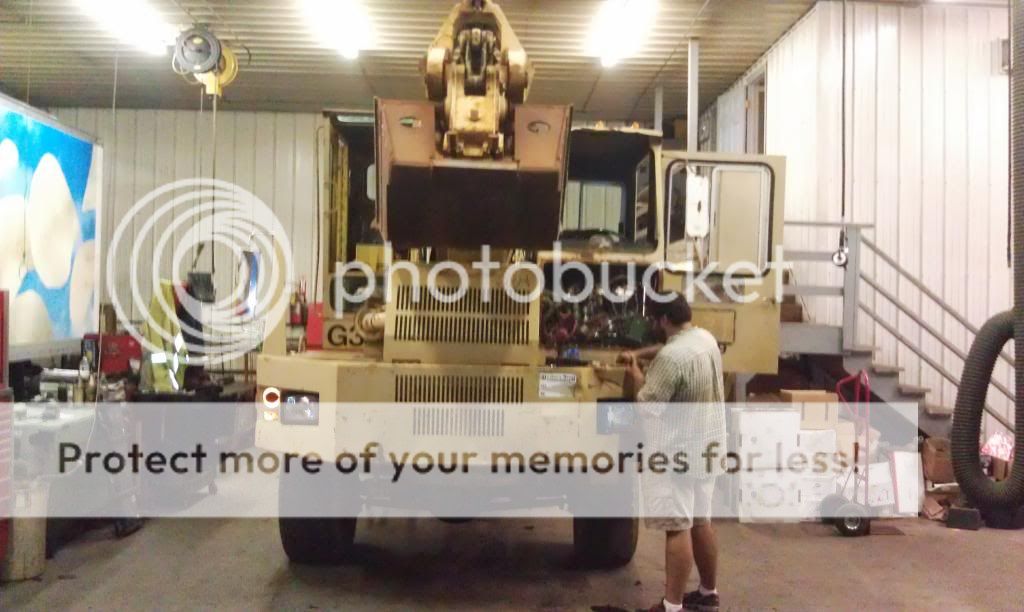
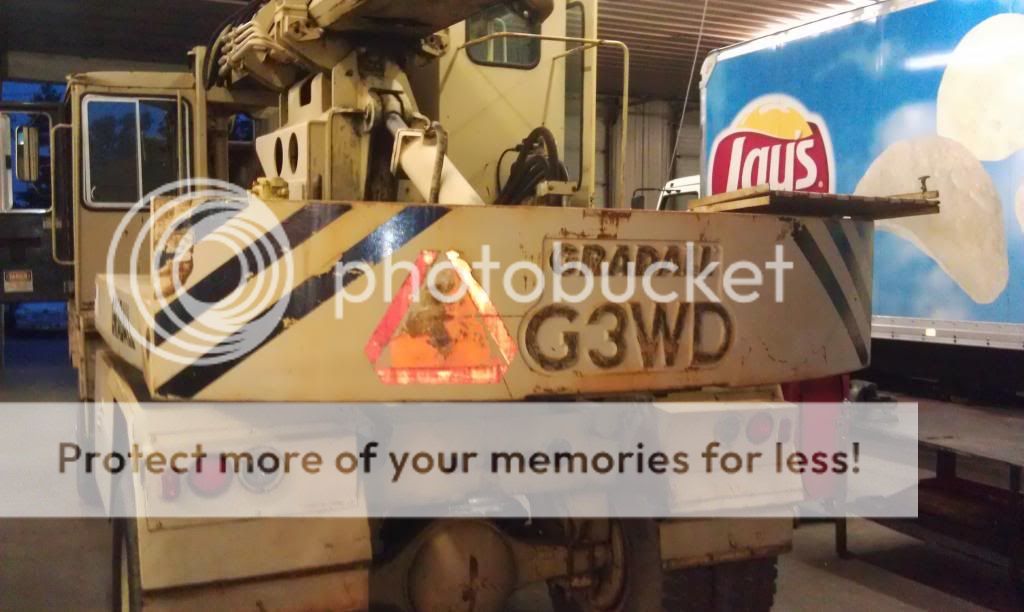
For living in New England its whole life, it has a surprising lack of rust. Upstate Maine tends to use sand instead of salt during the winter. 4500 miles on the carrier, 7300 hours on the machine. Not bad.

IMAG1939.jpg
IMAG1940.jpg


To quote an older thread on G3WD's, HOLY ELECTRICAL CONNECTIONS BATMAN. My electrical guy and I were totally flabbergasted when we pulled the front panel off. From what I can tell, G3WD's were very well thought out mechanically and hydraulically. The electronics were another matter, sadly. Easily HALF of the problems that these machines develop can be found right here:

IMAG1938.jpg


The primary issue is that the PTO shifter was engaged while the engine was running and needs to be replaced. The time spent without lubrication is very evident on the boom hoist cylinder. I plan on re-sealing and re-packing every one. Never done anything like it before, but I can't wait to learn.

IMAG1942.jpg


She's rough, and needs some work and $$, but she's mine! I'll post pics as I dig into it. Probably need to get a real camera.
 

Attachments

  • IMAG1936.jpg
    IMAG1936.jpg
    33.2 KB · Views: 3,246
  • IMAG1937.jpg
    IMAG1937.jpg
    38.8 KB · Views: 3,222
  • IMAG1939.jpg
    IMAG1939.jpg
    41.8 KB · Views: 3,207
  • IMAG1940.jpg
    IMAG1940.jpg
    37.2 KB · Views: 3,210
  • IMAG1941.jpg
    IMAG1941.jpg
    35.2 KB · Views: 3,209

Jim D

Senior Member
Joined
Nov 11, 2012
Messages
408
Location
California
Occupation
equipment operator
Very cool!

The wires... wow... and it looks like pneumatic hoses too! And an exposed laminate etched circuit board, IC's, op-amps or electro-mechanical relays too!

can you get the book for it?

The silver block with the black hoses going to it, is that pneumatics?
 

Andrew_D

Senior Member
Joined
Oct 20, 2012
Messages
298
Location
Newdale, Manitoba, Canada
Given the look of the electrical "area", and as you said, they have had a few electrical problems in the past, is completely rewiring it feasible? Maybe build do it yourself, replacing 1 wire at a time, bypassing all those connectors. Make it look neat and tidy. A lot of work for sure, though.

Local guy did that with his T800. It had a few owners in the past that had added bits here and there. When a wire failed, he ran a new one, but never removed the old one. There were wires everywhere! Took a couple of guys 2 weeks to trace all of the wires, pull the unused ones and make it look nice again.

Andrew
 

CraneInnovation

Well-Known Member
Joined
Jul 24, 2013
Messages
143
Location
United States
Occupation
Structural Engineer
Jim D:

Yes, those are air lines. Interesting how the arranged them. We do know that the PTO cylinder isn't getting air and its probably one of those solenoids. We also know the PTO shifter its self is chewed up (doesn't engage manually). And yes, that PCB is the transmission shift module and YES, it is exposed!! There was white deposits on the circuitry. Probably explains why none of the odd gears work...

I'm trying to find hard copies of the info. Gradall lets you look up parts and service manuals by serial number, but the ones for this unit aren't complete. There's almost no information on the 4x4 carrier transmission. The specs say they are both Funk 2000's, but even the drawings show two VERY different transmissions between 2x4 and 4x4.

Andrew_D:

Yup, we're planning on it! Weirdly, they used $1000 (yes, 1k) military spec bulk connectors in one spot, and right next to it they used butt splices that you can pull apart by hand. Definitely getting a re-wiring. My buddy Pat (in one of the photos) is superb at that stuff and making it look as good as it works. We'll try to pull old stuff out as we go!
 

61BG

Well-Known Member
Joined
Sep 15, 2012
Messages
80
Location
Ontario,Canada
Love those G3WDs. 5.9 Cummins for power?? A guy around here a few years ago took the upper off & drove it around as a 4x4 truck! Talk about overkill. I saw it a couple of times drivin down the road & of course didn't have a camera with me...
 

CraneInnovation

Well-Known Member
Joined
Jul 24, 2013
Messages
143
Location
United States
Occupation
Structural Engineer
Yup, its got the Cummins. It was recently replaced and runs great. Started right up even after it had been sitting.

The guy I bought it from said that the logging guys love the carriers and Spicer front axles. I guess they will drive them with a hydraulic motor and use them on standard trucks for emergency AWD in soft spots. If someone didn't buy the whole Gradall, he already had people interested in the driveline components.
 

CraneInnovation

Well-Known Member
Joined
Jul 24, 2013
Messages
143
Location
United States
Occupation
Structural Engineer
We've had a few work days on the Gradall and I figured I'd post an update and share a few headaches. I've already received some excellent tips from some of you and I really appreciate it!

I'll summarize what we've attempted and follow up with some pictures:

Main Pump PTO:

Removed the main pump and disassembled it.....discovered it was basically junk.

Took it down to TST in Merrimack, NH and was told that the various stages were not even from the same vendors or from the same configuration (some P/N's were for a triple pump). Complete mickey-mouse job. They followed up this bad news by offering to machine on site, with 24 hr turnaround, a brand new pump for 40% less than the dealer quote. WOW! These guys are sharp.

Got new PTO parts in per the parts manual and several conversations with Gradall. Today we removed the main pump disconnect and charge pump (the PTO on the Funk F20 TC is on the same shaft as the charge pump). Long story short, instead of finding the 2" long spline shaft that we got from Gradall we found this:

IMAG1978.jpg

Uh oh. We also determined that the internal structure of the charge pump shown in the parts manual is very different from the one on our bench:

IMAG1980.jpg

Sooo yeah... A few phone calls to make on Monday morning for sure. Theory #1 is that the most recent design involves the more serviceable 2" shaft tip that can be easily replaced and that our machine has an older version which involves replacement of the charge pump gear set after any PTO accident....

We have also removed the driver's cab roof and will be designing a sheet metal replacement this week.

IMAG1974.jpg

We have also made progress planning a complete electronics overhaul....and repainting...and new tires/undercarriage parts....and fluid flushes.

Oh, yes, the transmission fluid looks like this:

IMAG1971.jpg

Gross.

This poor Gradall is in rough shape. But we'll set her right.

IMAG1948.jpg
 

CraneInnovation

Well-Known Member
Joined
Jul 24, 2013
Messages
143
Location
United States
Occupation
Structural Engineer
A few pics of the main pump removal/disassembly:

IMAG1960.jpg

IMAG1963.jpg

Diggin' in:

IMAG1964.jpg

She's seen better days:

IMAG1969.jpg

Custom cover plate to keep the transmission fluid where its supposed to be. Didn't leak a drop!

IMAG1976-1.jpg
 

CraneInnovation

Well-Known Member
Joined
Jul 24, 2013
Messages
143
Location
United States
Occupation
Structural Engineer
Taking off the bucket with no help from the Gradall:

Taken by Pat in the old Trojan. Strong...but we found diesel in the engine oil today. Another project! I'm in the red shirt on the left.

View attachment 106692

Took some persuading (biggest wrench we had, some pipe, and sledgehammer) but it came off safely.

View attachment 106693

A few welds are worse than the very first bead I ever laid down with a MIG torch. Some grinding and welding in our future.
 
Last edited:

CraneInnovation

Well-Known Member
Joined
Jul 24, 2013
Messages
143
Location
United States
Occupation
Structural Engineer
Got some more work done....figured I'd post an update:

Charge pump came in....cost more than any vehicle I've ever bought (except for the Gradall). Swapped bearings and fittings over:

IMAG2111.jpg

Found that seal hiding under the shift adapter and had to put the old one back in to get the machine moving again. It was veerrry light going in and leaked like crazy. First on the following week's shopping list...

Got a roof fabricated! Joe is fitting it up...it came out nice.

IMAG2113.jpg

Got her moving for the first time in a few weeks...forward progress.

IMAG2114.jpg
 

CraneInnovation

Well-Known Member
Joined
Jul 24, 2013
Messages
143
Location
United States
Occupation
Structural Engineer
Got the seal this week. Pulled the pump, cleaned up the seat (a few burrs), pressed it in, and reinstalled the pump in under an hour. Might actually be learning something....:) I know seals are nothing for you guys, but they still scare the hell out of me... Didn't leak a bit doing a few laps around the lot!

DSCF0042.jpg

Bobby welded up half the roof. I appreciate his help, I know the basics, but the basics aren't quite good enough for this work.

DSCF0046.jpg

Once I had the charge pump back in, I started attacking the superstructure hydraulics. Got the boom telescope valve out. Rebuild kit is on the shopping list this week.

DSCF0050.jpg

Slow, steady progress.
 

CraneInnovation

Well-Known Member
Joined
Jul 24, 2013
Messages
143
Location
United States
Occupation
Structural Engineer
Thanks guys! The threads from the true professionals in this section are fascinating...but I thought a few of us amateurs would like to see a true newbie tackle a rebuild. I'm having a blast with this. Its making me re-think my engineering degree.... Maybe not...building things is fun whether in the shop or on paper.

We are hoping to get the cab ready for windows this weekend and some major electrical work finished. What a mess the electronics are.....this is THE send from the engine oil pressure sensor:

oilpressuresensor.jpg

Yeah....that's what we're up against with the electronics. Oh well...challenges keep life interesting!

I'll post pictures from this weekend's work. If all goes well, I'll be able to order all new carrier cab glass and weather stripping and have more than 50% of the gauges working. Baby steps...

What a ball!
 

CraneInnovation

Well-Known Member
Joined
Jul 24, 2013
Messages
143
Location
United States
Occupation
Structural Engineer
I'll also re-post the bucket removal pictures because the original post got munched...

This was taken by Pat in the old Trojan 1700 loader. When we fired her up that morning we found diesel in the engine oil. Oh well.......another project! I'm on the left in the red Manitowoc shirt. Left to right is myself, Matt, and Bobby, my trusty welder.

1175365_10151858978581068_1019327238_n.jpg

Took some work, but we got the bucket off safely:

IMAG1970.jpg

Left to right that's Matt, Ted, Joe, and Pat without faces. I'm grateful for their help and they will have free access to the G3WD when she's back in tip-top shape.
 

CraneInnovation

Well-Known Member
Joined
Jul 24, 2013
Messages
143
Location
United States
Occupation
Structural Engineer
In the middle of another big work weekend (possibly the last major one before the holidays). Figured I'd post an update:

After much debate about how to fabricate the missing cab support, we settled on this idea. We cut out carboard in the size of our available sheet metal and wrapped it around the existing support:

DSCF0082.jpg

We then spray painted the outline of the support from the inside with paint that matched the interior:

DSCF0084.jpg

We then unfolded and cut out the outline:

DSCF0085.jpg

And then bent the cardboard on the brake and installed to check fit:

DSCF0086.jpg

Hey, that might actually work! Bobby will be cutting out the real one and welding it in tomorrow. Then its off to CN Wood to order glass!
 
Last edited:

CraneInnovation

Well-Known Member
Joined
Jul 24, 2013
Messages
143
Location
United States
Occupation
Structural Engineer
A second reply due to picture limits.

Also dug into the electronics. I re-terminated the alternator wiring in a bid to fix the tach. Turns out the alternator is dead and the replacement is a specially modified Motorola part number. WTF? They couldn't find a way to make one of the other thousand common alternators work? Oy.

This is before rewiring...note the loose ends going nowhere in particular:

DSCF0087.jpg

Matt also dug into the rotten cab floor and seat assembly while we had the cab apart. This is a half inch of loose flake rust and dirt beneath the floor mat:

DSCF0090.jpg

Matt found the cause:

DSCF0091.jpg

Have to add a heater core to the glass order....can't say I'm not surprised. Still having fun :cool:
 
Top