• Thank you for visiting HeavyEquipmentForums.com! Our objective is to provide industry professionals a place to gather to exchange questions, answers and ideas. We welcome you to register using the "Register" icon at the top of the page. We'd appreciate any help you can offer in spreading the word of our new site. The more members that join, the bigger resource for all to enjoy. Thank you!

Leaking Final Drive

Mcrafty1

Senior Member
Joined
Oct 12, 2019
Messages
445
Location
Central Maine
Occupation
Earth work
service place quoted me 2,000 (can) to replace the seal and 12,000 for a reman. I'm hoping to not have to do either. got the cap on today, ill fill it with fresh oil monday and see how bad the leak is or if its present now that all the junk has been dug out from behind the sprocket.
I have no doubt the grease method has some merit, but i have to sell this thing when im finished with it and i cant imagine it will go over well if a prospective buyer does an inspection and finds that drive full of grease.
Nor was I insinuating that you should, I was just passing on what I've found to be a way that some people get around spending the money for a time and get some extra life out of the part they eventually know they'll need to replace anyway. I missed the part where you where selling the machine.
 

sdavies2000

Well-Known Member
Joined
Oct 22, 2022
Messages
76
Location
canada
Well, it didn’t take long to leak after I filled it up, guess I’m going to learn how to tear down a drive. At the rate it was leaking, it wouldn’t take long to be empty. I’m digging a pond so I can’t be loosing 7 pints of oil every couple days all over the place.
 

92U 3406

Senior Member
Joined
Jan 3, 2017
Messages
3,146
Location
Western Canuckistan
Occupation
Wrench Bender
Mark the final drive with a paint marker or something and turn the final drive a half turn, see if the leak stops. Sometimes if there's damage on the part of the seal that rotates you can just park it in a position where the damaged area is above the oil level.
 

sdavies2000

Well-Known Member
Joined
Oct 22, 2022
Messages
76
Location
canada
I parked it next to the house and drained it. I’ll spend the day tomorrow clearing out the garage and setting up some heavy welding benches I just bought at auction to build a brush rake for the dozer. Good thing I bought those, they’ll be perfect for tearing this down. If I have time, I’ll get started at splitting the track. It looks like my master pin is secured in place with a circlip. Any advice for those? I’ve dealt with circlips lots but is there anything special or helpful I should know about this master link setup?
I’ll take and post pictures of my progress over the course of the job.
 

Attachments

  • 19A5F46D-BB47-4489-9114-5B978BA2F2B5.jpeg
    19A5F46D-BB47-4489-9114-5B978BA2F2B5.jpeg
    2 MB · Views: 34

Diesel Dave

Senior Member
Joined
Sep 29, 2022
Messages
1,058
Location
Ontario Canada
You will only have the whole world looking over your shoulder as you work, what could possibly go wrong :)
That master pin / master link arrangement was a tap fit when new. Should drive out relatively easy, may take just a bit of heat to get it moving.
 

Bluox

Senior Member
Joined
Jun 19, 2010
Messages
1,960
Location
WA state
run the pin up on the sprocket, putting the pin about 45% from the top .
Make a punch with a handle so you can drive it with a big hammer.
the pin drives toward the clip side.
Bad Bob
 

sdavies2000

Well-Known Member
Joined
Oct 22, 2022
Messages
76
Location
canada
Anyone have a guess as to what size plugs/caps I’ll need for the hoses and travel motor? 200 hitachi.
 

Diesel Dave

Senior Member
Joined
Sep 29, 2022
Messages
1,058
Location
Ontario Canada
The 2 large high pressure hoses fittings are -12 flat face.
The case drain and motor angle shift are JIC for sure , likely -6 and or -8.
Have you decided to remove the complete motor and final drive assembly ?
You have the option to replace the duo cone seal leaving the motor and hub on the machine. You don’t need to remove any motor hydraulic hoses.
 

sdavies2000

Well-Known Member
Joined
Oct 22, 2022
Messages
76
Location
canada
That’s what I had intended to do. Are you suggesting leaving the whole unit on the machine and taking the cover off and pulling the guts out of it? I don’t know how else to do it without pulling the whole thing off.
 

sdavies2000

Well-Known Member
Joined
Oct 22, 2022
Messages
76
Location
canada
What does? Leaving it on or taking it off? Now I’m confused. I imagine you’re saying leaving it on makes it easier to torque the nut.
 

sdavies2000

Well-Known Member
Joined
Oct 22, 2022
Messages
76
Location
canada
The weather here is going to be well below zero (32 deg)the next couple weeks with snow, does that make more sense to remove it completely and do all the work in a garage or is it not that bad to get at the seal if left on machine
 

92U 3406

Senior Member
Joined
Jan 3, 2017
Messages
3,146
Location
Western Canuckistan
Occupation
Wrench Bender
Yes leaving it on makes it easier to torque the nut. The major downfall of doing it in place on the machine is contamination control. If you're doing the work outside there's a huge potential for dust, debris and water to get into the final drive. Inside a shop is not a big deal if you have that luxury.
 

sdavies2000

Well-Known Member
Joined
Oct 22, 2022
Messages
76
Location
canada
Aright, I’m just going to take the whole thing off. Having trouble getting the master pin out right now though. Got the damaged circlip out But the pin won’t move. Think I need to find a bigger hammer. My sledge is only 8lbs. I do have a a gas torch as well. Maybe I’ll try heating the link
 

sdavies2000

Well-Known Member
Joined
Oct 22, 2022
Messages
76
Location
canada
Diesel Dave, What’s flat face?
Here’s a picture of the drive.

the two big ones take a 36mm wrench and the other two take 27mm and 17mm

I don’t know what type though or thread type
 

Attachments

  • 0E928B70-CED3-496B-8CA7-01A6C6BC7306.jpeg
    0E928B70-CED3-496B-8CA7-01A6C6BC7306.jpeg
    2.5 MB · Views: 31

Diesel Dave

Senior Member
Joined
Sep 29, 2022
Messages
1,058
Location
Ontario Canada
A good hydraulic shop will know exactly what -12 flat face caps and plugs are.
Sorry, I guess the proper term is ORFS (o-ring face seal).
You will need 2 sets to plug the 2 large hoses and cap the 2 large motor fittings.

The JIC caps and plugs are relatively inexpensive so maybe get 2 sets of -4, -6 and -8 JIC caps and plugs to plug the 2 smaller hoses and cap the 2 motor fittings.
I’m unsure of the exact JIC fitting sizes on the machine but will be one / two of those for sure.
 
Last edited:

Tones

Senior Member
Joined
Mar 15, 2009
Messages
3,078
Location
Ubique
Occupation
Ex land clearing contractor, part-time retired
It would be easier to flop the track off without removing the master pin. You don't need another machine to help, just a good chain
 

92U 3406

Senior Member
Joined
Jan 3, 2017
Messages
3,146
Location
Western Canuckistan
Occupation
Wrench Bender
Most times when splitting a track I'd remove the 2 pads over the master link and then bash on it with a 20 lb sledge. A 2nd set of hands and a big drift with a handle for the 2nd person to hold makes it easier.
 

John Shipp

Senior Member
Joined
Mar 5, 2015
Messages
643
Location
England
Occupation
forestry contracting
With a stubborn pin I've found it easier for myself to put the master link down on the ground between two bottom rollers, make a drift that is long enough to come out about a foot past the track pads. Weld a handle about 6-8" back from the end you'll hit with the hammer, so it's like a crucifix type of cross and about 2 foot long so you can stand on it with your feet apart a little way. Weld a centre blob on the other end, if the master pin has a centre hole or divot, this helps keep it on the end of the pin at the start.
Set it up on wooden blocks, stand on the cross tube with your back to the tracks, with a bit of practice and a 14lb hammer you can get a full on swing beating the drift backwards between your feet.
I always have a practice on some heap of crushed stone first, to get my swing into shape. It helps that I used to mess around as a kid playing croquet :)
You can knock a plain drift back through after so you can track it a few feet to split the track in a good position.
Don't forget to pull the tensioner all the way back before starting.
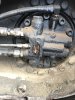
If removing the final, maybe loosen the nut in there first.
 
Top