• Thank you for visiting HeavyEquipmentForums.com! Our objective is to provide industry professionals a place to gather to exchange questions, answers and ideas. We welcome you to register using the "Register" icon at the top of the page. We'd appreciate any help you can offer in spreading the word of our new site. The more members that join, the bigger resource for all to enjoy. Thank you!

Hough H80B source for parts

kshansen

Senior Member
Joined
Mar 11, 2012
Messages
11,165
Location
Central New York, USA
Occupation
Retired Mechanic in Stone Quarry
I have yet to figure out how to quote somebody on this forum, kshansen, but I agree the brakes are the number one priority but while waiting to get brake parts in, other tasks can be completed.

Well not knowing how you are reading or posting to the forum I can not be too positive about it but on my desktop computer I just look down to the right corner of the box you are reading this in and there are three words and the message #.

If you click on the "Like" when the next person reads it there will be a white line near the bottom where it says "so-in-so" "liked this"

Now the "+Quote" is a little different. Say if in reading the thread you want to quote and reply to two or more comments but put it all in on post from you then you can just click on that "#Quote" for each posting you are replying to then wen you have them all selected click on the "Reply" in the last one and it should open a box where you can enter your reply. To make it easier for others to follow what you are commenting on I like to highlight and delete any text that is not needed but be sure to not delete the "/QUOTE" in the [ ]'s at the end.

Now if you were only wanting to quote from one post you would just click on the "Reply". Again I like to edit out the extra stuff not directly related to you reply like I did for your post when writing this reply!
 

Welder Dave

Senior Member
Joined
Oct 11, 2014
Messages
12,536
Location
Canada
I'd think you'd want to get some experience before doing commercial snow removal with a large loader. Also make sure there are no hidden issues with the loader. Insurance for snow removal is higher than for dirt work because many things can be hidden by snow. I've seen chunks of concrete curbs and speed bumps ripped out by a loader. Even in a skid steer hitting a raised manhole cover is not a fun experience. You'll need a bolt on cutting edge if you're going to do snow removal. The standard edge would be ruined in a very short time. Not many people use a wheel loader for clearing tree's and brush. Tires are probably a couple thousand a piece and clearing tree's is one of the most dangerous jobs because tree's are unpredictable, especially dead tree's. They can break half way up and fall back on you.
 

Minnesota Eric

Well-Known Member
Joined
Jan 19, 2017
Messages
102
Location
Minnesota
I have experience commercially moving snow, Welder Dave. If I am able to pick-up a commercial job I would try to pick up an Avalanche Optimus pusher plow which is the best I've used on a wheel loader. Trouble is the plow costs more than the wheel loader in a 10' or 12' version.


Welder Dave

Senior Member
Joined
Oct 11, 2014
Messages
12,536
Location
Canada
What did you clear snow with before? You'd need a lot of work to justify a box pusher. A bucket is also good if the snow has to be hauled away.
 

Minnesota Eric

Well-Known Member
Joined
Jan 19, 2017
Messages
102
Location
Minnesota
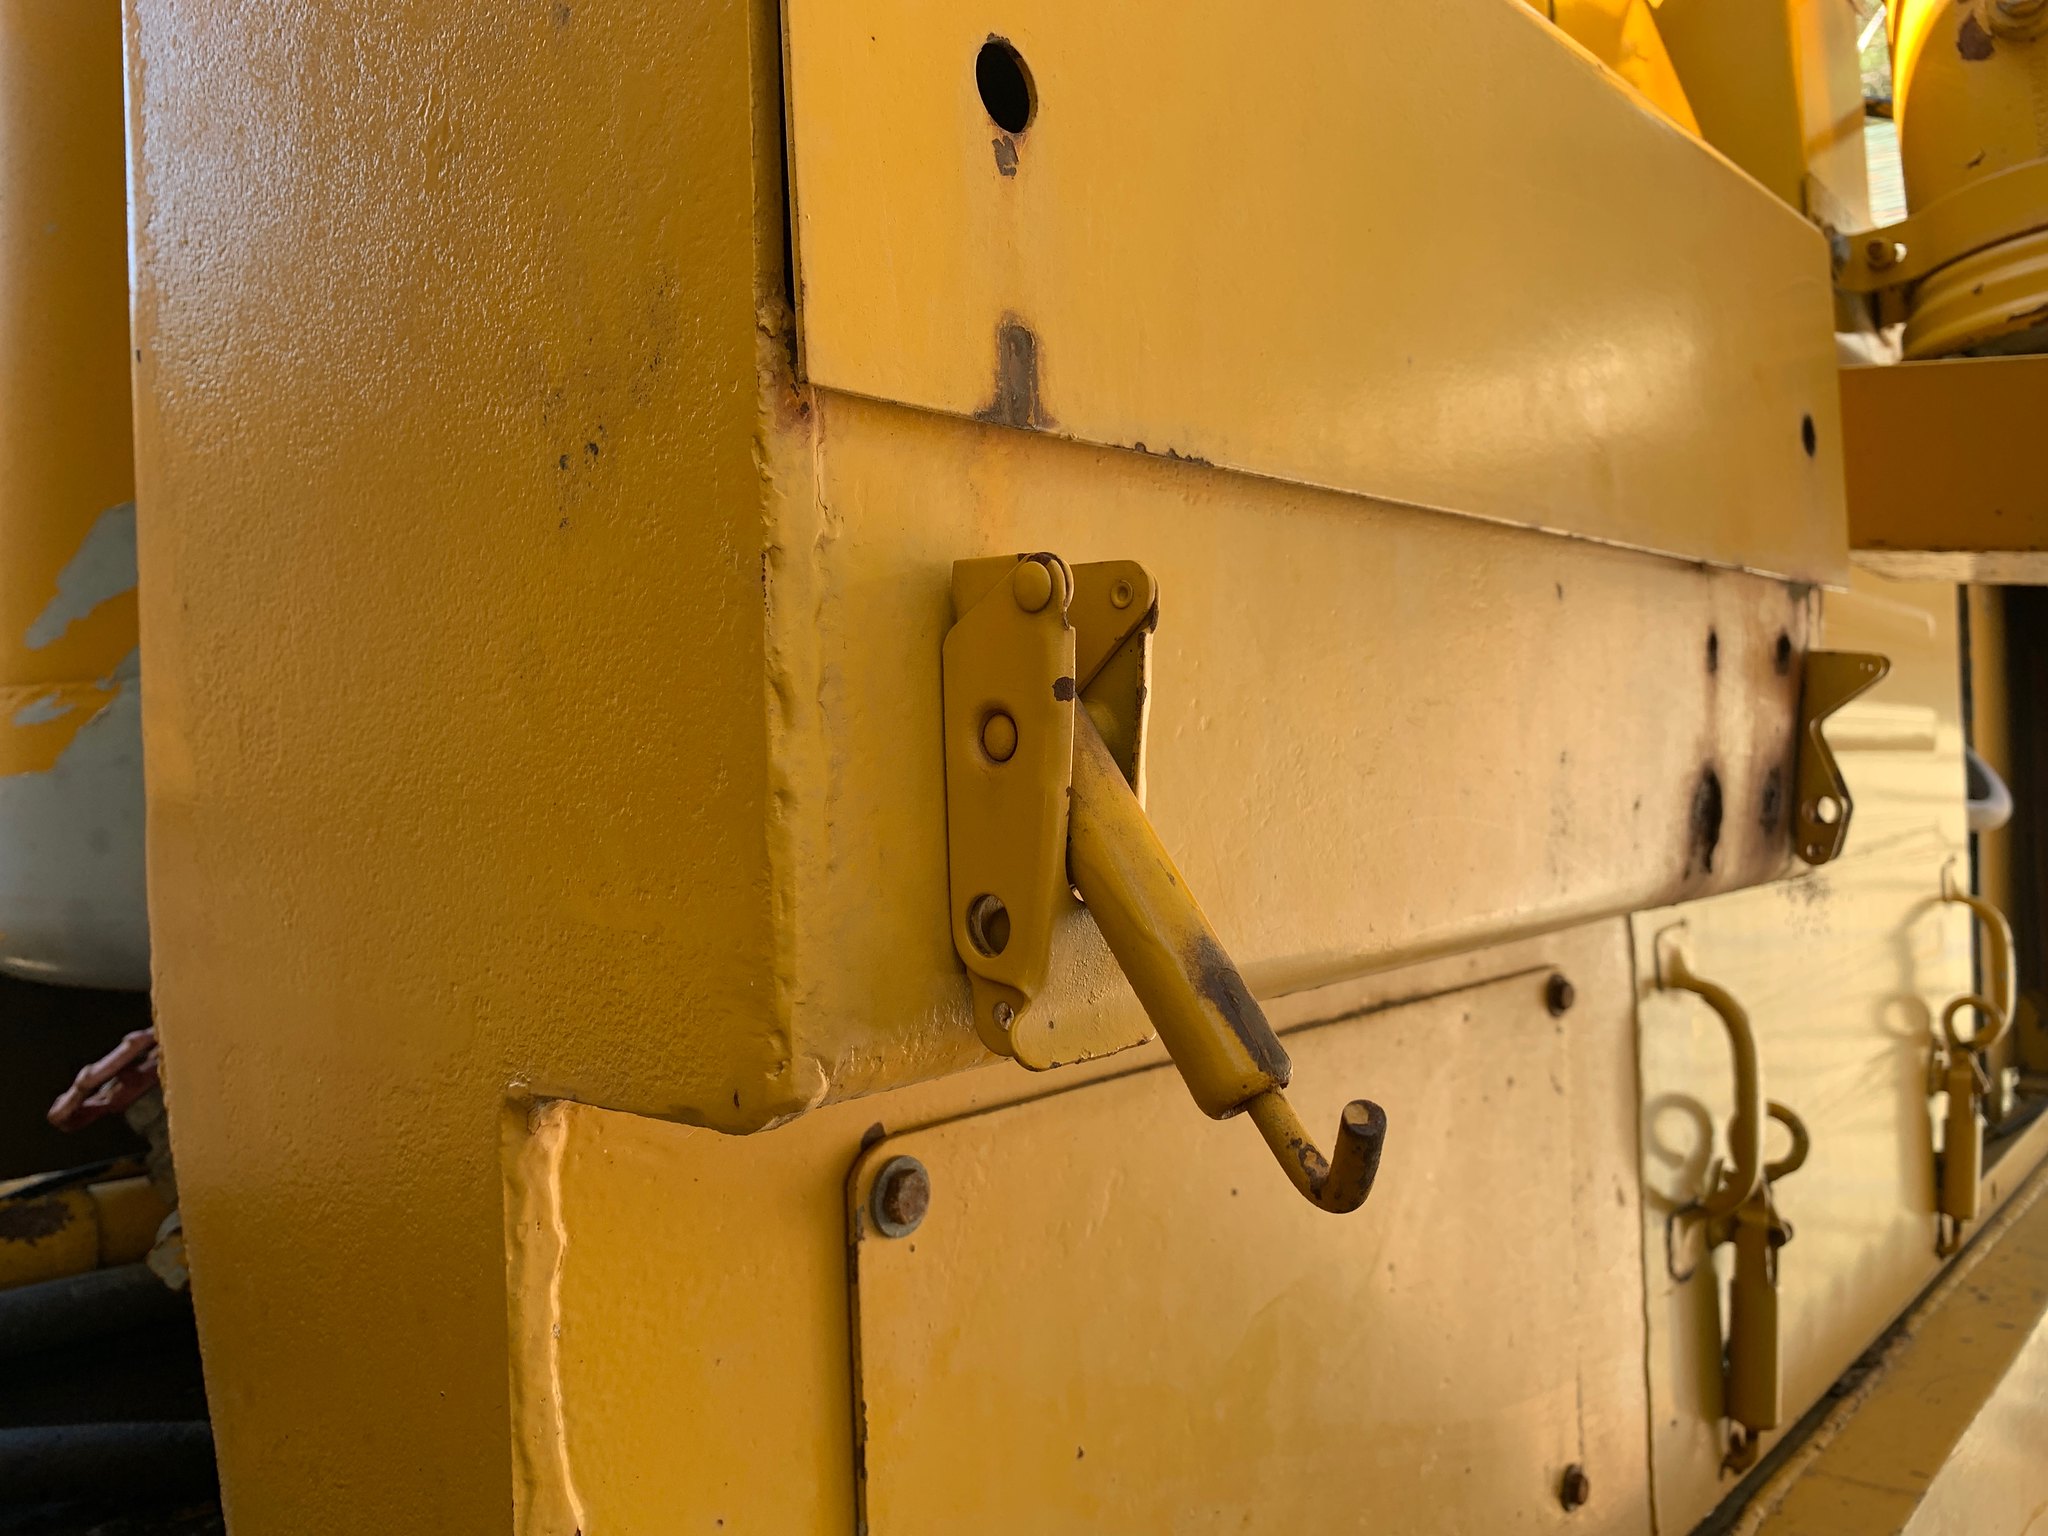
Does anybody know of a source for or other machines that used for the spring-loaded J-hooks for the battery boxes on the H80B? Three of them are smashed or missing on my machine. Thank you for any help.

49855517473_c05d7e00af_k.jpg
 

Minnesota Eric

Well-Known Member
Joined
Jan 19, 2017
Messages
102
Location
Minnesota
What did you clear snow with before? You'd need a lot of work to justify a box pusher. A bucket is also good if the snow has to be hauled away.

Wheel loaders, smaller field tractors running 12' plows, and skid loaders running 8' pushers. Unless working in a tight space, wheel loaders rule for clearing commercial parking lots and again, the plow I'd purchase costs more than what I have into this H-80B which is fine if I can land a contract that requires clearing snow every two inches. Right now I'm clearing snow residentially.
 

Minnesota Eric

Well-Known Member
Joined
Jan 19, 2017
Messages
102
Location
Minnesota
Neither McMaster or Spaenaur panned out for the spring-loaded J-hook anti-rattle fastener.

Meanwhile, I'm stall waiting for air brake parts but I attended to the throttle cable this weekend.


Minnesota Eric

Well-Known Member
Joined
Jan 19, 2017
Messages
102
Location
Minnesota
While trying to find where the fuel sending unit is located, I realized there is a good two inches of dirt, twigs and leaf litter between the bottom the engine oil pan and the top of the fuel tank. It rained today limiting my fix-it time but I dug out at least two gallons of dirt into an ice cream bucket and there is much more to go. Cleaning that mess up will be tedious. Mental note: let's not run this thing without the access panels installed. Anyway, there is but one reference wire from the sending unit back top the fuel gauge. Sure be nice to get that meter to wake up. Also, I received a new Hour meter that reads in 10,000 hours. It picks up its power from the engine oil pressure meter, so I need to get the engine oil pressure sending unit or wiring sorted out. So far I haven't been able to locate the engine oil meter. I know it is a single wire sending unit, but where is this thing located on a DT-466B???

Everywhere I look there are mysteriously disconnected wires, and bad replacement wiring which is hokey, exposed, and amazing it is even working.

Air brake wise, the replacement foot-operated air horn arrived and so I can begin plumbing some airlines back in so as to be able to start mending the air leaks. Toward the goal of fixing the air leaks, does anybody happen to know where shop air can be supplied or the best place to tap in on this Hough H-80B?

I picked up some plugs so I can terminate air leaks at the valves (I have loose 1/4" air hoses here and there that I have yet to trace where they were supposed to go) as well as 30' of 1/4 air brake line (it's a start), as well as zip-tie tags (so I can identify the existing air brakes line which is either black or painted yellow). I also have a logically drawn diagram of the air brake system to puzzle from but is small enough to make me squint looking at it.

Air from the compressor, to the regulator and to everywhere from there. I need to puzzle out the best way to break down the air brake system in order to understand it.

Since the ether system wiring has been cut, I may as well remove what is left. Removing the ether system will hopefully allow me to trace back and remove the wiring thereby simplifying my wiring job on everything else that is necessary until I can replace the ether system with a new one (as well as puzzle out how to get a fuel heater into the system).
 

kshansen

Senior Member
Joined
Mar 11, 2012
Messages
11,165
Location
Central New York, USA
Occupation
Retired Mechanic in Stone Quarry
Well to plumb in a line in for shop air to test the air system for leaks and operation one of the best places would be to disconnect the line from compressor that feeds the "wet tank". Most air systems have what is called a "wet tank" to give a place for moisture to condense and be drained out before going to the rest of the system.

My reasoning for plumbing air in right at the line off the compressor is it would suck to think you got all the leaks fixed to find that the line or fittings in that line had there own problems. Of course this would only work for stationary work on machine, unless you have a very long hose! I would also at that connection install a ball valve to allow you to shut off the air supply to be able to see if there is a slow leak. Build up to 120 psi from shop air, close valve and let set to see if pressure starts going down.

I always liked to see a machine sit at least over night without loosing, say 25 psi. Actually recall an old Euclid I worked on that we parked the truck and pulled engine for overhaul and when we came back to install engine it was still showing air pressure on gauge before stating rebuilt engine!
 

Minnesota Eric

Well-Known Member
Joined
Jan 19, 2017
Messages
102
Location
Minnesota
Updates:

Still digging for the fuel sending unit. I believe it is on the righthand side forward of what I believe is the governor.

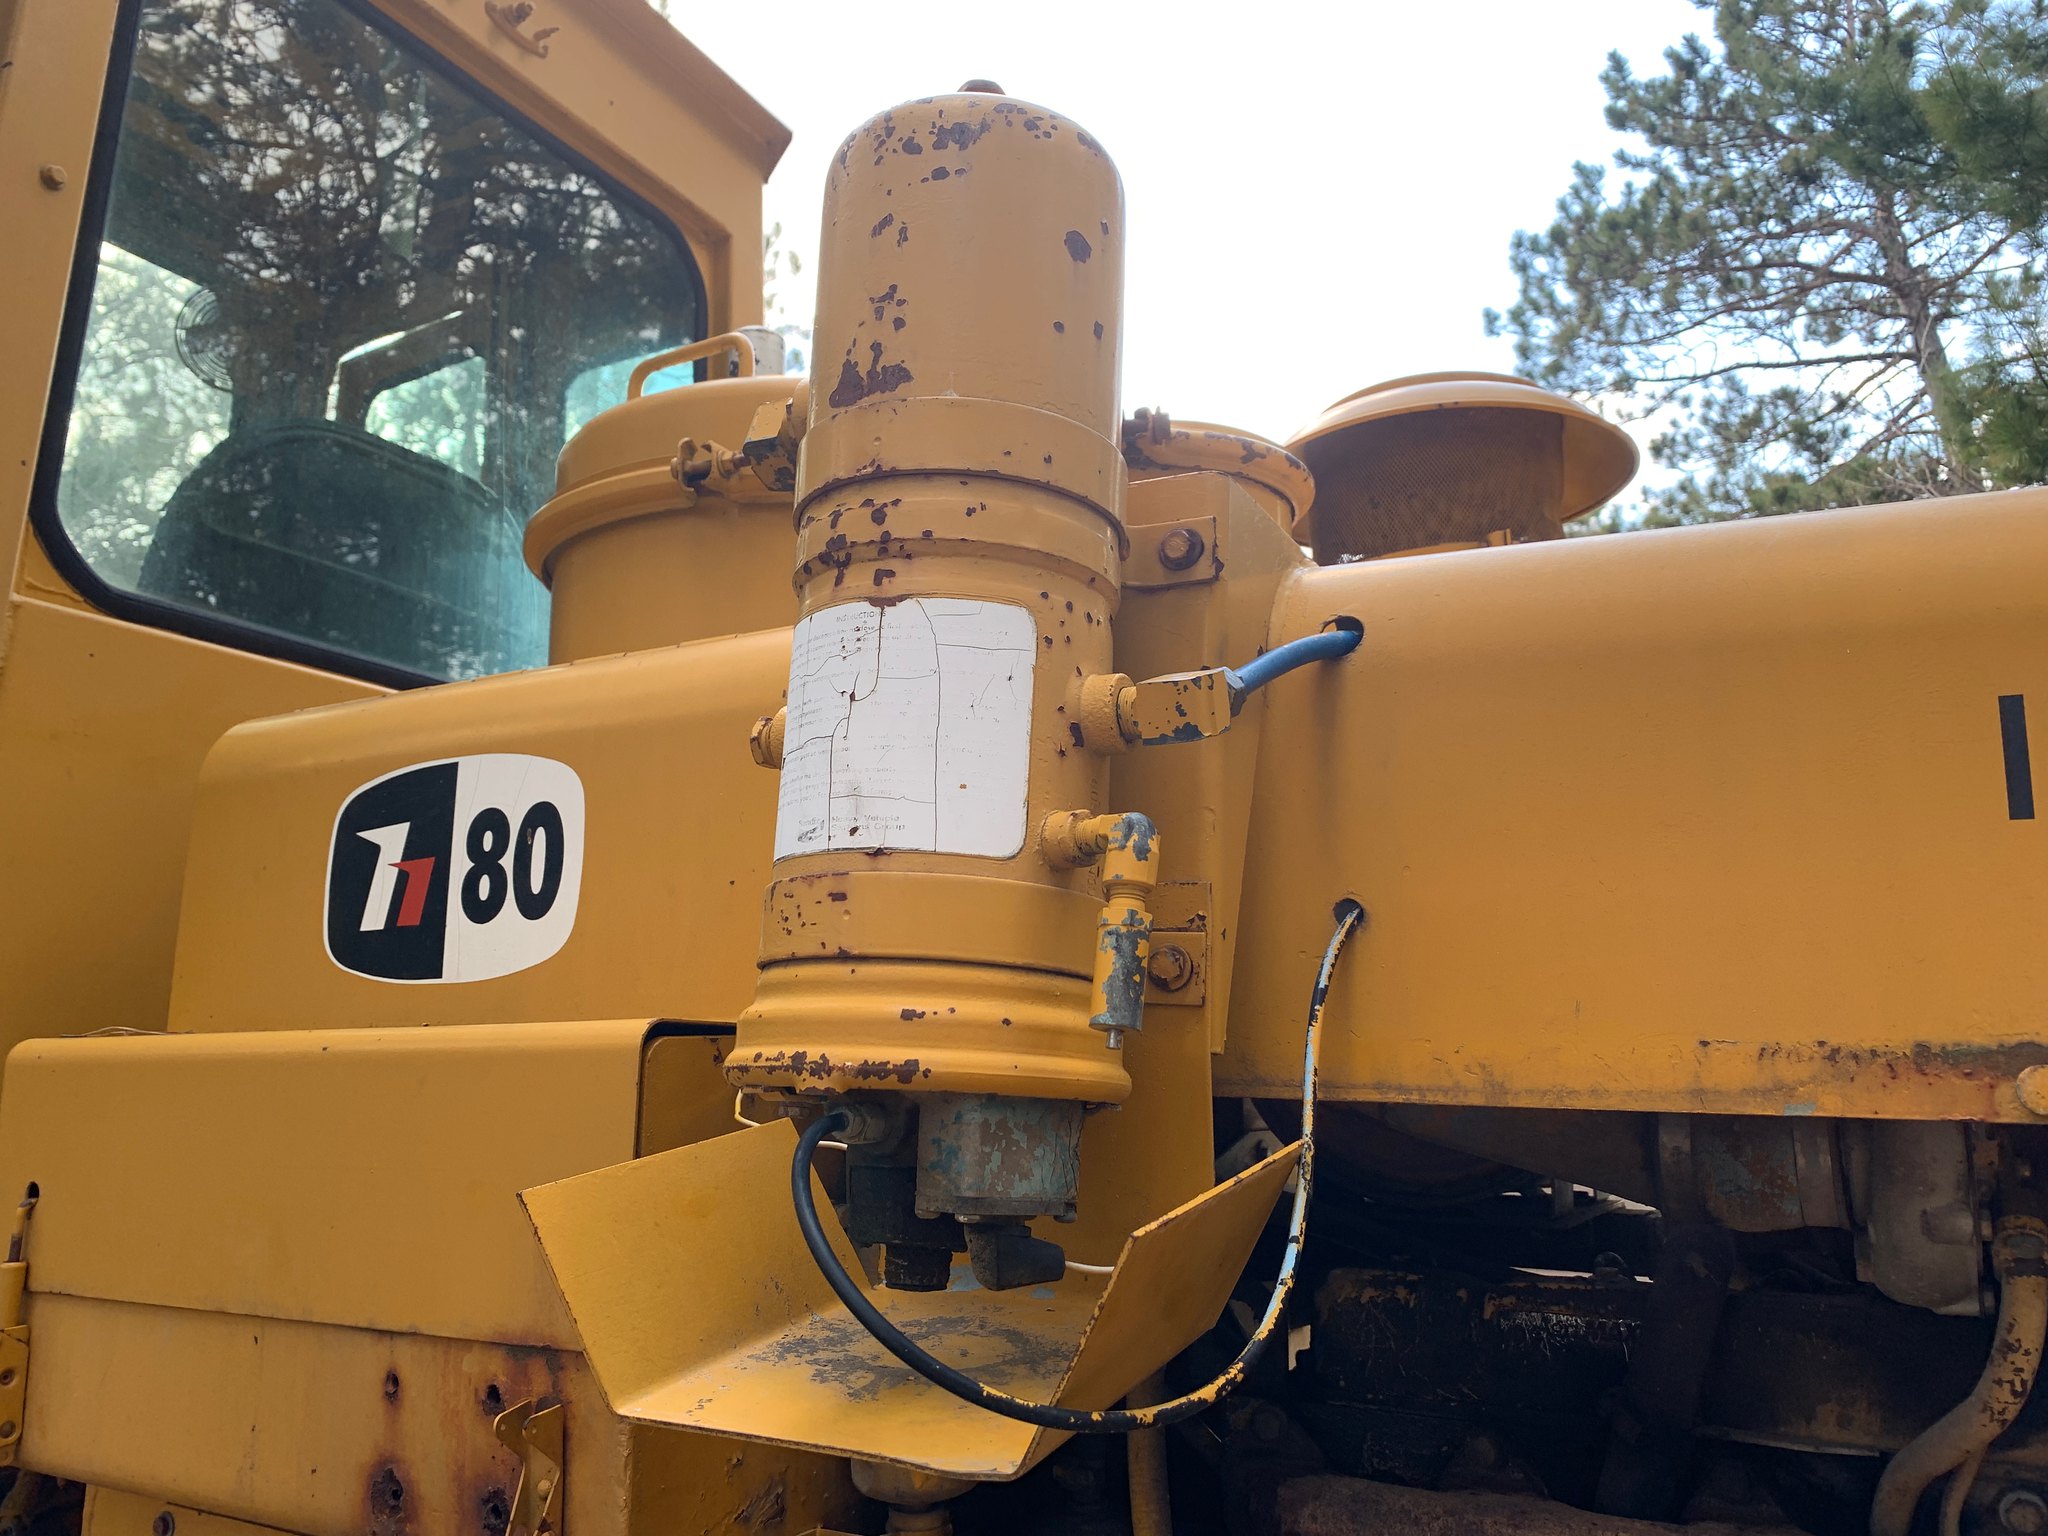
Plumbing in a shop airline became an instant problem when the machine didn't follow my airline schematic or the logical drawing of the air system. I wasn't able to get too far into as my sister popped in and she and I got to assembling and hanging a storage cabinet in my garage which chewed up the rest of my day. Anyway, near as I can tell, this thing (whatever it is) is between the wet tank and the compressor. Looks like it has a pressure relief valve on it but I have no idea what I'm looking at.

49896272018_d2dda627d9_k.jpg


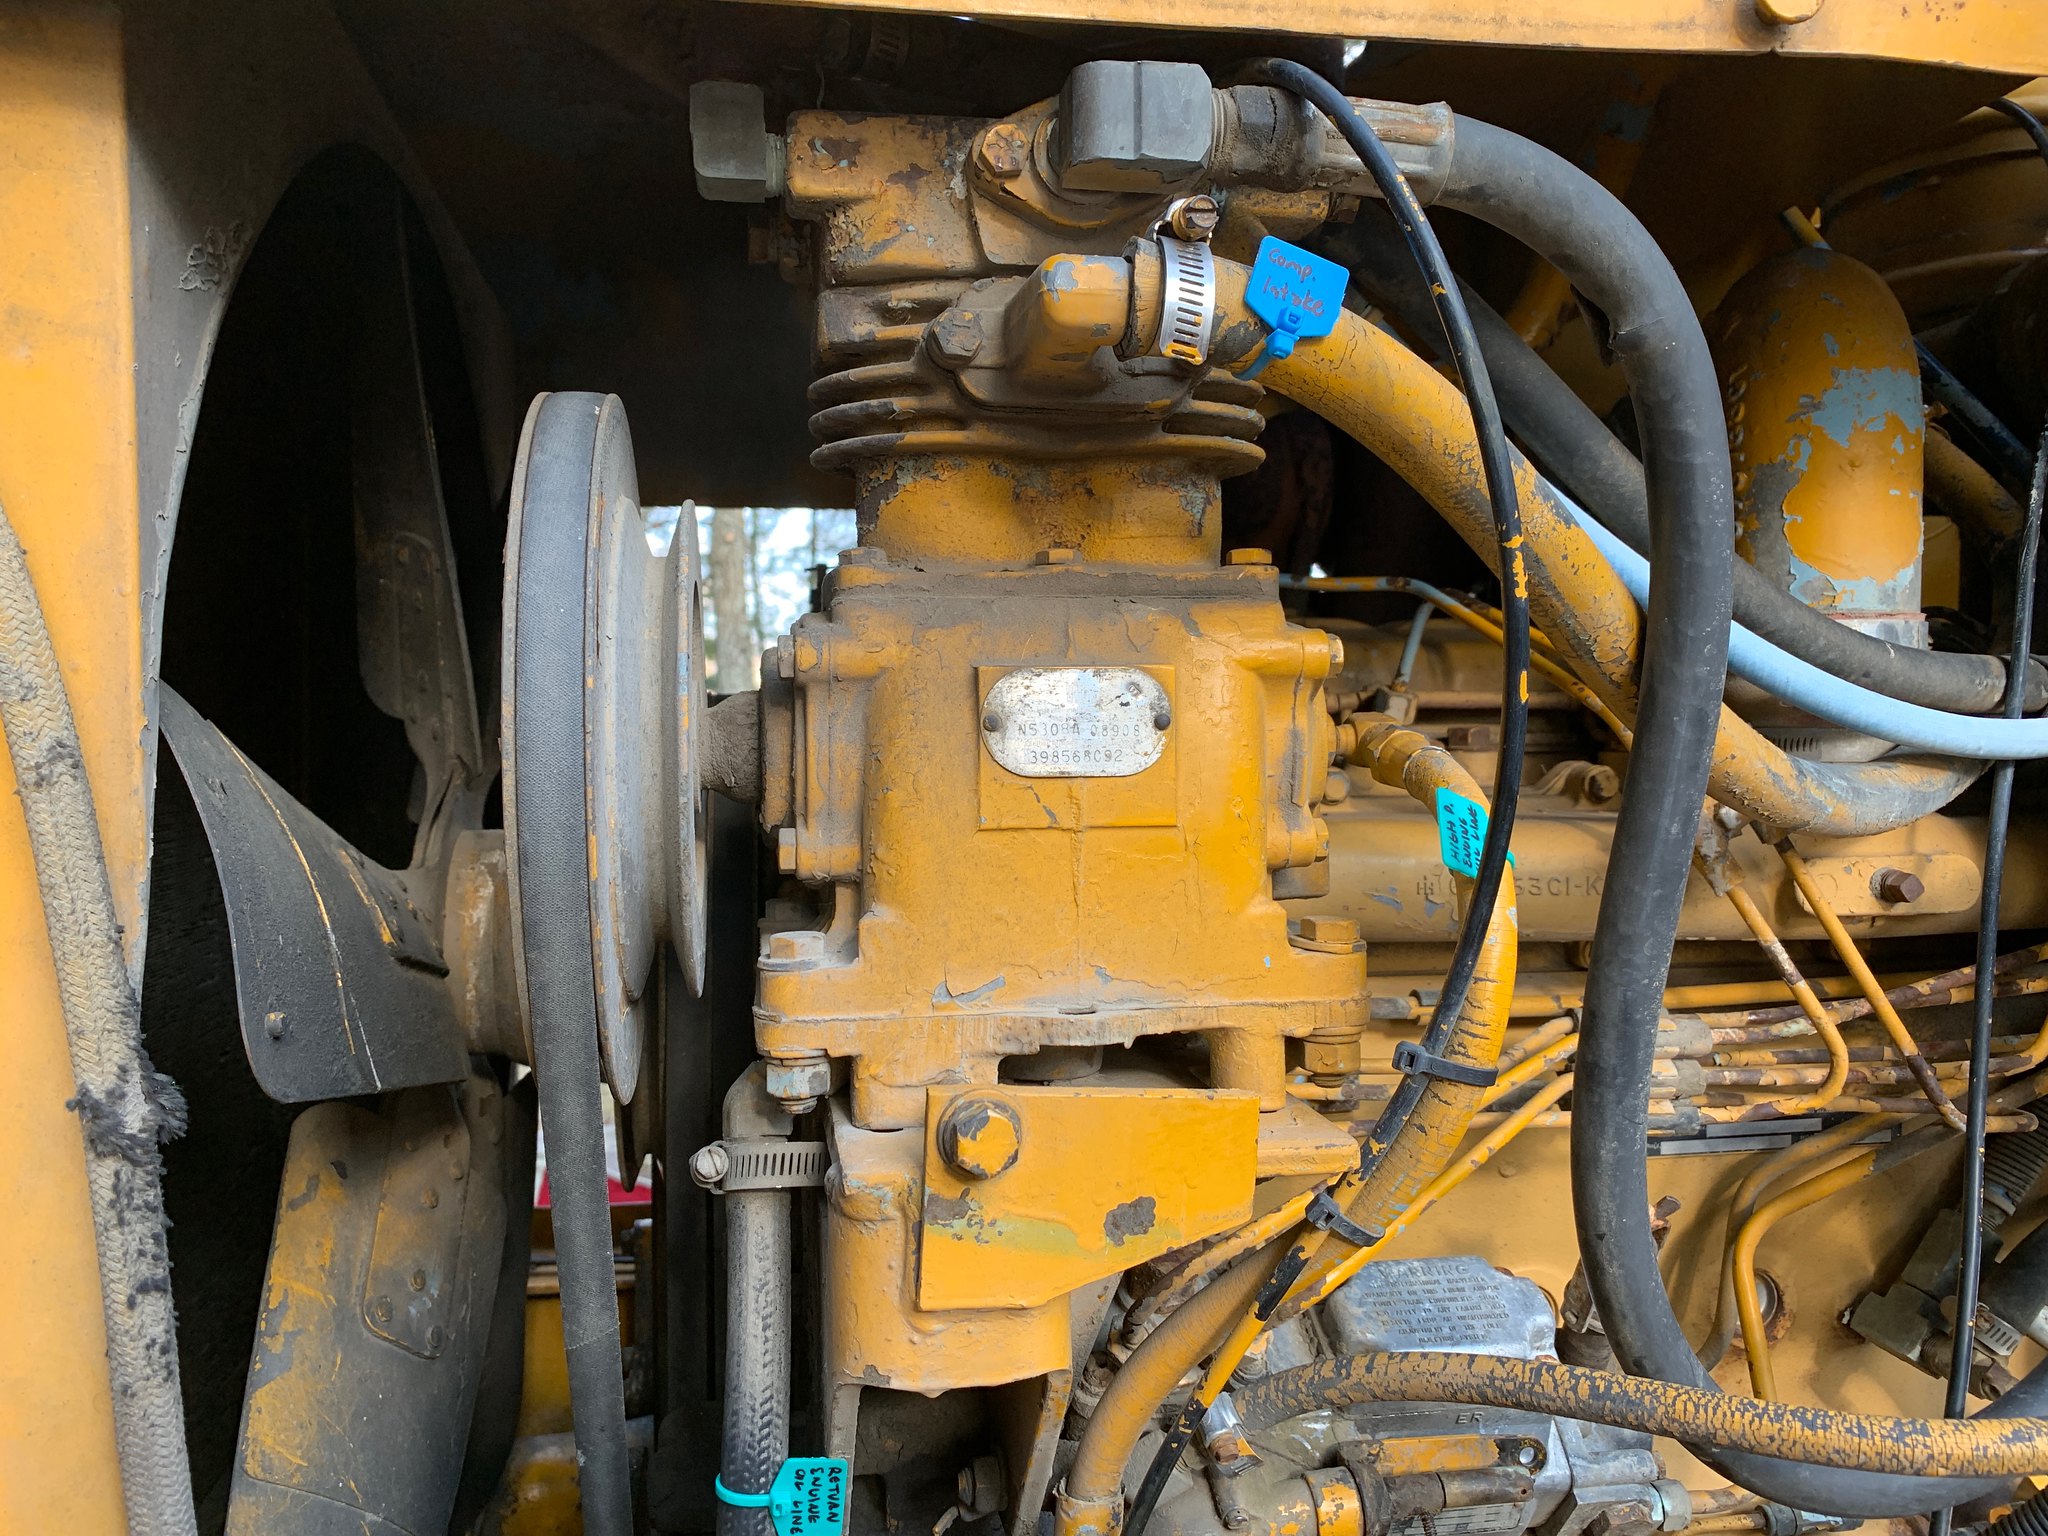
Meanwhile, the compressor also has a bunch of lines coming off of it. My sister interrupted me as I was tagging what was obvious.

49896809361_2ee98366f8_k.jpg


The black line on the compressor above the painted yellow compressor intake line turns into the blue line above the pressure relief valve going into the whatever-it-is. I wasn't able to confirm a line coming out of the water-it-is runs to the wet tank due to the interruption, but I would like to know what is the black, 1/4" air line coming off of the head of the compressor. Here is a photo of where that 1/4" airline goes.

49897118692_ba55d508d7_k.jpg


I'd appreciate any help identifying these lines as there is nothing in the service manuals about the compressor lines and again my goal is to locate a good place to tap shop air in, with that ball valve kshansen suggested in his last post.
 

Minnesota Eric

Well-Known Member
Joined
Jan 19, 2017
Messages
102
Location
Minnesota
After looking around the internet, I've determined that the compressor is a Haldex EL740 water-cooled, pulley-driven, 4-bolt Base Mount apparently rated at 7.4 CFM. I have not found any literature on it, but service parts and rebuilds are possible. Me, I'd just like to know what ports are what ports so I can tap in shop air at the compressor or maybe on that whatever-it-is with the safety valve. Open to information and suggestions, Gentlemen.

Thanks!
 
Last edited:

Jonas302

Senior Member
Joined
Jan 4, 2015
Messages
1,198
Location
mn
Air drier on the side of your loader the small black lines should go to a air governer somewhere the one on the conpressor causes it to unload or quit building air when air is applied from the governor the one on the bottom of the air drier causes it to purge when the governor reaches cutout pressure http://www.gonefcon.com/trucktcom/brakes_pressure_components.htm its the same system as a truck the governor can be remote mounted like yours looks like or right on the conpressor
 

Minnesota Eric

Well-Known Member
Joined
Jan 19, 2017
Messages
102
Location
Minnesota
Air drier on the side of your loader the small black lines should go to a air governer somewhere the one on the conpressor causes it to unload or quit building air when air is applied from the governor the one on the bottom of the air drier causes it to purge when the governor reaches cutout pressure http://www.gonefcon.com/trucktcom/brakes_pressure_components.htm its the same system as a truck the governor can be remote mounted like yours looks like or right on the conpressor

Thank you for the theory link, Jonas302. Very helpful!

To confirm:

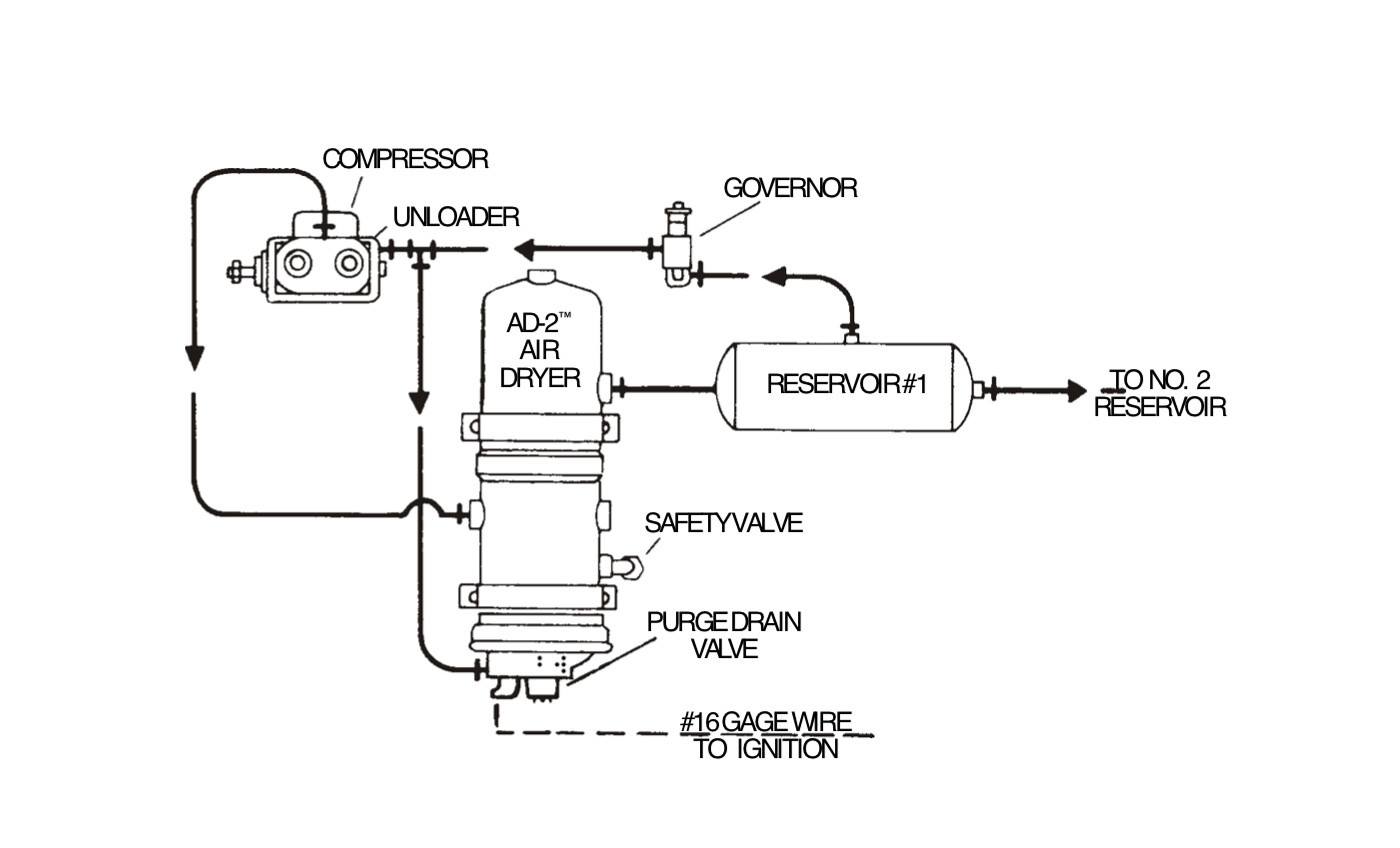
1) The whatever-it-is is a remote-mounted air-dryer.
2) The small line does go to the governor.
3) The discharge and small line both are line pressure?
4) The air dryer's intake is from the compressor's main discharge line.
5) The compressor has an unloader valve which when fed air pressure from the governor, shuts off the intake air.
6) The air dryer has three ports. The air dryer takes in line pressure from the compressors' output/discharge line. The second line is tied into the governor's control pressure to the unloader valve (we'd call that signal pressure in a transmission). The third and final line goes to the wet tank delivering filtered line pressure.

If all that is correct, then a good place to tap in with shop pressure and a ball valve to lock-the-pressure-in/close-the-quick-connect would be the intake line of the air dryer which is the same line as the discharge line from the air compressor, correct?
 

kshansen

Senior Member
Joined
Mar 11, 2012
Messages
11,165
Location
Central New York, USA
Occupation
Retired Mechanic in Stone Quarry
I'm going to say that that compressor is a Bendix Tu-Flow 400 unless some one replaced it over the years.

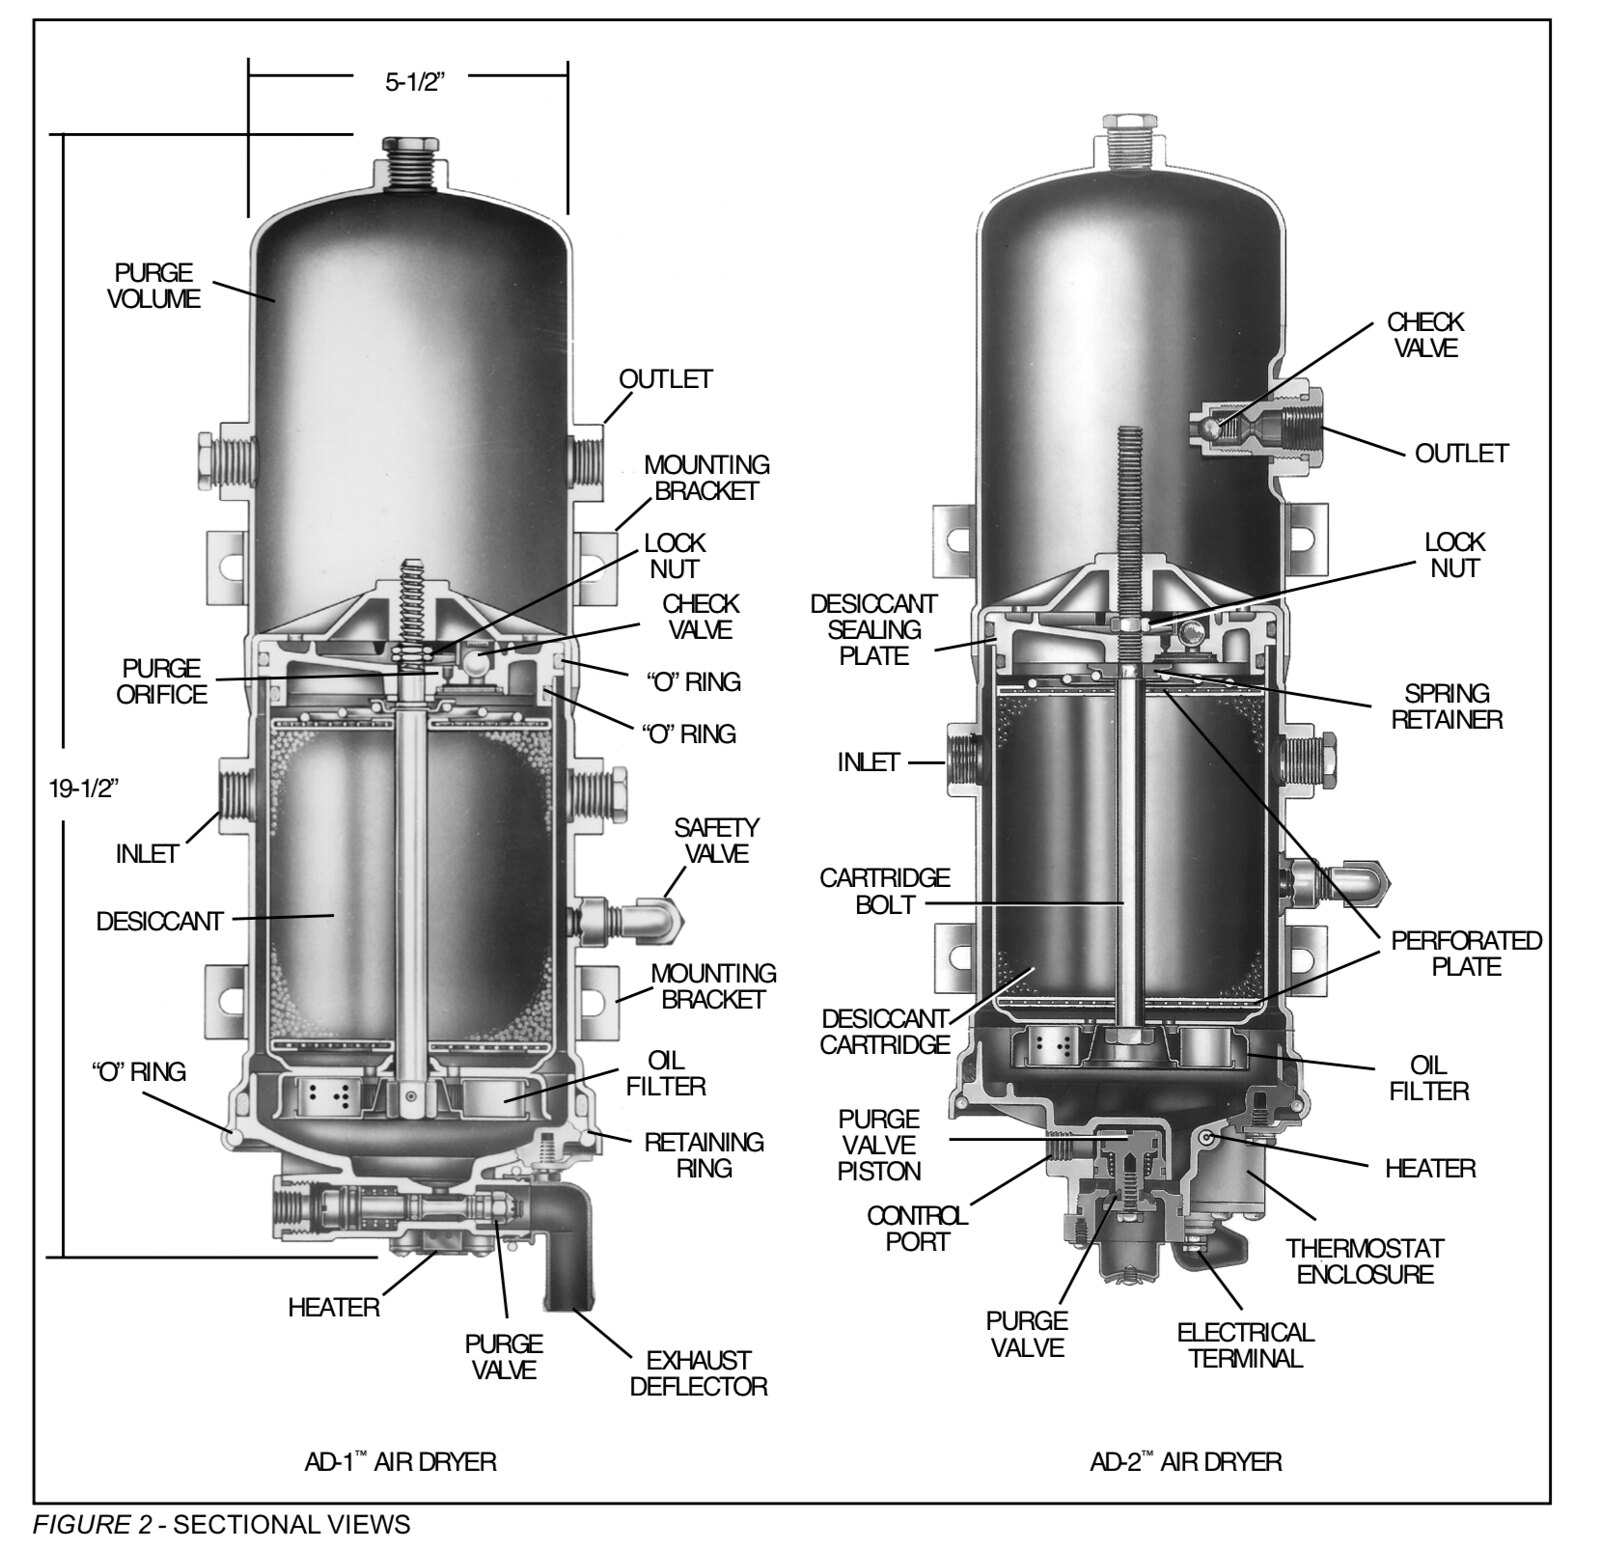
The air dryer would be a Bendix AD-2
#5 The compressor unloader does not shut off the air it actually holds the intake valves open so the compressor stops building air.
#6 To save anyone typing out an explanation just open the file I posted below on the AD-1 and AD-2 air dryers

A good source of information on air systems I would suggest this:

https://www.bendixvrc.com/itemDisplay.asp?documentID=6390

Sure it has more than you need but I would get it anyhow as it's free!
 

Attachments

  • AD-1 and AD-2.pdf
    5 MB · Views: 2

Minnesota Eric

Well-Known Member
Joined
Jan 19, 2017
Messages
102
Location
Minnesota
I'm going to say that that compressor is a Bendix Tu-Flow 400 unless some one replaced it over the years.

The air dryer would be a Bendix AD-2
#5 The compressor unloader does not shut off the air it actually holds the intake valves open so the compressor stops building air.
#6 To save anyone typing out an explanation just open the file I posted below on the AD-1 and AD-2 air dryers

A good source of information on air systems I would suggest this:

https://www.bendixvrc.com/itemDisplay.asp?documentID=6390

Sure it has more than you need but I would get it anyhow as it's free!

At first, I also thought the compressor was a Bendix 400, but under closer inspection, it is a Haldex EL740. My photos of what I have above are not the best, but the cylinder jug is separate, with 6 bolts holding it to the crankcase, and on the top of the cylinder head there is a protrusion on the backside where the unloader airline comes in from the governor. The photo below is flipped backward for whatever reason. At any rate, I have no service documentation that tells me what air compressor would have been offered as OEM equipment so I'll run with the idea that if you're right and OEM was a Bendix, that this compressor was swapped in with the rebuilt DT466B engine.

49902573266_056a132335_k.jpg


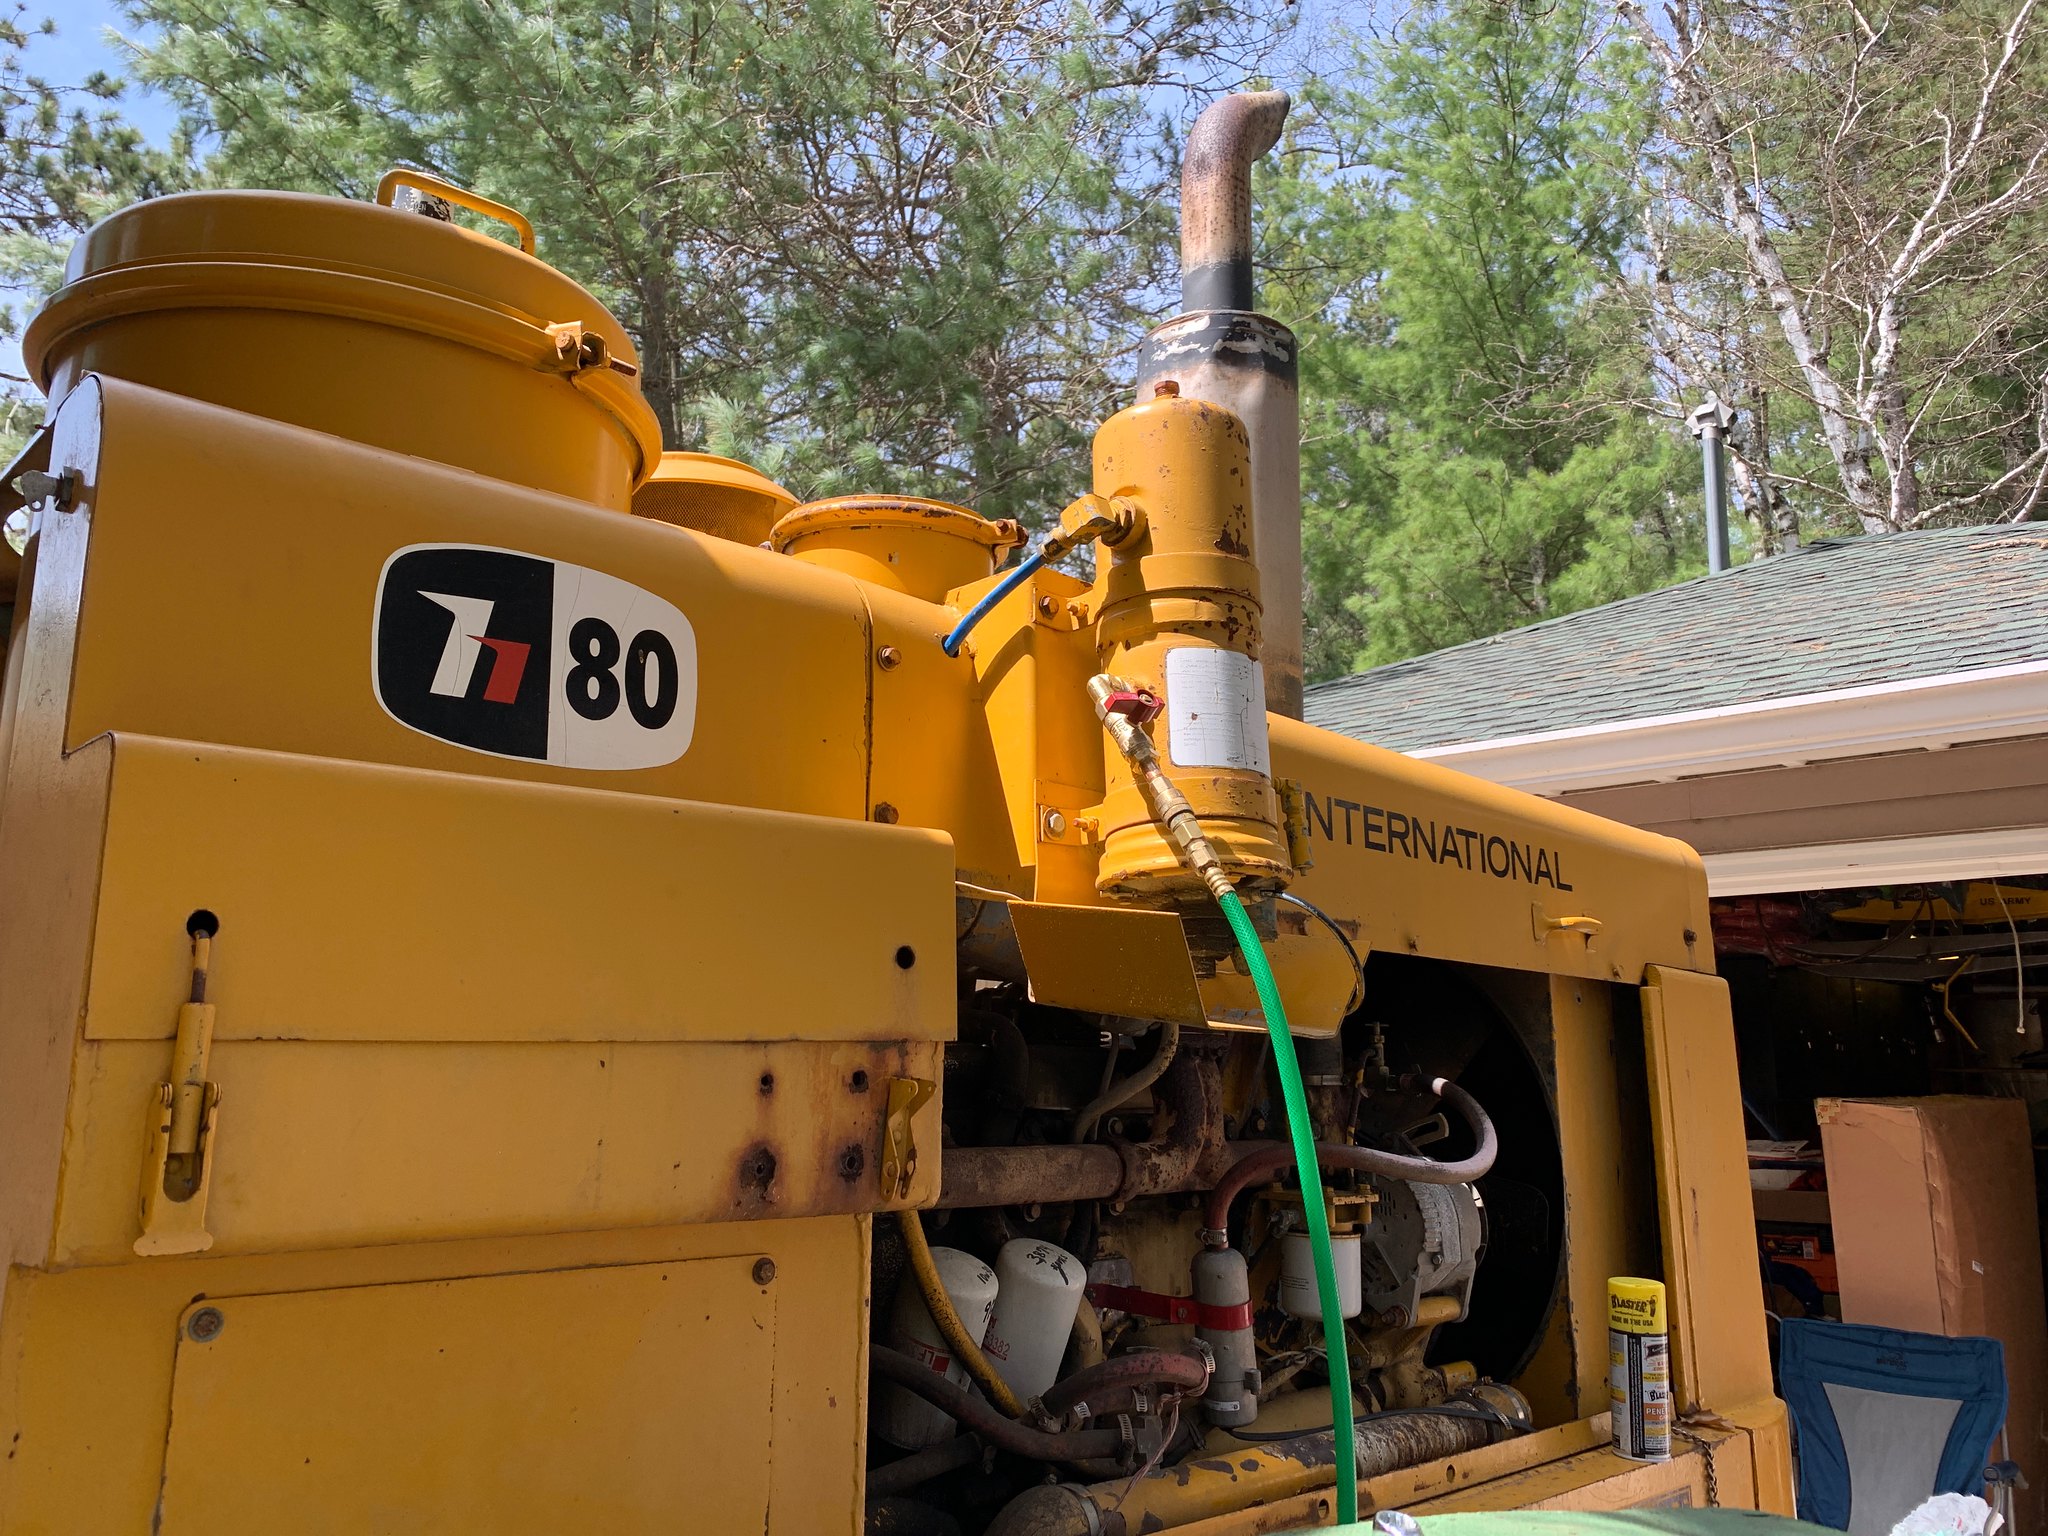
Good call the this Bendix AD-2! It looks like I can add a shop air tap on the forward side of the air dryer (both sides are stamped "compressor") so this afternoon I'm going to pull the plug and chase around locally hoping I can get the bits I to make a shop air tap possible (as well as the ability to add air the tires as needed in the field).

49902873812_b7eb59ba97_k.jpg
 
Top