Tall.Timber
Member
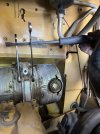
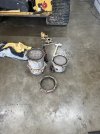
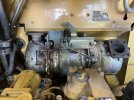
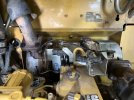
Hi all, I recently had to remove the DPF from my 277d and was reading horror stories about the process. Some said to remove the motor. Others suggested tilting the cab and going in from the plate with hydraulics. I figured there had to be a way around this. The following is how I was able to remove and re install the DPF in around 6 hours. This should be a similar process for all 3.3 motors in skid steers. A few sources i saw actually showed the 259d diving more room than the 277d. But either should be possible.
Tools used(may be missing some):
-12mm box wrenches
-14mm box wrenches
-16mm box wrench
-small pry bar
-non-marring mallet
-10mm socket
-16mm socket
-needle nose
-LOTS of profanity
I started by freeing up some room and removing the air cleaner and intake hoses.
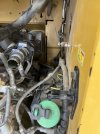
Next I got to work on the worst bolt. The 14mm mounting bolt that faces the fire wall. I have long arms which helped this alot. But my large hands made things a bit difficult. But there is room to reach all the way behind the DPF to feel a wrench onto this bolt. I positioned my wrench so that i could use a small prybar to leverage against the DPF to loosen this bolt. Once it was loose it was a game of 1/8 turns until the bolt was out. Once that bolt was out I knew i had this in the bag.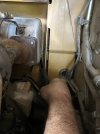
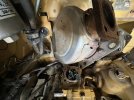
With this bolt removed a went in for the other 3 bolts. The rear ward facing is very easy to access and the bolts on the "driver side" can be felt quite easy and came right off with a 14mm socket and ratchet. These are easy to feel for as they are the only bolts you will feel. If you feel the nut side of a hardware then that is a DPF filter bolt and does not need to come off. We only want to remove the bolts holding the DPF canister to the mounts. I also unplugged the temperature sensors and differential pressure sensor and unbolted their mounts. I then took off the turbo to DPF manifold bolts/nuts. The DPF side has studs so it will not be able to remove until you move the DPF.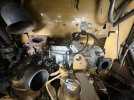 It was then that i realized the 277d does not have as much wiggle room as the 259d that i had seen. I proceeded to remove the intake horn, throttle body and wiring mounts. This was fairly quick as it was just (3) 14mm bolts holding that intake assembly together. This gave alot of room and if i was doing this again i would do that before removing the "driver side" DPF bolts. With the DPF now able to move around quite a bit i went ahead and removed the (3) temperature probes and (2) differential pressure sensor tubes and mounting plate.
Tools used(may be missing some):
-12mm box wrenches
-14mm box wrenches
-16mm box wrench
-small pry bar
-non-marring mallet
-10mm socket
-16mm socket
-needle nose
-LOTS of profanity
I started by freeing up some room and removing the air cleaner and intake hoses.

Next I got to work on the worst bolt. The 14mm mounting bolt that faces the fire wall. I have long arms which helped this alot. But my large hands made things a bit difficult. But there is room to reach all the way behind the DPF to feel a wrench onto this bolt. I positioned my wrench so that i could use a small prybar to leverage against the DPF to loosen this bolt. Once it was loose it was a game of 1/8 turns until the bolt was out. Once that bolt was out I knew i had this in the bag.

With this bolt removed a went in for the other 3 bolts. The rear ward facing is very easy to access and the bolts on the "driver side" can be felt quite easy and came right off with a 14mm socket and ratchet. These are easy to feel for as they are the only bolts you will feel. If you feel the nut side of a hardware then that is a DPF filter bolt and does not need to come off. We only want to remove the bolts holding the DPF canister to the mounts. I also unplugged the temperature sensors and differential pressure sensor and unbolted their mounts. I then took off the turbo to DPF manifold bolts/nuts. The DPF side has studs so it will not be able to remove until you move the DPF.
 It was then that i realized the 277d does not have as much wiggle room as the 259d that i had seen. I proceeded to remove the intake horn, throttle body and wiring mounts. This was fairly quick as it was just (3) 14mm bolts holding that intake assembly together. This gave alot of room and if i was doing this again i would do that before removing the "driver side" DPF bolts. With the DPF now able to move around quite a bit i went ahead and removed the (3) temperature probes and (2) differential pressure sensor tubes and mounting plate.

