• Thank you for visiting HeavyEquipmentForums.com! Our objective is to provide industry professionals a place to gather to exchange questions, answers and ideas. We welcome you to register using the "Register" icon at the top of the page. We'd appreciate any help you can offer in spreading the word of our new site. The more members that join, the bigger resource for all to enjoy. Thank you!

Aux. hydraulics

Joined
Feb 24, 2021
Messages
14
Location
toronto
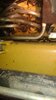
Hello and good day , I have an issue as where my thumbwheel just does nothing all of a sudden . The machine is a cat 216b all other systems work just fine , It has not been used in a few months but used to work fine with the auger attachment . Is there a common issue where i can look first , A wiring diagram would help plenty . Thanks from georgetown ontario canada.
 
Joined
Feb 24, 2021
Messages
14
Location
toronto
Is there a troubleshooting guide for this machine available to do a step by step test on the aux hydraulics . I want to fix it not bypass it if i can .
 

Nige

Senior Member
Joined
Jun 22, 2011
Messages
29,314
Location
G..G..G..Granville.........!! Fetch your cloth.
As far as I can tell the Handle As on the RH joystick of your machine should be a Part Number 215-8307. Below is the illustration of it taken from the electrical schematic.

With everything connected and power on you need to back-probe the wires at CONN 33. You should have 8V between P994 & P997 if the power is working correctly. If not you have to go back to the ECM (Grid D-1 of the schematic) and check for power there.
I hope one of our skid-steer experts will chime in with how to test the signal from the thumbwheel on wire P996. I think it may be a PWM signal but I'm not certain of that. (If it is then you will need a DMM that reads % duty cycle.)

upload_2021-2-25_23-23-19.png
 
Joined
Feb 24, 2021
Messages
14
Location
toronto
I have checked wire p994 and have no power to thumbwheel , can I run a wire to solenoids with grn and yellow to a momentary on off on switch and call it a day . and eliminate factory activation .
 

Nige

Senior Member
Joined
Jun 22, 2011
Messages
29,314
Location
G..G..G..Granville.........!! Fetch your cloth.
Yes you do need to use P997 because it is the sensor return wire to the ECM. See the snip from the schematic that I posted above.

If you have back-probe attachments for your DMM you can try measuring the voltage between P994 & P997 at CONN 33 both with the harness connected and also disconnected to see if it makes any difference.
 
Joined
Feb 24, 2021
Messages
14
Location
toronto
Yes got to play again today , tested 994 blue + and 996brown - and got zip , I have the machine apart but need to take outside as i dont have the height inside to raise cab . I did get it outside fri. but only got it washed in there . Can i do a stand alone switch to activate these , seems easy enough and bypass ecm .
 

Attachments

  • cat solenoids.jpg
    cat solenoids.jpg
    99.5 KB · Views: 9
Joined
Feb 24, 2021
Messages
14
Location
toronto
In that pic of the wires I see an orange that connects in the drawing is that pressure relief , so green and yellow would be my new favorite friends right .
 

Nige

Senior Member
Joined
Jun 22, 2011
Messages
29,314
Location
G..G..G..Granville.........!! Fetch your cloth.
It didn’t make any difference with the machine harness connected or separated at the joystick connector then.?

TBH the next move really ought to be to check continuity in those two wires between the machine harness CONN 33 and the ECM. It may be nothing more than a broken wire which will be a far easier fix than trying to McGyver a complete new control circuit. I realize that to test that you will have to raise the cab, but you’d have to do that anyway if you went the McGyver route so it’s as broad as it is long IMO.
 

Nige

Senior Member
Joined
Jun 22, 2011
Messages
29,314
Location
G..G..G..Granville.........!! Fetch your cloth.
Looking at the schematic there is another connector (CONN 27) between CONN 33 and the ECM.
I suggest to disconnect the machine harness both at the Auxiliary ECM, at CONN 27, and at CONN 33, then test as follows: -

1. With Key on, test for 8.0v DC between Pin 60 "Proportional 8v Supply" & Pin 52 "Proportional A Snsr Return" of the ECM. If you find 8v there then proceed to step 2.
2. Check the continuity in wires P994 & P997 between the ECM and CONN 27, and also between CONN 27 & CONN 33.
3. Clean all connectors with aerosol contact cleaner before reassembling.
 
Joined
Feb 24, 2021
Messages
14
Location
toronto
I will check tomorrow , I cannot find an ECM anywhere on this machine I believe its a 2009 all engine controls are mechanical just electric shut down of course . I will do a good thorough trace of 994 and 997 when i move to an area with higher ceiling .
 

Nige

Senior Member
Joined
Jun 22, 2011
Messages
29,314
Location
G..G..G..Granville.........!! Fetch your cloth.
I will check tomorrow , I cannot find an ECM anywhere on this machine.
There are actually two of them - located under the floor. See below.
The operator seat will have to come out first, followed by the floor panel itself. You will probably be horrified how much mud and general debris you find in there. TBH that's most probably where your problem is.

upload_2021-3-1_21-44-39.png
 
Top