Juskatla
Senior Member
onemank6 - No name yet but as it gets closer to start up and final assembly, I'll have to pick something. Last year when all went to a full stop, I had more than a few choice names but that's in the past now. I'm just happy to be moving on this again, even if a bit slower than I wanted. Some months left on the treatments but Wednesday's consultation was very positive.
khansen - As much as I like the adventure its a bit trying at times to get stuff done over here but when its done, it will be great. The actual batch plant is only a few miles from here as the crow flies but a couple of hours minimum via the trains, planes and automobiles route. Tuesday will be an expensive day but at least its done.
Grady - The hood and hose come from Axis and I have a turbine made by Hobbyair that is their upscaled #2 model with larger air volume. I found I don't need it and if time wasn't an issue, I would have built my own. See YouTube for one disassembled. Its essentially a vacuum motor with a speed control to adjust air flow. I would use a built in vacuum system motor, a HEPA intake filter and a home built speed control. Hoses use garden hose fittings but I think they a food grade, so no funny Chinese rubber or plastic smells. They are cheap enough to buy. I have quick connects and just set up the supply turbine speed before closing up and heading outdoors to paint. Because we are using the upstairs rooms in the shop as temporary living space while the build is going on, I won't paint inside.
Here is good resource for this system and other stuff - http://autobodystore.net/Merchant2/merchant.mvc?Screen=CTGY&Store_Code=ABS&Category_Code=HP
I got my stuff from Aircraft Spruce that has a Canadian outlet in Ontario - http://www.aircraftspruce.ca/categories/building_materials/bm/menus/to/paint.html
The foundation is a combination of 8" Logix ICF and conventional formed walls. The bracing you see on the outside of the ICF forms is 2x4 used to support the walkway needed for the concrete placing and ensuring the walls are vertical. It will remain until the builder gets the floor system in place and then they will take it down. We'll peel and stick the outside of the ICFs and then put dimple mat up before backfilling. Perimeter drains and drain rock come later. For the reinforcing, we put 5/8 bar into the footings, and added 4' rebar vertically in to the footing on 16" centres. As the ICF forms were set up, each row has another horizontal 5/8 bar and full height vertical pieces were placed on 16" centres. All together, we put 2200' of rebar into the footings and foundation walls. This was all engineered as part of the design. If I was to consider having this done again, I would do all the foundation and lower floor walls in ICF but we saved some concrete in the footings by using conventional forms for the deeper part. The upper section with the ICFs sits on solid rock which we blasted and hauled away. I have contracted a builder for most of this and will not be doing much myself as originally planned. I'll focus on the tractor.
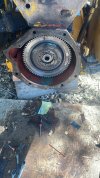
Thanks for the interest. I'm hoping to get some small parts ready for another batch of painting so we can start the long anticipated assembly. The cab panels are still at my home after sandblasting and epoxy primer and will get transported back here when I bring another load in my pickup.
Once day at a time....
khansen - As much as I like the adventure its a bit trying at times to get stuff done over here but when its done, it will be great. The actual batch plant is only a few miles from here as the crow flies but a couple of hours minimum via the trains, planes and automobiles route. Tuesday will be an expensive day but at least its done.
Grady - The hood and hose come from Axis and I have a turbine made by Hobbyair that is their upscaled #2 model with larger air volume. I found I don't need it and if time wasn't an issue, I would have built my own. See YouTube for one disassembled. Its essentially a vacuum motor with a speed control to adjust air flow. I would use a built in vacuum system motor, a HEPA intake filter and a home built speed control. Hoses use garden hose fittings but I think they a food grade, so no funny Chinese rubber or plastic smells. They are cheap enough to buy. I have quick connects and just set up the supply turbine speed before closing up and heading outdoors to paint. Because we are using the upstairs rooms in the shop as temporary living space while the build is going on, I won't paint inside.
Here is good resource for this system and other stuff - http://autobodystore.net/Merchant2/merchant.mvc?Screen=CTGY&Store_Code=ABS&Category_Code=HP
I got my stuff from Aircraft Spruce that has a Canadian outlet in Ontario - http://www.aircraftspruce.ca/categories/building_materials/bm/menus/to/paint.html
The foundation is a combination of 8" Logix ICF and conventional formed walls. The bracing you see on the outside of the ICF forms is 2x4 used to support the walkway needed for the concrete placing and ensuring the walls are vertical. It will remain until the builder gets the floor system in place and then they will take it down. We'll peel and stick the outside of the ICFs and then put dimple mat up before backfilling. Perimeter drains and drain rock come later. For the reinforcing, we put 5/8 bar into the footings, and added 4' rebar vertically in to the footing on 16" centres. As the ICF forms were set up, each row has another horizontal 5/8 bar and full height vertical pieces were placed on 16" centres. All together, we put 2200' of rebar into the footings and foundation walls. This was all engineered as part of the design. If I was to consider having this done again, I would do all the foundation and lower floor walls in ICF but we saved some concrete in the footings by using conventional forms for the deeper part. The upper section with the ICFs sits on solid rock which we blasted and hauled away. I have contracted a builder for most of this and will not be doing much myself as originally planned. I'll focus on the tractor.
Thanks for the interest. I'm hoping to get some small parts ready for another batch of painting so we can start the long anticipated assembly. The cab panels are still at my home after sandblasting and epoxy primer and will get transported back here when I bring another load in my pickup.
Once day at a time....
Last edited: