• Thank you for visiting HeavyEquipmentForums.com! Our objective is to provide industry professionals a place to gather to exchange questions, answers and ideas. We welcome you to register using the "Register" icon at the top of the page. We'd appreciate any help you can offer in spreading the word of our new site. The more members that join, the bigger resource for all to enjoy. Thank you!

Allis Chalmers m-100

ippielb

Senior Member
Joined
Mar 30, 2014
Messages
695
Location
Saskatchewan
if you find any more for that price let me know o_O
I have $750 into buying the grader itself. $630 into a tire/tube/liner.
$50 into three sets of fuel filters.
$20 in grease lol
$0 used blades and used bolts.
Total $1,450
Have to buy a bunch of skate u joints for all these shafts lol had to rob one off of the wheel lean so I could put it on my circle turn shaft. I don’t need wheel lean I do need circle turn though.
 

DIYDAVE

Senior Member
Joined
Feb 18, 2007
Messages
2,416
Location
MD
Wheel lean is only necessary, when you're in heavy traffic, and some sumbiotch tries to pass you. Lean left, and his doorhandles and any plastic trim disappears...;)
 

ippielb

Senior Member
Joined
Mar 30, 2014
Messages
695
Location
Saskatchewan
Wheel lean is only necessary, when you're in heavy traffic, and some sumbiotch tries to pass you. Lean left, and his doorhandles and any plastic trim disappears...;)
Lol If only one could do that.

I do have a question for you guys, my circle rotate lever, there’s no return springs, so it bounces back and chatters against the gears.tips to fix it? Been snowing past three days now, and very windy. I don’t want to go mess around and make huge ruts in the yard. Just want an idea before I open it up.
 

ippielb

Senior Member
Joined
Mar 30, 2014
Messages
695
Location
Saskatchewan
Put some burnt oil or diesel fuel on that circle. It’ll help. She sounds good.
Didn’t want to attract dirt to it, I took a wire wheel and buffed all the surface rust off of it that I could get to. Should probably do the underside now too.

My machine HAD the hydraulic slide on the moldboard, but the cylinder is gone, hydraulic hoses gone, lever is gone. But I see someone welded on bolts to the end of the moldboard slide to limit it. Tried to take a tractor and push on the blade to get it to move but she’s rusted solid.
 

ippielb

Senior Member
Joined
Mar 30, 2014
Messages
695
Location
Saskatchewan
Long time no post, been away recovering from back surgery. Decided to touch the old grader today now that spring is upon us.

I never had any batteries for my grader and I was too cheap to buy any so I would always get someone to pull start me. That was getting old, last fall we changed the batteries on my dads semi, and left them on a pallet. I decided to test them out with my load tester and two had over 12 volts still, and two were around 10-11. So I decided to try and save these batteries.

The batteries that were low on voltage were also low on water. So I filled it up with more water and gave it a hot charge 60amps for an hour on each battery, then left them to rest overnight. This morning I went out and checked the voltage, the lowest battery was at 12.2 volts, the best was at 12.7 volts.

Decided to give it a gamble and see if these batteries will be good enough for my grader. Made steel bars to connect the battery terminals because they had threaded 3/8 studs. Connected all 4 in series, and man oh man did it turn over fast. I didn’t know that starter had it in it anymore. So stupid me forgot to turn the fuel on, so there I was trying to start it without the fuel on. Wasting the battery power like an idiot.

once I realized why it wasn’t firing I gave it a shot of ether, and then it fired right up and ran surprisingly well for literally having zero maintenance done on it for the last 25 years sitting in the bush except for a few sets of fuel filters and fresh fuel.

But now I have a few questions.

1. is this grader 24v positive ground, or a normal negative ground? (I didn’t even think about it when I was doing it so I have it set up as negative ground, and it fires up, but the volt meter stays at 0. Also the one work light is lit up with the switch)

2. After starting the machine and playing on the driveway to maintain it like it so badly needed. I turned it off infront of the shop and wanted to see how well the batteries would start it again. And it would turn over, but it wouldn’t fire again. I put a little ether in it and it fires right up. Im unsure why it won’t dump fuel into it.

3. the throttle lever when pushed all the way forward, is at a higher rpm then if it is pulled back about 1”.

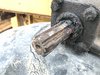
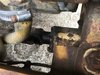
4. Where and how does one test the generator? There is two wires coming off of the generator, one a larger gauge then the other, and they both feed into a black box that is on the firewall mounted to rubber mounts, and then go under the cab on the electronic side.

5. The power steering is very strong arm turning left from straight, meanwhile turning right it is powered.

6. Is the diff always locked? Or is there a way to unlock it? It makes it difficult to turn around with all 4 tires spinning together.

7. what’s the pedal directly in the middle of the floor used for? Mine isn’t connected to anything. Flops forward to backward with no resistance.
 

ippielb

Senior Member
Joined
Mar 30, 2014
Messages
695
Location
Saskatchewan
8. I have no brakes on my machine, i haven’t checked the reservoir on the foot pedal, but the bellow for the shaft is ripped and oily, so I have a leak there, but unsure if it’s the hydraulic or the brake fluid itself. Can I use my pneumatic brake bleeder?
 

Queenslander

Senior Member
Joined
Apr 5, 2009
Messages
1,242
Location
Australia
Welcome back ippielb.
I might be able to answer a few of your questions.
It definitely should be negative ground.
Are you sure it is spinning fast enough?
How well was it starting when you were pull starting it?
The pedal in the centre of the floor is a foot throttle so we rarely used the hand throttle.
The diff can’t be unlocked, unfortunately.
When we needed to bleed the brakes I would hold an air duster gun to the tiny breather hole on the cap of the brake fluid reservoir, pressurising the system a little.
 

ippielb

Senior Member
Joined
Mar 30, 2014
Messages
695
Location
Saskatchewan
Okay, negative ground is left as it is.

first time I started the engine it was definitely fast enough, now the batteries a little drained, I’m not 100% positive it is fast enough.

While pull starting it would take a little bit to get the engine to turn and eventually fire up. Hard to tell when exactly it started because there’s not much difference in sound engine turning vs firing it’s so loud everything shakes and rattles if I’m being honest.

I guess the throttle pedal is not hooked up, there’s quite a few hydraulic leaks under the floor of the cab I’ll take the floor panel off and take a look and see what I can find that’s messed up.

I popped the top of the brake reservoir, and just like I thought bone dry. And I little too bone dry. The brake fluid must’ve attracted moisture and there is a decent amount of rust on the inside so I popped the master off. I’ll put some nuts inside it and shake it upside down to break free as much as I can of that rusty film. And then take it apart and throw the master into my ultrasonic cleaner to see if I can save it. Water and some redneck ingenuity is free, vs a new master.
 

ippielb

Senior Member
Joined
Mar 30, 2014
Messages
695
Location
Saskatchewan
Did a little more work, got the floor panel off to try and diagnose the shaft vibration. The shaft that runs from the belt driven gear box off the engine. To the controls and the hydraulics under your left foot.

There is a steady bearing between the two shafts with splined ends. Well those splined ends are worn a decent bit, and the yoke splined holes are absolutely egged right out. surprisingly the U joints are good.

The yoke on the belt driven gear box seems to be held on with a roll pin. But for the life of me I cannot get that roll pin out. I was mushrooming the pin inside it.
 

Queenslander

Senior Member
Joined
Apr 5, 2009
Messages
1,242
Location
Australia
Yeah, been there done that.
I could here it rattling away in your video.
I remember being terrified that something would let go and come up through the floor.
I forget what we we replaced and although it didn’t ever let us down, it never looked or sounded pretty.
Foot throttle is worth fixing.
Can set speed with hand throttle and rock the pedal forward to decelerate, or just use it as an accelerator.
If a brake wheel cylinder is leaking you will have to make up a puller to pop the hub off the axle.
No big deal and parts are readily available but a temporary fix would be to plug off the line to the offending wheel...brakes on two or three wheels will pull it up just fine.
 

56wrench

Senior Member
Joined
Dec 4, 2016
Messages
2,106
Location
alberta
did you say you connected all 4 batteries in series? that would give you 48volts. at that voltage you likely burned out the voltage regulator if it was a 24v
 

56wrench

Senior Member
Joined
Dec 4, 2016
Messages
2,106
Location
alberta
also, the generator will likely need to be polarized any time the batteries are disconnected if it will not charge
 

ippielb

Senior Member
Joined
Mar 30, 2014
Messages
695
Location
Saskatchewan
Yeah, been there done that.
I could here it rattling away in your video.
I remember being terrified that something would let go and come up through the floor.
I forget what we we replaced and although it didn’t ever let us down, it never looked or sounded pretty.
Foot throttle is worth fixing.
Can set speed with hand throttle and rock the pedal forward to decelerate, or just use it as an accelerator.
If a brake wheel cylinder is leaking you will have to make up a puller to pop the hub off the axle.
No big deal and parts are readily available but a temporary fix would be to plug off the line to the offending wheel...brakes on two or three wheels will pull it up just fine.

The sound you hear in the video is one of the levers bouncing back and forth, there is no spring load on that one so it bounces, i usually just set it, tighten up the nut. I've only used this grader for maybe a couple hours, just to try and figure out whats wrong with it.

The foot throttle was actually just disconnected under the floor boards. The shaft is there and the bolt and nut are still in there.

I will have to clean out the master completely before i try fill it with fluid and get an idea where it leaks the brake fluid out. If it needs a cylinder i will just plug it off, this wont be getting any use off the farm.

did you say you connected all 4 batteries in series? that would give you 48volts. at that voltage you likely burned out the voltage regulator if it was a 24v

I did not hook up all 4 of the batteries in a single series. I hooked up the batteries in series to make 24v with two banks.

also, the generator will likely need to be polarized any time the batteries are disconnected if it will not charge

I am not familiar with polarizing a generator, i'll have to google that.

I fixed a badly worn splined shaft problem on a 5' tiller about 8 years ago using a product called Devcon Titanium Putty. Here's a thread about it. Several other products were mentioned through out the discussion.
https://www.heavyequipmentforums.com/threads/devcon-titanium-putty.28767/

There wont be any fixing of these yokes, they are EXTREMELY egged out, with a new yoke i should be able to save the steady bearing and the yoke together.

I did find one spot that i didnt like, the coupler between the engine and the transmission. The transmission side is splined, and it is wobbly as well, the engine side is good.

I'm guessing all these issues are caused by u-joints going bad and dragging, causing a little bit of movement and over time it increases the wear, and increases the movement. I'll get some pictures.
 

ippielb

Senior Member
Joined
Mar 30, 2014
Messages
695
Location
Saskatchewan
Well, did some more work. Changed the fuel filters. The tank is really bad. You can see the sediment level on the old fuel filters. I am thinking about making a deep sediment bowl to catch all that, and then have a ball valve at the bottom to keep trying to drain it out before the filters itself.

second picture is the splines on the steady bearing. You can see how they’ve worn.
Third picture is of the yoke on the front shaft and how it’s worn an oblong hole letting it absolutely shake everything to death.

last picture is an access hole in the side that the steady bearing was bolted behind. Got quite a puddle in the frame rail. Was debating on drilling a hole at the back and front to let water drain out.
 

Attachments

  • 9E830E95-AC06-45B6-B2BA-5A9A2363433C.jpeg
    9E830E95-AC06-45B6-B2BA-5A9A2363433C.jpeg
    2.4 MB · Views: 22
  • 77ABC927-BACC-4D0B-B94A-7E4E1BA58ECE.jpeg
    77ABC927-BACC-4D0B-B94A-7E4E1BA58ECE.jpeg
    2.6 MB · Views: 20
  • 9E953727-15A9-4E0E-A266-DCD7A39C27F2.jpeg
    9E953727-15A9-4E0E-A266-DCD7A39C27F2.jpeg
    2 MB · Views: 20
  • FF84C3A8-B5A6-48E4-AEFF-468EC0E67769.jpeg
    FF84C3A8-B5A6-48E4-AEFF-468EC0E67769.jpeg
    3.6 MB · Views: 21

ippielb

Senior Member
Joined
Mar 30, 2014
Messages
695
Location
Saskatchewan
First picture is of the generator I have in my machine. It’s nicely marked for my first time understanding the two posts.

second is the floor board off. Everything is caked with heavy oil residue over years and years. On the gearbox itself for the hydraulic pump there’s a fitting that broke off that looked like a. Breather. Gotta try and easy out to get the broken off section removed.

last two pictures are of the rear shaft on the engine mounted belt driven gear box. It will not come off that shaft. I can’t really swing a hammer worth a crap so I’ve gotten help with lifting things and using the swing press.

I also changed the engine oil in it. First oil change in over 22 years. There was some sludge. But not that bad, I let it drain overnight to try get everything out that I could. Then put fresh oil in, but can’t start it to check for leaks.
 

Attachments

  • 127F34B2-3AB8-419E-9D99-BAB0AB949CAF.jpeg
    127F34B2-3AB8-419E-9D99-BAB0AB949CAF.jpeg
    2.7 MB · Views: 19
  • 39C10397-A975-4817-9932-F4A16001930E.jpeg
    39C10397-A975-4817-9932-F4A16001930E.jpeg
    3.4 MB · Views: 19
  • F6011EC7-4FD2-499D-A230-1819207F5BAC.jpeg
    F6011EC7-4FD2-499D-A230-1819207F5BAC.jpeg
    3 MB · Views: 19
  • 81924AFB-1001-41D9-ADAB-330D98DF3676.jpeg
    81924AFB-1001-41D9-ADAB-330D98DF3676.jpeg
    2.6 MB · Views: 19
Top