• Thank you for visiting HeavyEquipmentForums.com! Our objective is to provide industry professionals a place to gather to exchange questions, answers and ideas. We welcome you to register using the "Register" icon at the top of the page. We'd appreciate any help you can offer in spreading the word of our new site. The more members that join, the bigger resource for all to enjoy. Thank you!

Case 680G backhoe project: squad

Tenwheeler

Senior Member
Joined
Dec 15, 2016
Messages
870
Location
Georgia
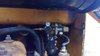
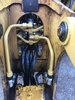
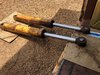
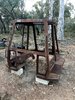
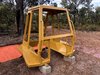
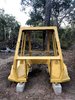
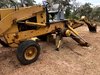
I have a 680C which I bought and used as a dozer for a while. That paid for it twenty times over. Now it just sits around most of the time. About 10 years ago the manual transmission locked up so i pulled it out. It was totally full of water. Can it be the shift boot because the work station is covered? It is the only way as mentioned. Tore it all down and found nothing wrong. Put it back together with new seals. Seamed like the countershaft bearing locked up like a one way roller clutch. I may have replaced those roller bearings but I found nothing wrong other than it was full of water.
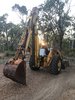
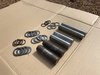
Have a 680E apart right now. No way to drain the converter in the machine but I thank that is unrelated to the question.
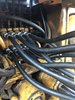
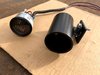
Anymore I just loosen the drain plug and check for water if it has been parked a while.
 

Tinkerer

Senior Member
Joined
May 21, 2009
Messages
9,373
Location
The shore of the illinois river USA
I dunno, strange things happen to machines that make no sense.
A four speed transmission with a good pliable shift lever boot in place should never get water intrusion. Especially with a cab over it. That is just weird.
In regards to draining a 680 convertor. If the oil is really nasty removing the shuttle and convertor will give a person a way to drain it. Remove the convertor and turn it with the input shaft opening over a bucket and drain it. I have done it that way myself.
A side benefit of doing it that way is you have an opportunity to inspect the flex plate on the flywheel.
This photo is what mine looked like when I removed the engine. It was on the brink of failure. It probably would have broken completely with the machine in a very bad place.


flex plate.jpg
 
Last edited:

squad_1881

Well-Known Member
Joined
Aug 21, 2017
Messages
59
Location
Australia
Occupation
Architect
Ha ha by saying that you really pushing my mechanics skills to take the torque converter off Tinkerer : p hence that flex plate photo looks scary and i can only hope mine would be in better shape. The machine has clear signs that gearbox, shuttle and axles have been reconditioned some time ago though not sure about the quality of workmanship or how much things have been in use ever since. Managed to change all the gear fluids and it runs again, decided not to use diesel for flushing will do more frequent fluid changes instead. From the shuttle i was able to drain approx 8 litres out by also disconnecting the cooler lines. According to the specs the system should hold 11.3 litres which is i guess good enough if i will do another oil change shortly, same thing with the gearbox. Here is another shot of the improvements at the airline side, added a mini pressure gauge to monitor the pressure in the hydraulic tank.
 

Attachments

  • IMG_20180915_165228.jpg
    IMG_20180915_165228.jpg
    132.1 KB · Views: 36

Tinkerer

Senior Member
Joined
May 21, 2009
Messages
9,373
Location
The shore of the illinois river USA
Did the torque converter pilot break off like this one did? View attachment 186282
No, the convertor was ok. The small amount of flex plate that was left was still working with no vibration.

Squad, it was a good idea to replace the air pressure gauge. It had one there when the machine was new. The service manual says you must have air pressure in the tank to prevent damage to the hydraulic pump on start-up.
 

Tenwheeler

Senior Member
Joined
Dec 15, 2016
Messages
870
Location
Georgia
The converter is a bit expensive. We fixed the old one.
The C does not have air and I did not notice that gauge set up on the E. Should it be 12 PSI like the picture?
 

Attachments

  • KIMG1139.jpeg
    KIMG1139.jpeg
    232.9 KB · Views: 25

Tinkerer

Senior Member
Joined
May 21, 2009
Messages
9,373
Location
The shore of the illinois river USA
http://clicks.att.com/OCT/eTrac?EMA...urce=CBIL_C011EH&userid=noname4me6418@att.net
The C does not have air and I did not notice that gauge set up on the E. Should it be 12 PSI like the picture?
Yes ; air pressure should be 12 to 15 PSI.
Tenwheeler, If your 680C doesn't have air brakes it is a series B. To clear up any confusion the correct way to describe your machine is ---> 680C series B.
They were made from 1969 to 1970. In 1971 the B series was discontinued and the machine became known as a 680C.
 

AU.CASE

Well-Known Member
Joined
May 7, 2010
Messages
164
Location
NSW Australia
Occupation
Grazier // Rancher remote NSW

Strewth ! With all those shiny new parts it is going to be too good to get dirty from all that dust our Climate (globally warmed that is) delivers these days; Can't follow a Kelpie across a paddock a day after rain now with out dust / sadly.

Best of with the build; Fun and production there for sure.
 

squad_1881

Well-Known Member
Joined
Aug 21, 2017
Messages
59
Location
Australia
Occupation
Architect
it has been a while but there has been some progress, almost finished overhauling the whole rear arm of the backhoe. it was quite a mess when i got the machine at first, most of the hydraulic tubes were gone and replaced with whatever hoses they got. recreating the tubes was not easy or cheap to do as everyone is keen to make hoses hence there are very few places in here where hydraulic tubes can be done using small radiuses as it has. also stabiliser cylinder seals have been replaced and it was a decent challenge to get the lower pins out as there are no grease zerks to keep pins in play. eventually i give up and cut them off from the pads and made a new ones, old pins were so seized that guys from the workshop had to use 200+ tonne press to push the remaining pieces out. other than that it is coming along slowly and surely, there is still some work to do, new tires, new paint to rims are and cab needs to go back on as well after small overhaul and patch up. added some photos of the progress as well.
 
Last edited:

squad_1881

Well-Known Member
Joined
Aug 21, 2017
Messages
59
Location
Australia
Occupation
Architect
- - -
 

Attachments

  • IMG_5091.jpg
    IMG_5091.jpg
    2.3 MB · Views: 37
  • IMG_5098.jpg
    IMG_5098.jpg
    1.3 MB · Views: 34
  • IMG_4719.jpg
    IMG_4719.jpg
    1.4 MB · Views: 32
  • IMG_4720.jpg
    IMG_4720.jpg
    1.4 MB · Views: 33

squad_1881

Well-Known Member
Joined
Aug 21, 2017
Messages
59
Location
Australia
Occupation
Architect
- - -
 

Attachments

  • IMG_2028.jpg
    IMG_2028.jpg
    1.5 MB · Views: 18
  • IMG_2062.jpg
    IMG_2062.jpg
    4.2 MB · Views: 18
  • IMG_2068.jpg
    IMG_2068.jpg
    3.2 MB · Views: 19

squad_1881

Well-Known Member
Joined
Aug 21, 2017
Messages
59
Location
Australia
Occupation
Architect
Time for another update, managed to fix-up the cab over the Christmas, had to cut out and replace the whole bottom part as there was not much metal left, sandblasted it as good as i could and then painted with 2 two pack polyurethane. I had some spare polycarbonate sheeting and covered three openings using windscreen seal with locking strip, i must say it is such a tedious job and easy to get sore fingers for a next day or so lol. Also i figured that transmission temperature gauge has been somehow missed out when the dashboard overhaul was done, took some time and fabricated it to the set, looks little too modern as separate unit but at least it is there now. Another milestone was the new set of tyres, both front and the rear. Tyre fitters from the shop recommended to go tubeless hence after seeing how little coverage the sealing bead has, especially what rear tyres have i hope it was not a mistake and i do not have to put the inner tubes in, will watch and see. Had some trouble to get the rear rims off from the hub as they were totally rusted in, after soaking the area around the hub with wd40 for a day i got rims off using 2.5m pipe and sledge hammer hitting the rim from the back across the other side of the machine. I managed to get second hand skid steer rims 12-16.5 with matching bolt hole pattern, they are half an inch bigger in overall and slightly wider but it gives much better selection of tyres to use, including R4 pattern, the cost of tyres is lower as well. Some shots from the site added as well.
 

squad_1881

Well-Known Member
Joined
Aug 21, 2017
Messages
59
Location
Australia
Occupation
Architect
- - -
 

Attachments

  • IMG_5196.jpg
    IMG_5196.jpg
    3 MB · Views: 16
  • IMG_5426.jpg
    IMG_5426.jpg
    3.1 MB · Views: 16
  • IMG_5488.jpg
    IMG_5488.jpg
    3 MB · Views: 16
  • IMG_5528.jpg
    IMG_5528.jpg
    2.6 MB · Views: 16

squad_1881

Well-Known Member
Joined
Aug 21, 2017
Messages
59
Location
Australia
Occupation
Architect
- - -
 

Attachments

  • IMG_2890.jpg
    IMG_2890.jpg
    3.1 MB · Views: 17
  • IMG_5642.jpg
    IMG_5642.jpg
    2.2 MB · Views: 16
  • IMG_5646.jpg
    IMG_5646.jpg
    3.2 MB · Views: 15
  • IMG_5623.jpg
    IMG_5623.jpg
    2.8 MB · Views: 17
Top