• Thank you for visiting HeavyEquipmentForums.com! Our objective is to provide industry professionals a place to gather to exchange questions, answers and ideas. We welcome you to register using the "Register" icon at the top of the page. We'd appreciate any help you can offer in spreading the word of our new site. The more members that join, the bigger resource for all to enjoy. Thank you!

Ford 555 Backhoe (early Eighties) shuttle removal?

iowahill

Senior Member
Joined
Apr 18, 2015
Messages
271
Location
Lincoln, CA
Occupation
Retired, owner of Thomas Fischer Company, consultant
I didn't want to interrupt your momentum with negativity but more than likely the crash box behind the shuttle looks like the clutch drum. Possibly a gear is frozen to a shaft or a detent isn't moving. Could be the shifter is frozen within the top cover. I forget how large of a hole there is in the floorboard around the shifter. I think you can see enough after removing the floorboard and transmission top cover to figure out what's going on. Leaving the office finally. Won't be of any help the rest of the day.

Got the disassembly done, but havent tried taking the spring out of the clutch housing yet. It looks like the housing can be turned either way, or is there a front and back?
 

Check Break

Senior Member
Joined
Jan 21, 2012
Messages
469
Location
USA
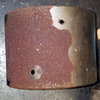
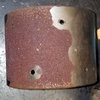
You got me on that one. I don't remember if both sides are the same. I think they are but would have to look at a drum to refresh my memory. I was trying to remember how we took the pressure off the spring to remove the snap ring and realized we used a spring compressor. It looked a lot like the ones you see used for automotive transmission clutch packs. The problem with working on these things is life usually interrupts and it's days before you get going again. You're taking lots of pictures so you should be fine. Figure out which way your clutch drum came out (rust picture) and don't worry which side goes where for now. You still have work to do on the rear input shaft and there's a couple of bearings in there that need to be evaluated. The clutch drum is a stand alone subassembly. Yours looks salvageable from what I can see. Many time all you save are the pistons, springs and retainers as the lip has a tendency to break out from operator abuse. That's all for now. I'll check back tonight.
 

iowahill

Senior Member
Joined
Apr 18, 2015
Messages
271
Location
Lincoln, CA
Occupation
Retired, owner of Thomas Fischer Company, consultant
You can go deeper. There's more bearings and a thrust washer on the input shaft you'll want to look at. Remove the four bolts on the casting that supports the rear input shaft and remove the casting and reverse gear. You'll need to replace the sealing rings on the rear input shaft also.

You need to disassemble your clutch drum if you haven't already. Remove the snap ring that holds the spring retainer to the drum. One per side. Don't get hurt in the process. You need to rig something to depress the spring retainer and spring so you can remove the snap ring and release the pressure off the spring safely. Blow the pistons out with compressed air if they don't want to come out. There's orings in the pistons that need to be replaced and the pistons need to be cleaned and checked.

There's a number on that bearing. Alexanders sells the bearing but a local bearing house or ebay might sell it for less. Buy a name brand bearing made in USA, Japan or Europe.

There is no torque converter rebuild kit but I figured out the reason for your comment. Alexanders labels their friction, pump, seal and gasket set a "Torque Converter Kit." They're just referring to a kit for tractors with 4x4 T/C transmissions. If your frictions and steels are good, then all you need is their Gasket/Seal kit. I would call and verify what all is included. I've always bought my parts from CNH but now there's selected parts being sold by online sellers like Alexanders and Cross Creek Tractor. You found Josephs. I'd ask them what they have before ordering from CNH. If CNH is unavoidable, I've found that Messicks is better than the local dealer.

There's exchange reman T/C-s out there from $350 to $600 but I don't know who's doing the reman. You mentioned you talked to Joseph Industries. I'd ask them what they want for a reman T/C first. Alexanders says to call for a price. Ask them for the country of origin and name of remanufacturer. There was a local rebuilder in San Jose years ago. They still may be in business but I heard some negative reports for their automotive converters some time ago so I'd be hesitant to recommend them. I don't think there's anything special about the Ford converter. I cut one open once and nothing unusual caught my eye. If you exchange, you need to determine whether you want a low stall or high stall converter. I prefer the low stall. More power at lower rpm. Best for the owner operator. When a multitude of idiots are operating the machine, a high stall converter makes it more difficult to tear up the shuttle.

We have a converter rebuilder here in the Sacrament region (PDQ) that I was thinking of, but as mentioned I might see how clean mine is after flushing. It's been sitting for the past 3+ years with red kerosene in it since when I split the tractor. The original fluid was a brown mix of water and fluid that got agitated when I first fired the sleeping beast up. All was drained and the kerosene filled in to displace as much water as I could.

And the left side pin on the modulator valve was firmly stuck in its bore, but I was able to finally free it. Right side pin came out easily

I pulled the thrust washer and bearings behind the clutch drum and so far things look good. I'll pull the four-bolt cover behind them tomorrow and see how the crash box input shaft bearing looks. Now that things are moving after three-plus years I ordered a pair of new tires for the front (11L-16's) for about $350 with free shipping. The rears are the 16.9-28's. One of the rears is a very good Firestone and the other is a used worn Firestone that I bought because that side of the tractor was the one facing south as the tractor sat outdoors for about 11 years and rotted the original to the point of being junk. I probably won't get back to this until Sunday as I start compiling my list of parts needed.
 

iowahill

Senior Member
Joined
Apr 18, 2015
Messages
271
Location
Lincoln, CA
Occupation
Retired, owner of Thomas Fischer Company, consultant
You can go deeper. There's more bearings and a thrust washer on the input shaft you'll want to look at. Remove the four bolts on the casting that supports the rear input shaft and remove the casting and reverse gear. You'll need to replace the sealing rings on the rear input shaft also.

You need to disassemble your clutch drum if you haven't already. Remove the snap ring that holds the spring retainer to the drum. One per side. Don't get hurt in the process. You need to rig something to depress the spring retainer and spring so you can remove the snap ring and release the pressure off the spring safely. Blow the pistons out with compressed air if they don't want to come out. There's orings in the pistons that need to be replaced and the pistons need to be cleaned and checked.

There's a number on that bearing. Alexanders sells the bearing but a local bearing house or ebay might sell it for less. Buy a name brand bearing made in USA, Japan or Europe.

There is no torque converter rebuild kit but I figured out the reason for your comment. Alexanders labels their friction, pump, seal and gasket set a "Torque Converter Kit." They're just referring to a kit for tractors with 4x4 T/C transmissions. If your frictions and steels are good, then all you need is their Gasket/Seal kit. I would call and verify what all is included. I've always bought my parts from CNH but now there's selected parts being sold by online sellers like Alexanders and Cross Creek Tractor. You found Josephs. I'd ask them what they have before ordering from CNH. If CNH is unavoidable, I've found that Messicks is better than the local dealer.

There's exchange reman T/C-s out there from $350 to $600 but I don't know who's doing the reman. You mentioned you talked to Joseph Industries. I'd ask them what they want for a reman T/C first. Alexanders says to call for a price. Ask them for the country of origin and name of remanufacturer. There was a local rebuilder in San Jose years ago. They still may be in business but I heard some negative reports for their automotive converters some time ago so I'd be hesitant to recommend them. I don't think there's anything special about the Ford converter. I cut one open once and nothing unusual caught my eye. If you exchange, you need to determine whether you want a low stall or high stall converter. I prefer the low stall. More power at lower rpm. Best for the owner operator. When a multitude of idiots are operating the machine, a high stall converter makes it more difficult to tear up the shuttle.


I've been sidetracked for the past week with a couple of other projects but finally called Joseph Industries this morning to ask about availability of a shuttle reseal kit with gaskets and o rings. They got em! Part number for the earlier 12-disk shuttle is 502250, and price is $87.01 plus UPS shipping. I'm still on the fence about exchanging the torque converter, and Joseph touts itself as the largest re-builder of these things in the U.S. and Mexico. I'm going to see how clean mine looks and do an internal inspection with my bore-scope to see if there's anything visible that might set off a flag or two before deciding. It looks like all of my hard parts and bearings are looking good though, and even the front pump is looking good. Guess the water, being heavier than the oil, stayed below the critical levels and spared me a major disaster. Just received two new 12-ply front tires (11L-16, about $360 for the pair with free freight on eBay), so I'm getting excited about finally getting this machine back to work. Still have to have a few new hydraulic hoses replaced, but have a buddy that owns Rocklin Hydraulics a few miles up the road from me, so shouldn't get skinned too bad! And I have to replace close to 20 zerk grease fittings that are either broken or clogged. Some of the pins are loose, but none that I inspected when we first got the tractor up and running seemed to be excessive.
 

Check Break

Senior Member
Joined
Jan 21, 2012
Messages
469
Location
USA
Did you pull the casting and the rear input shaft. There's a bearing in the back of the shaft and more on the shaft. Thrust washers to evaluate also. Below the rear input shaft is a reverse idler gear. There's a bearing inside it that also needs to be evaluated. It's low in the transmission case and may have water damage. Cheap to find out now that reverse is compromised. I don't know what to tell you about the T/C. Chances are it's in the same condition as the rest of the shuttle. Just another risk you have to decide whether to take. If the bearing in the reverse idler gear is pristine, maybe all you are dealing with is a bad cooler and someone who decided the repair solution was to park her for ten years until they could convince management to buy them a new one.

When she goes back together, I'd advise you to bolt the flex plate to the converter and install the converter in the pump first. This is the hard way. A lot of guys like to attach the converter to the fly wheel and shove it back together. It's safer to go through the starter hole and bar the flywheel around as you install the flex plate bolts than it is to risk damage to the pump, T/C and seal doing it the easy way. If you decide easy is the way you want to go, you'd better make some guide pins out of long bolts to help align the engine to the bell housing during reassembly.

More later. Let me know how you're doing when you go as far as you're going to go and start backing out. .
 

iowahill

Senior Member
Joined
Apr 18, 2015
Messages
271
Location
Lincoln, CA
Occupation
Retired, owner of Thomas Fischer Company, consultant
Duplicate
 
Last edited:

iowahill

Senior Member
Joined
Apr 18, 2015
Messages
271
Location
Lincoln, CA
Occupation
Retired, owner of Thomas Fischer Company, consultant
Just pulled the casting and the gears. Things look good, including the bearings.

case.jpg


Used my old valve spring compressor to get the shuttle drum springs compressed and the clips removed. After pulling the aluminum piston heads out things looked ugly with debris and deteriorating o rings. But nothing that a light cleaning could hold me back.

drum.jpg

drum-2.jpg


Bought a used bead blast cabinet with thoughts of using that to clean up the rust on the drum, but with thoughts of having hidden debris and blast media, decided to try using the electrolytic method of rust removal after washing it good with an industrial cleaner.

electro.jpg

Used the washing soda as recommended and filled a plastic tub with about 6 gallons of water and about three or four scoops of the washing soda. The fine Belgian beer works as a catalyst to aid the procedure! Used a scrap piece of 16 gauge steel to use as the anode and a bent piece of steel flat stock to set the drum on as the electrode. Connected up to my battery charger set at 12 volts and saw it start out pulling about 2 amps, then climbing to about 8 or 9 amps as things began to clean. The scum on the surface showed me that the part is getting some deep cleaning. I'll leave it on overnight then take a picture of the part in the morning for comparison. You can see the progress in the photos.
 

Check Break

Senior Member
Joined
Jan 21, 2012
Messages
469
Location
USA
Just pulled the casting and the gears. Things look good, including the bearings.

View attachment 185745


Used my old valve spring compressor to get the shuttle drum springs compressed and the clips removed. After pulling the aluminum piston heads out things looked ugly with debris and deteriorating o rings. But nothing that a light cleaning could hold me back.

View attachment 185746

View attachment 185747


Bought a used bead blast cabinet with thoughts of using that to clean up the rust on the drum, but with thoughts of having hidden debris and blast media, decided to try using the electrolytic method of rust removal after washing it good with an industrial cleaner.

View attachment 185748

Used the washing soda as recommended and filled a plastic tub with about 6 gallons of water and about three or four scoops of the washing soda. The fine Belgian beer works as a catalyst to aid the procedure! Used a scrap piece of 16 gauge steel to use as the anode and a bent piece of steel flat stock to set the drum on as the electrode. Connected up to my battery charger set at 12 volts and saw it start out pulling about 2 amps, then climbing to about 8 or 9 amps as things began to clean. The scum on the surface showed me that the part is getting some deep cleaning. I'll leave it on overnight then take a picture of the part in the morning for comparison. You can see the progress in the photos.


Looks great. I figured you were busy and I was too so I decided not to ask how things were going. The pickup screen is down in the bottom of the case. I forget how it comes out. It would be a good idea to pull it out, give it a look see and reseal it when it goes back. I think those piston seals may have been the beginning of the previous owner's problem. Your frictions aren't damaged but it's hard to believe those pistons were applying if the seals were shot. It doesn't matter now. Clean her up, clean her out and take your time going back together, to the point that its better to read the manual 2x and check your work 3x after the install of each piece. You can air test that clutch pack after you reassemble to make sure the pistons are working. Lube the frictions with 134A or ATF before installation.
 

iowahill

Senior Member
Joined
Apr 18, 2015
Messages
271
Location
Lincoln, CA
Occupation
Retired, owner of Thomas Fischer Company, consultant
Looks great. I figured you were busy and I was too so I decided not to ask how things were going. The pickup screen is down in the bottom of the case. I forget how it comes out. It would be a good idea to pull it out, give it a look see and reseal it when it goes back. I think those piston seals may have been the beginning of the previous owner's problem. Your frictions aren't damaged but it's hard to believe those pistons were applying if the seals were shot. It doesn't matter now. Clean her up, clean her out and take your time going back together, to the point that its better to read the manual 2x and check your work 3x after the install of each piece. You can air test that clutch pack after you reassemble to make sure the pistons are working. Lube the frictions with 134A or ATF before installation.

As mentioned, I put the heavily rusted shuttle drum into the washing soda electrolytic tub last night and hooked things up to my battery charger. The heavy rust could have been taken down with a wire brush, and even with a fingernail as it was that thick and scaly. But I wanted to see how the electro approach would work. Bear in mind that I didn't do anything more than just give the part a quick wash with a cleaner, thinking that since the washing soda is is a surfactant that it would do most of the work in removing residual oils.

After about 12 hours in the charged tub this is what it looks like. First the "before":

drum.jpg

And the "after"

drum clean-1.jpg

drum clean-2.jpg

Note that the dark area is where it once was red!

drum clean-3.jpg

So what happened to the rust? It migrated to the sacrificial piece of scrap steel that served as the anode, and some fell to the bottom of the tub as is scaled off the anode.
 
Last edited:

iowahill

Senior Member
Joined
Apr 18, 2015
Messages
271
Location
Lincoln, CA
Occupation
Retired, owner of Thomas Fischer Company, consultant
As mentioned, I put the heavily rusted shuttle drum into the washing soda electrolytic tub last night and hooked things up to my battery charger. The heavy rust cusld have been taken down with a wire brush, and even with a fingernail as it was that thick and scaly. But I wanted to see how the electro approach would work. Bear in mind that I didn't do anything more than just give the part a quick wash with a cleaner, thinking that since the washing soda is is a surfactant that it would do most of the work in removing residual oils.

After about 12 hours in the charged tub this is what it looks like. First the "before":

View attachment 185756

And the "after"

View attachment 185755

View attachment 185757

Note that the dark area is where it once was red!

View attachment 185758

So what happened to the rust? It migrated to the sacrificial piece of scrap steel that served as the anode, and some fell to the bottom of the tub as is scaled off the anode.


And the anode is still serviceable after scraping the crud and rinsing it off with a blast from the hose. The washing soda solution is still reusable, but can be put into a sewer or septic system as it is non-toxic, though in CA it likely would be labeled as "hazardous waste". Better to seek forgiveness than permission!

Here is the process about an hour into it:

electro-a.jpg

... and this morning after about 12 hours:

electro-b.jpg

The anode showing where the beef is:

electro-c.jpg

... and the anode after scraping it off and washing it, ready to be used again:

electro-e.jpg

I'm going to do a light cleanup of the grooves with my blast cabinet to ensure that the clutch packs slide freely. The beauty of the electro derusting is that it gets into hidden and inaccessible areas that no other means could. This is how they do rust removal on larger things like car bodies and machinery, though with larger tanks and heavier power supplies. More to come as I start putting the beast back together.
 

Check Break

Senior Member
Joined
Jan 21, 2012
Messages
469
Location
USA
Lots of great pictures. What are you blasting with; glass, soda??? Won't be long now before she's back together. Check that pickup screen to make sure it's clear. She might need a dose of washing soda. Sorry about not getting back here sooner. Too much work, not enough play.
 

iowahill

Senior Member
Joined
Apr 18, 2015
Messages
271
Location
Lincoln, CA
Occupation
Retired, owner of Thomas Fischer Company, consultant
I'm using the glass bead material that was in my blast cabinet when I bought it. It's probably grade AD and smaller. A good cleaning prior to assembly will get rid of any remaining bead. Here's a picture of the drum. What looks like rust is actually something going on with the way my phone camera is processing the light. It's actually completely clean, but the PB Blaster that I sprayed the drum with to protect is refracting the light in some strange manner:

drum clean-4.jpg

This is what the gasket kit from Joseph Industries looks like, and it has everything I need:

gaskets.jpg

The aluminum pistons show what the insides of the clutch drum looked like when I tore it down. A quick wash in my solvent tank, then a quick blast in the cabinet if needed should have them looking like new.

pistons.jpg

Unless unexpected circumstances arise I should be reassembling the shuttle by mid week. I'll take a good look at the torque converter and the front pump tomorrow to see if I think they are usable. From the looks of things I think I might get lucky!

I have to look at the manual to figure out how to get the screen out for inspection. I can feel the loose screen under the filter housing. Don't know if it's supposed to float freely, or whether it's come loose. One more thing to look at tomorrow.
 
Last edited:

Check Break

Senior Member
Joined
Jan 21, 2012
Messages
469
Location
USA
This is what the gasket kit from Joseph Industries looks like ... Unless unexpected circumstances arise I should be reassembling the shuttle by mid week. I'll take a good look at the front pump tomorrow ... I can feel the loose screen under the filter housing. Don't know if it's supposed to float freely ...

I don't remember the screen floating freely unless you're feeling the entire assembly moving a bit on the oring seal. I thought it was bolted in. If any of the screen is rusted badly or missing, you'll need to repair or replace it. The front pump comes apart. Look for scratches on the gear and housing. If there's no scratches or wear marks, it should be good. Does the gasket kit have the cast iron sealing rings for the shafts. I tried to get an answer out of Joseph and Alexander but they didn't know.
 

iowahill

Senior Member
Joined
Apr 18, 2015
Messages
271
Location
Lincoln, CA
Occupation
Retired, owner of Thomas Fischer Company, consultant
I don't remember the screen floating freely unless you're feeling the entire assembly moving a bit on the oring seal. I thought it was bolted in. If any of the screen is rusted badly or missing, you'll need to repair or replace it. The front pump comes apart. Look for scratches on the gear and housing. If there's no scratches or wear marks, it should be good. Does the gasket kit have the cast iron sealing rings for the shafts. I tried to get an answer out of Joseph and Alexander but they didn't know.

Yep! The kit looks pretty complete for about $90 delivered.

rings.jpg
 

iowahill

Senior Member
Joined
Apr 18, 2015
Messages
271
Location
Lincoln, CA
Occupation
Retired, owner of Thomas Fischer Company, consultant
Screen removal and inspection, as mine was loose at the screen. I had originally missed the rebuild chapter section of the manual earlier but finally saw hat a single screw in the front of the case releases the filter assembly for removal. Watch out for the o-rings!!!

If you ever have to go into the shuttle assembly for repair You MUST have the factory reprint of the manual to guide you through the procedure.

And make sure of your tractor's date codes! The early March 1971 and previous seem to be the 12-disk models with the modulator valve assemblies as I have. From 3-1981 and after, they appear to be the 10 disk models according to BUILD DATE. MAJOR DIFFERENCES!

Know what you're working on!
 
Last edited:

Check Break

Senior Member
Joined
Jan 21, 2012
Messages
469
Location
USA
"Know what you're working on!"

You can say that again.

I can't seem to figure out how to send a PM with this new format. When you get a chance, send me an email to 545D@mail.com I'd like to give you a call when you have a minute.
 

iowahill

Senior Member
Joined
Apr 18, 2015
Messages
271
Location
Lincoln, CA
Occupation
Retired, owner of Thomas Fischer Company, consultant
Found the screw that holds the shuttle filter behind the oil distributor gasket. It's a 5/16" Allen:

filter-1.jpg

After pulling the filter back and out things look nasty. It's a pleated filter that rides loose under the filter housing, no clip or other restraint:
filter-2.jpg

The later filter used on the 555A has a spot welded clip that keeps the pleated filter in place and looks like it's just an improved version. Here's another shot of my original:
filter-3.jpg

I ordered a clean usable one for the later version off eBay for under $100 with a 30-day return option if it doesn't work out or isn't acceptable. I think I'll do okay with it though.
 

iowahill

Senior Member
Joined
Apr 18, 2015
Messages
271
Location
Lincoln, CA
Occupation
Retired, owner of Thomas Fischer Company, consultant
Happy to say that I finally got the old beast back together and running after going through a nightmarish rebuild of the shuttle, replacing all the springs for check valves and other odd bits that arose as I went through the job. This tractor sat in a field for over 10 years with water in the trans and hydraulic oil in the cooling system due to a bad radiator.

I brought it to my shop about 4 years ago as a project that I only recently was able to complete due to lack of time and/or money. New tires on the front and 11 new hoses are among the items replaced, but the motor runs strong, hydraulics are perfect (even the extend-a-hoe).

But now I have to replace the bushing and seals on the end of the dipstick. I have a bushing on the way from Amazon, but am curious as to whether or not to install the seals and the correct pin. The current bucket pins are solid and don't appear to have seen grease since Clinton was in office! Any leads on cheaper after-market parts or kits? And advice is always welcome!
 

Attachments

  • 555 running-1.jpg
    555 running-1.jpg
    122.5 KB · Views: 23
  • 555 running-2.jpg
    555 running-2.jpg
    114.6 KB · Views: 23
  • 555 running-3.jpg
    555 running-3.jpg
    111.3 KB · Views: 23
Top