• Thank you for visiting HeavyEquipmentForums.com! Our objective is to provide industry professionals a place to gather to exchange questions, answers and ideas. We welcome you to register using the "Register" icon at the top of the page. We'd appreciate any help you can offer in spreading the word of our new site. The more members that join, the bigger resource for all to enjoy. Thank you!

BAD miss, may have major trouble! 1967 580ck. Roughest backhoe in captivity.

packratc

Senior Member
Joined
Jan 25, 2011
Messages
405
Location
tennnessee
Not sure how to edit my posts. Should have been a question mark after "whim" in the previous post. I'm always ashamed of myself when I reread my posts. I really should stick to just the facts and concentrate on spelling and punctuation. I can do those better than I can type. I'm gonna "lern red and spel gud"!
Thanks, Packratc
 

willie59

Administrator
Joined
Dec 21, 2008
Messages
13,386
Location
Knoxville TN
Occupation
Service Manager
No worries pactratc, we all muck up our posts on occasion, that's why there is an "Edit Post" button at the bottom of each post you make. You have up to 1 hr after you make a post to edit it, after that, it's locked in. But even in that case, if it were something important that you would like edited a mod could do that for you. :)
 

Deere John

Well-Known Member
Joined
Oct 5, 2006
Messages
178
Location
North Bay, Ontario
Occupation
Professional Forester
Not sure how to edit my posts. Should have been a question mark after "whim" in the previous post. I'm always ashamed of myself when I reread my posts. I really should stick to just the facts and concentrate on spelling and punctuation. I can do those better than I can type. I'm gonna "lern red and spel gud"!
Thanks, Packratc

Ha - Don't worry packratc - post away. I have been following this entertaining thread for days now. Normally, I wouldn't, but as was said above, your style of writing encourages further reading.
 

dwloop

Well-Known Member
Joined
Jul 14, 2011
Messages
197
Location
St. Louis, MO & Wayne Co, MO
packratc, there is a ridge that holds the 'fire ring' that is above the flange. See the famous Phil pic below:

New%20liner%20kits%204.JPG

The measurement for flange projection is right at the edge of the flange at the block. Notice the liners are held down with while measured. I just used a large set of washers to clamp mine down as well to check them.

This came from Phil's thread of rebuilding a 480D, some good stuff here:
https://www.heavyequipmentforums.com/showthread.php?15238-Case-480D-dies-burying-goat/page2&highlight=died+goat

Dave
 
Last edited:

packratc

Senior Member
Joined
Jan 25, 2011
Messages
405
Location
tennnessee
ARE YOU KIDDING ME? I nonchalantly duck under this ugly thing and drain the oil. Oops I do notice a green tinge to it when it first starts. Oil pan over flows making limestone gravel very dark & oily. MMM....perhaps that steering link needs to drop down. Find the pickle fork and a 3lb sledge and knock it out of the way. When I took the plastic tarp off of the engine, the little water pools had made funny shaped ice cubes. I keep tossing those out of the way as I know when I lay on them my body heat will melt them and my coveralls will be wet through and through. It's about 24 degrees but there's rain coming this afternoon and this might be the only day to get the pan down and order the rebuild kit. I gotta' check the rod bearing size to make sure I order right. Retrieve air hose and buttefly impact and start at the front taking out the pan bolts. And then, THERE IT IS! The pan is under the steering stabilier rear mount. Here's where I need you all's advise. Can I just drop down the rear by stabilizing the torque tube and unbolting the rear mount, or do I have to pull the axle foward? Looks to me like the later. This ain't good on gravel! Please advise. Couldn't spot the engine number. Can you hint where I might look? Tractor tag says 580CK, serial # 8320001. Thanks for the help and comments, Packratc
 

packratc

Senior Member
Joined
Jan 25, 2011
Messages
405
Location
tennnessee
Thanks for the link to Phil's rebuild. I thought when I put the liners back in I'd just clean em up and drop em in there. Can they go too far? Do I need to hold down the liners when I put the new ones in when turning over the engine before putting the head back on? Is there any need to check the depth of the liners now that I've already decided that they're coming out? Sorry if I'm asking too many question. I'm just a poor ol' red neck needn' to play in the dirt. Packratc
 

alrman

Senior Member
Joined
Jun 20, 2009
Messages
3,308
Location
QLD Australia
Occupation
Diesel Fitter;Small Business Owner;Cleaner
The pan is under the steering stabilier rear mount. Here's where I need you all's advise. Can I just drop down the rear by stabilizing the torque tube and unbolting the rear mount, or do I have to pull the axle foward? Looks to me like the later. This ain't good on gravel! Please advise. Couldn't spot the engine number. Can you hint where I might look?

Been a long long time since I have even seen a CK, packratc. To be honest I can't give you exact advice re sump removal - any chance of some pics, they may help us to help you.
Hopefully someone with a recent experience will chime in.....
If something has to be moved, the front is probably the best. Do you have the loader frame up in the air & supported? You may need to do that to get the axle fwd enough.
I envy you! :rolleyes: Being on gravel, cold & wet - be sure about how you support the rest of the hoe - BE SAFE!

The engine number should be on a tag, mid block RHS down low near sump.
Did those liners move? They usually need a puller to remove them or a few good hits from below. When all clean they go in by hand & will need clamps just like Phil's pic. (cross that bridge when you get to it)
 

dwloop

Well-Known Member
Joined
Jul 14, 2011
Messages
197
Location
St. Louis, MO & Wayne Co, MO
packratc, I was thinking I could have supported the front, remove the A brace from the back of the axle to get the pan down. I didn't do it, so I am not sure that would work. Mine is a B also, so it may be different there.

Like alrman said, block the loader up and out of the way. I made two cylinder stops out of 3" heavy angle iron, cut to the length of the loader rams at full lift put them on top of the gland and under the end bracket. Hold them in place with large hose clamps in the middle of the ram so they don't slip out. It makes working on the engine so much easier.

HTH,
Dave
 

packratc

Senior Member
Joined
Jan 25, 2011
Messages
405
Location
tennnessee
The right cylinder on the top photo is #2 cylinder as it is the middle cylinder on the third photo. Note the excessive exhaust or carbon build-up. Also note the ice chips on top of the piston. On other topics: Found a post that said that the engine serial number is under the power steering pump on the lower edge of the block; I'll need to study the chassis manual to see what I have to drop to get at the oil pan; I have previously held up the loader arms with angle iron. I'll look around & see if I still have them. Thanks for the help. Still welcoming comments and suggestions. Packratc
 

dwloop

Well-Known Member
Joined
Jul 14, 2011
Messages
197
Location
St. Louis, MO & Wayne Co, MO
The last photo, the left hand cylinder the flange looks low, or is it a illusion? Is the edge of the liner flange below the block? Sure blew that fire ring in the gasket!!

Dave
 

willie59

Administrator
Joined
Dec 21, 2008
Messages
13,386
Location
Knoxville TN
Occupation
Service Manager
I haven't been deep into one of those engines so I can't offer much. But looking at the top of those liners, there appears to be some rough spots so I think liner replacement would be prudent. Don't forget, when you go to put that thing back together, to clean all the head bolt threads thoroughly and clean the hole threads with a tap, gives much better bolt torque results.
 

wildhorse trnr

Well-Known Member
Joined
Feb 13, 2010
Messages
78
Location
Texas
Occupation
Field Technician
Were you able to clean the liner tops and get a good measurement for liner height? The carbon on the liner edges usually can be knocked off with a die grinder and scotch brite pad. I usually do that prior to making my 4 pt. measurement.
 

packratc

Senior Member
Joined
Jan 25, 2011
Messages
405
Location
tennnessee
I haven't cleaned anything as I took these pictures with my phone today as I was about to cover it up. Thought I had read that the liner heigth should be .003 or just enough to catch your fingernail on. These sleeves are certainly higher than that. Yep! The gasket wires were pretty much destroyed. There was a piece of one about 3/4 " long on top of one of the pistons. For the sake of discussion, why should I take the time to clean them up and measure the height when I'm going to replace them? If there's a lesson to be learned, I'm in. Let me know. Thanks, Packratc
 

alrman

Senior Member
Joined
Jun 20, 2009
Messages
3,308
Location
QLD Australia
Occupation
Diesel Fitter;Small Business Owner;Cleaner
By the looks of the pics, the sleeves don't look as if they have moved. The coolant in the sump may have come from removing the head.
I don't usually measure liner protusion when dismantling, but the fingernail test gives an indication that the block will be OK. You truely wont know how good it is, until it is stripped, cleaned & new liners are inserted.

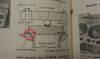
Just thought I should clarify exactly where to look. It is between the outer flange of the liner & the block surface, this is the area where the fire ring of the head gasket seals.
It is important that there is not much difference between cylinders as this will affect the gaskets ability to seal.
Before cleaning, you will notice the sealing area of the fire rings, on both the liner flanges & cyl head, to be shiny & where there was any leakage (apart from the obvious) it will be dull or black.
 

Attachments

  • liner protrusion.jpg
    liner protrusion.jpg
    91.5 KB · Views: 495

packratc

Senior Member
Joined
Jan 25, 2011
Messages
405
Location
tennnessee
Thanks again for all the comments and advise. Have to admit that when the head came off & I saw the obviously blown gaskets between 1 & 2 I didn't spend a whole lot of time lokking at the rest of the block. Everything looked normal and the back two cylinders were running fine. Even thought they had relatively low compression (300 & 275). I attributed that to wear, tear, age, etc. When I get the head back & a report on it's condition (valve seats, stem wear, evenness,etc) I'll know more about what could have caused low compression in those two cylinders. I didn't perform a leakage test as I was already pretty sure I was going to sleeve it. Yucky winter weather in Tennessee. Slowing down this important work. Kiss your partner on Valentines day and maybe he or she will buy you a new set of filters for your hoe. Packratc
 

Tinkerer

Senior Member
Joined
May 21, 2009
Messages
9,366
Location
The shore of the illinois river USA
Packratc; If you do take the sleeves out, check the top of the cylinder bores in the block real carefully to see if somehow, someone installed some kind of shim in them. There is no way the sleeves should be protruding the 1/8" above the top of the deck like you said it was. Unless, like Alrman said they may have moved up when the crankshaft was rotated. Actually if you can't get them back down with bolts and washers (as shown in Phil's thread). You almost have to pull one out to see what is causing them to be so high.
 
Top