AirBornOne
Well-Known Member
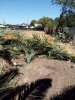
Ripper Saw draws first Blood!
 Finally got this thing attached,if only for a trial run.I still need to make the bushings and sort out the geometry.
But it worked.
 The concave arc is a bit too much.With a simple 'up' movement of the boom,the arc mimics the boom motion and can pull away from the target.Maybe half as much arc would be good.
 I'm thinking now it could have been a foot longer.As it is I need to be very careful I don't poke my boom cylinder.
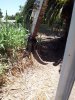
I worked on a 3-4 year old camphor sapling that was situated between a slab and a cyclone fence (about a 10" gap).It was tricky getting in there and I did manage to pick up the slab.And crack it! Da@@it!.

Hope things are well for you folks down under & back east over here.
I think I got a little sunburned.

Finally got this thing attached,if only for a trial run.I still need to make the bushings and sort out the geometry.But it worked.
The concave arc is a bit too much.With a simple 'up' movement of the boom,the arc mimics the boom motion and can pull away from the target.Maybe half as much arc would be good. I'm thinking now it could have been a foot longer.As it is I need to be very careful I don't poke my boom cylinder.I worked on a 3-4 year old camphor sapling that was situated between a slab and a cyclone fence (about a 10" gap).It was tricky getting in there and I did manage to pick up the slab.And crack it! Da@@it!.
Hope things are well for you folks down under & back east over here.
I think I got a little sunburned.
")