• Thank you for visiting HeavyEquipmentForums.com! Our objective is to provide industry professionals a place to gather to exchange questions, answers and ideas. We welcome you to register using the "Register" icon at the top of the page. We'd appreciate any help you can offer in spreading the word of our new site. The more members that join, the bigger resource for all to enjoy. Thank you!

Repairing older style dozer final drives D6D

.RC.

Senior Member
Joined
Nov 27, 2012
Messages
756
Location
Qld, Australia
I measured one of the plastic gauges that used to come with the seals and the installed height .450 to .5 inches above the carrier.
Bob

Thanks, sounds like I had them installed correctly then.

Firstly you do not put any oil on the rubber bits of the seals and the land they sit in has to be dry and also retain the seal complete without the Zip things, the hub adjuster needs to be backed right off so the inner section with the bearing cup slides in. tctractors

Thanks, I did have them dry, the zip ties were just to hold the electrical wire in to assist in installation as per the suggestions in the installing seals thread. I think I may have found the issue and it was an amateurs mistake. However it is now raining so will not be able to get back to it for a day at least. It is very well covered so will not get wet.
 

.RC.

Senior Member
Joined
Nov 27, 2012
Messages
756
Location
Qld, Australia
There was a break in the weather so I tried take 2.
Seals into correct depth and square to bore. The outer support still went on with only a bit of thread showing. So I screwed on an adapter and it pushed in fairly easily.
Then it started showering again so all tarped up again. But it seems I was simply being too gingerly. Where those seals sit in the ramp now to when they are squashed up there is about a 5mm difference. So times by four seals that is 20mm.
 

.RC.

Senior Member
Joined
Nov 27, 2012
Messages
756
Location
Qld, Australia
The outer support is now locked onto the taper so I can install the shims and track frame bearing now, fill with oil and adjust the bearings. The new adjusting nut I bought when it turned up had made in China on it and on the outside seems to be the shittiest casting I have seen, it looks like the surface of the moon. I have seen better stuff come from Pakastani truck repairers, however there were no voids in the internal machined parts of the cast iron. I got it from where I did because they were the closest supplier.

Hopefully I am on the home straight now.

20220721_160650.jpg
 

tctractors

Senior Member
Joined
Oct 9, 2007
Messages
2,411
Location
Worc U.K.
Well I tried installing the outer duo cone seals today and seem to have failed. I can get them in no problem. The toric ring sits up against the the outer lip of the seal ramp. I adjust the toric ring so they are well within the 1mm height difference tolerance. I put oil on the faces.

Then I put everything together and the seals butt up together about 5/8" to 3/4" short of where I need to be so the outer plate and nut can not be put on.

How much are these seals supposed to squash up? I know the ramp is pretty deep and if the toric ring was sitting in the bottom of both sides there should be plenty of room but the rings will not go to the bottom, nor will they ride up the metal sealing bit either, they sit in a groove on it.

Or is it a case of brute force needed? I have just been going gently. I used the trick of some electrical wiring held on with zip ties as explained in the installing duo cones seals thread. https://www.heavyequipmentforums.com/threads/installing-floating-seals.36971/


View attachment 264188
Was looking at your lock tab detail, the favorite way to sort the tab is to lock the tab to the nut as you tighten it then tap the tab to the flat area on the rim when tight, before you go to undo the dead shaft nut to shim set the frame make sure the nut is well tight first and the hub adjuster is a bit slack as the hub can fly off when the nut is removed, then give yourself a pat on the back chap.
 

.RC.

Senior Member
Joined
Nov 27, 2012
Messages
756
Location
Qld, Australia
That would make sense with the lock tab. I did the nut up bloody tight and could not get it to fit in a groove. The nut was quite loose when I originally disassembled it. The bearing had been spinning on the hub and had also worn part of that nut away. I have a cylindrical grinder here so had to grind a mm or so off it to get it back square.

20220710_165830.jpg
 

OzDozer

Senior Member
Joined
Jan 18, 2007
Messages
2,207
Location
Perth, Western Australia.
Occupation
Semi-Retired ..
RC, isn't there a lock washer for that outer hub nut? - or have Cat dispensed with it? If that nut comes loose while you're working, you'll be in a world of costly pain again.
 

Glum

Active Member
Joined
Feb 15, 2017
Messages
29
Location
South Africa
RC, isn't there a lock washer for that outer hub nut? - or have Cat dispensed with it? If that nut comes loose while you're working, you'll be in a world of costly pain again.
Lock plate that sits over the nut and locates on two dowels, OzD.
 

.RC.

Senior Member
Joined
Nov 27, 2012
Messages
756
Location
Qld, Australia
Well the finals are all back together, tracks on. No oil leaks (yet). I am just working on other things on the dozer at the moment as it is too wet to move it around anyway. If people are interested in the cost, it was around US$5500 in parts. Pretty much everything was replaced except the top pinion and the dead axle and case. Labor cost was nil.

Thanks to everyone especially tctractors for all the helpful advice. Without it I would have made a right old mess.
 

.RC.

Senior Member
Joined
Nov 27, 2012
Messages
756
Location
Qld, Australia
Have done around 35 hours on it and the final drive oil has gone dark. Since the new gear teeth were not shiny as they had not been shaved or ground the oxide layer from the induction hardening was all on the teeth. So this is where I would say the black has come from. Since iron oxide is very hard and I feel I do not want a lapping compound going through the bearings I decided to dump the oil.

The plug had a good amount of fuzz which had the consistency of anti-sieze compound on it much like in this thread https://www.heavyequipmentforums.com/threads/d6c-final-drive-sea.68921/page-2#post-747691

Been pushing dirt so it has not been light work.

20220806_130337.jpg

20220806_125028.jpg
 

Metalman 55

Senior Member
Joined
Feb 6, 2013
Messages
1,301
Location
Ontario
Mine had a similar amount of fuzz in the plugs after running it perhaps 25 hrs or so, if I recall correctly. My oil didn't turn dark though.
 

tctractors

Senior Member
Joined
Oct 9, 2007
Messages
2,411
Location
Worc U.K.
Dark oil = burnt oil? F/Drive fails take a lot of cleaning out and to be honest it's near impossible to get every speck and flake out of the internals although lot of it can be new parts, so don't loose any sleep over the drain plug magnet looking happy with it's self, but the next drain period should look better, as for the slot dozing don't forget always use front to back pushing and again well done for sticking with it .RC. tctractors
 

.RC.

Senior Member
Joined
Nov 27, 2012
Messages
756
Location
Qld, Australia
Well maybe dark oil was a slight exaggeration. It had a slight dark tint to it like used transmission oil. I got the new oil in it today but it is too wet to use at the moment.

20220807_121412.jpg
 

1693TA

Senior Member
Joined
Feb 27, 2010
Messages
2,687
Location
Farmington IL
Occupation
FAA Radar Engineer, (Retired)
I've been watching your thread as a friend has a D5B that is leaking on one side from the outer seals. I've never done any in the past but will attempt to do his. We both have friends the tooling, (pullers, installers) can be borrowed from, so shouldn't need to fabricate much. Many of the tips both Willie59, and Nige have posted in the referenced thread to installing these things will be followed as they make sense to me.

Thanks for your postings and follow ups.
 
  • Like
Reactions: DB2

D5Dan

Well-Known Member
Joined
Sep 29, 2021
Messages
119
Location
Oxford, Maine
.RC. your final drain plug got me wondering how bad do my final plugs look??? …no “chunks”, but PLENTY of fuzz/crap!! My oil wasn’t terrible considering it was likely 10-12 years old.

Looking in my service manual I see Cat recommends (in 1967) every 1000 hours to check/retighten the sprocket nut; I notice in step 6 they mention tighten the “adjusting nut” with 5ft pipe…curious what you’ve been using for a tool to hook/tighten that nut??

Lastly, did you have to add/remove any shims to (better?) align your track?? My guess is no, using the shims that were on your machine probably worked fine…but I can see where doing it (once!) on assembly is key.

Appreciate the info/links that you (and others) have posted.

F949182F-8CD4-43D2-90AB-BB456C4818A7.jpeg 79CDE732-5BA4-49F3-B17F-D2C86361441E.jpeg ADCEC93F-A2AD-4819-87D4-71C6DFF983B1.jpeg
 

.RC.

Senior Member
Joined
Nov 27, 2012
Messages
756
Location
Qld, Australia
Well no chunks on the magnet is a bonus.
As for the shims. My alignment is about 8mm out and shims would not fix it. An old machine, using aftermarket parts, when you realise the alignment all relies on tapers being correctly cut and parts not being worn when reassembled I think that 10mm is not that critical. If you were doing 1000+ hours a year, yes maybe it might be worth spending money getting the alignment spot on so everything lasts longer.

In fact when you look at the other side I did not touch as it was done not long before I bought it, the sprocket lines up about 30mm out of alignment with the front idler. Of course the track frame on that side has been heavily welded and reinforced, even so far as the end of the diagonal brace was cut off and rewelded on. The track goes round and round. I am not worried about some alignment issues on a 45 year old dozer with a zillion hours on it.
 

.RC.

Senior Member
Joined
Nov 27, 2012
Messages
756
Location
Qld, Australia
I've been watching your thread as a friend has a D5B that is leaking on one side from the outer seals. I've never done any in the past but will attempt to do his. We both have friends the tooling, (pullers, installers) can be borrowed from, so shouldn't need to fabricate much. Many of the tips both Willie59, and Nige have posted in the referenced thread to installing these things will be followed as they make sense to me.

I found it at the end of the day not that complicated to do. Even the mysterious Duo Cone seals did not turn out that hard to install.

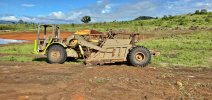
Still running well. Got my first real dam finished today. Probably around 5000 yards of dirt shifted.

20220811_122525.jpg
 
Top