• Thank you for visiting HeavyEquipmentForums.com! Our objective is to provide industry professionals a place to gather to exchange questions, answers and ideas. We welcome you to register using the "Register" icon at the top of the page. We'd appreciate any help you can offer in spreading the word of our new site. The more members that join, the bigger resource for all to enjoy. Thank you!

I expected the fuzz...

OzDozer

Senior Member
Joined
Jan 18, 2007
Messages
2,207
Location
Perth, Western Australia.
Occupation
Semi-Retired ..
Re the earlier advice about using a floor jack on a piece of plywood to remove belly pans - I went one further, and made up an adaptor plate to fit to the floor jack, which holds the pan more securely than the standard floor jack head.
Most floor jack heads are easily popped off. I sourced a chunk of scrap 1/4" plate about 14-15" square, welded a short piece of pipe for a prong on the bottom, that fits the hole where the jack head goes.
Most pans have several bolt-size holes in the bottom that you can use to locate/secure the plate. If there's none handy, just gas-axe or drill some small holes in a squarish pattern, to match the size of the adaptor plate.

Weld 4 short small pieces of pipe to the top of the adaptor plate. Remove floor jack head, install the adaptor plate in its place, line up the top prongs on the adaptor plate with the holes in the pan, insert them into position, jack up until the weight is taken up, unscrew the pan retaining bolts. Lower the jack, and the pan comes down, securely attached to the jack - no more risk of the pan falling off the jack head.
You can then wheel the pan out from under the tractor easily, with the pan securely attached to the jack - and you can replace and re-position it, in the same manner.
 

D5Dan

Well-Known Member
Joined
Sep 29, 2021
Messages
119
Location
Oxford, Maine
I like the idea of the pan hooking onto the jack. I was able to put a piece of plywood down, then use my ATV jack to catch/lower the nose piece…but it was wobbly.

AMAZING how much these machines tolerate crap stuffed up in these pans…my fan belts HAD to be spinning thru that crap…

2 belly pans down- the one under the trans/bevel won’t give up the two rear bolts- believe I will be introducing them to the gas axe.


6B44AA11-9B25-4E56-A445-DBFE1DCB99D8.jpeg 0408F03A-87EE-4D65-AC45-EC3477903C87.jpeg 7ED00116-60EB-4671-9D85-78EC1625FDB9.jpeg 945F8BC3-0CE6-4BE5-9C51-811F5A207808.jpeg
 

emmett518

Senior Member
Joined
Mar 24, 2021
Messages
811
Location
USA
Amazing how those radiators get plugged up with junk. My 2015 was pretty caked, until I cleaned it.
 

colson04

Senior Member
Joined
Apr 11, 2016
Messages
2,087
Location
Delton, Michigan
My 2015 was pretty caked

That's ignorance on the operator, not doing regular checks. We had a Deere 4440 that one guy ran daily on the farm. Get a call one day that he's stranded in a field, engine overheating. Get down there and find he had not been checking radiator or screens and front hydraulic pump had a seeping fitting. Radiator was plugged right up tight, engine locked up. Engine temp gauge worked, he never looked at that either.

@D5Dan nice work on the tractor so far. I don't have much to add, but I appreciate the work you're putting in to sort out your machine.
 

D5Dan

Well-Known Member
Joined
Sep 29, 2021
Messages
119
Location
Oxford, Maine
Well well well…

63D217AD-A8C7-475A-A2D9-6A7BD481F33E.jpeg980F94B1-27B6-4523-A427-389E5145AF02.jpeg1538C1B6-E9D9-4774-95EC-5929EEE06B66.jpeg

Only have a handful of hours on the machine since screen/magnets cleaned, so not out of woods yet (nor do I have pressure tests or temps, yet)…but pulling the trans screen and magnets again showed no metal fuzz or chunks…

Definitely a good sign/start, but certainly still has me concerned…especially with the outrageous(!) amount of CRAP that was in both steering clutch compartments (separate thread)…that amount of dirt/debris would certainly be a “cause” for a clutch bearing failure…but what did the previous owner expect by running the machine with the compartment plugs removed (such a forehead slapping moment!!)

Atleast I installed a new O-ring on the magnet/screen cover since I know I’ll be back there inspecting soon!!?!

Hoping in the next couple weeks I can get blade lift rams reinstalled (and no more leaks!) then it will be time to stump edge of field and see how she does :cool:

Also a big thanks for HEF members and their willingness to share knowledge/experience…starting to think I like working on this old iron more then working with it o_O. Definitely learning a TON as I go- thanks guys!!
 

D5Dan

Well-Known Member
Joined
Sep 29, 2021
Messages
119
Location
Oxford, Maine
Nige, I agree 1000% there are good, better, best oils; and after further reading I’m not feeling good about what I have in the trans (long-term)…

Good week last week; blade lift rams are back from hydraulic shop with new packings/seals; then Friday I made a trip to our local Cat dealership to pickup parts/orings/filters/etc- the guys there have been a big help.

…when I asked them about the trans oil to use, they both looked at each other and said “the ole man will know what he needs to run, but he’s off on Fridays”…one guy thought maybe TDTO30, the other said no, should run a DEO straight 30 weight oil (non detergent so not to pit the bronze bushings), I asked if that would be considered a TO-4 oil?? In the end, we agreed we should wait for the “ole man” next week to tell us…

If my machine we’re a direct drive I would think TO-4; but b/ it’s a Powershift I believe I should be looking more towards the TDTO30 oil??

…or like previous owner (aka the “flipper”) told me, just run Rotella 15w40 in everything!! o_O
 

Nige

Senior Member
Joined
Jun 22, 2011
Messages
29,389
Location
G..G..G..Granville.........!! Fetch your cloth.
TDTO is Cat’s own-brand powertrain oil. TO-4 is the specification any commercial oil has to meet to be an equivalent to TDTO. So they are the same specification, only the brand name on the label would differ.

For me a powershift would use an SAE30 TDTO/TO-4 oil.

Alternatives to Cat oil would be Mobiltrans HD30 or Conoco Powerdrive 30. There will also be an oil from the Shell Spirax range but I’m not sure exactly what the designation is - have to check.
 

John Shipp

Senior Member
Joined
Mar 5, 2015
Messages
643
Location
England
Occupation
forestry contracting
Greetings Dan, how's your D5 going? Revisited your thread here and just interested how you'd got on.
 

Mcrafty1

Senior Member
Joined
Oct 12, 2019
Messages
445
Location
Central Maine
Occupation
Earth work
I second John Shipp, I too was wondering how the piece is doing, You did a great job getting it ready to work so do let us know, and good luck.
 

D5Dan

Well-Known Member
Joined
Sep 29, 2021
Messages
119
Location
Oxford, Maine
Happy 2023 HEF - hard to believe we're about to roll into 2024!!

Also want to Thank all of you for putting up the various info/pics you have, I much rather read about these "issues" than the news! I know I've learned a ton...in fact- here is where my transmission distraction occurred...

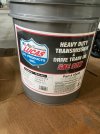
So, you guys saw I pull the screen/magnets and didn't find fuzz or chunks; definitely a positive sign, but the "TO-2" oil I used just wasn't sitting well with me...so after searching the various names/suppliers listed above (for TO-4 30) I found Lucas TDTO-30 oil delivered for $89/5gal (and free shipping from Summit Racing)...I also got a new filter and o-ring...then the "lessons that others where going thru" kicked in- and yes, the oil/filters are still on bench waiting to go in!?!

Must have been late June/early July I kept reading guys having stalling issues/running funny complaints - most starting points were "have you looked in bottom of fuel tank"? AND "have you opened the low-point drain"...It occurred to me - I had done neither. Should add this was around the time I was refitting the rebuilt rams back on the machine (separate thread with its own side-projects) AND trying to dodge the rain drops all the while trying to make bales of hay (which we were 39% off production this year b/o bad weather, but good part it gave me time to figured out how to adjust/fix a square baler - what a REMARKABLE feat of engineering still in use today). but I digress...

Now I should add, I've been happy with how the machine runs, with the exception of how the machine first starts - just cranks too long (~30-40 seconds)...but going off the previous owners info "don't worry about fuel filters, I've been thru those"...being a "trust but verify" guy I thought I should look at the bottom of tank AND I should open the low point...certainly has to occur at some point.

SOOOOO...off comes the tank cap, remove the clip that holds screen (which I can't believe is still with the machine)...shine flash light (torch for you Aussies!) into bottom of tank - SHOCK - it's PERFECT!! No sign of any crap!! ...then I realize, great I'm gonna open that low-drain and that b*****d will never seal back up (realist not a pessimist! so I have 30 gallon drum ready)...crack the screw open...bit of a pause, then she drains great and surprisingly seals back up...a real 20-minute job!!

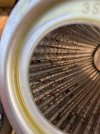
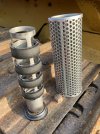
Then it hits me, I better check those fuel filters up front - that's when the $-hit hit the fan...the first stage screen was 2/3-3/4 FULL of rust/crap- absolutely sicking feeling...then pulled the plug for the secondary filter housing - WATER...DAMNIT(!) why did I not start with the filters a YEAR+ ago...then I removed the filter it was just CAKED with crap (I'm still pissed at myself- everyone knows (or should!) always start with the fuel filters)...anyway...

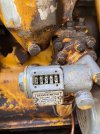
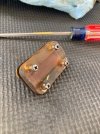
That then highlighted my fuel primer plunger was weak/junk and the old pressure gauge on the secondary housing was filled with condensation - after ordering/replacing those parts finally got her back to running state (still not perfect, thinking my transfer pump is likely weak??). Also took the time to remove the faded plastic cover from the hour meter and polished that, now the non-functioning hour meter is visible!?! May roll that rebuild into the transfer pump project (time will tell).

So I definitely feel like I took 3 steps forward and two back, but on the other hand I now KNOW I have a (remarkably) clean tank/drain along with reseting the filters so at least I can keep track as I go.

Just so thankful I got the rams off/resealed...they were making a ridiculous mess and needing constant oil added...as with all my the tasks on this dozer leads to many more - playing the game "while I'm here"!?! I will say - I am SOOOO impressed with Cat and my ability to get parts for this machine, I feel very fortunate...I'm sure the day will come I hit the Oh crap situation, but at this point so far so good.

I do wish my machine was indoors (for many reason) and that I was closer to the machine to keep chipping away at the repairs, but right now I'm getting prepared for undercarriage removal/rebuild and down the road, radiator removal/cleaning along with water pump check, belts/pulleys...but I need to prove a couple more things work before I go that deep, and with the way time is passing by me...it might be the next guys issues!!

Sorry to be long winded, but when I stop loving to hate my iPhone (or is it- I hate loving my iPhone!?!?) and can get on a laptop/keyboard, I can add pages vs sentences!!

Couple notes:
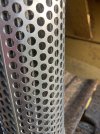
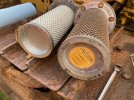
- Did change both air filters too - thinking the 1978 date "might" indicate they've been in use a while!
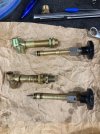
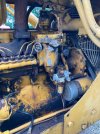
- Fuel primer ...the fine threads on the body of the plunger are NOT the same from the original to new...don't have real data, but if you look at pics, new one only has 2 set-nuts vs 3 on the old
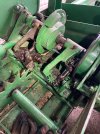
- John Deere square bale pic is just for "show"
71088576978__785586A3-B2DE-4EB6-B6B8-12E2E1BFA073.jpeg71139288006__1C108559-6C92-4635-9D3C-27B1751109FA.jpeg71096860416__9A2A0DE7-4B6E-4B66-A28A-CB29201CEE43.jpeg71096863739__54D1DF95-523D-4D91-A962-2A35776F4E1D.jpeg
 
Top