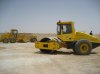
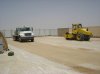
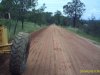
Hello, I'm a student in my 2nd week of grader. I hear through the grapevine that you're a grader god of sorts. Just wanted some tips on removing material from a corner on a large dirt platform where 2 sides are a big drop off. I tried articulation and can get most of the material but there is a small windrow left that I can not reach. The pin on the draw bar is out of order for now so I can not move it to a better hole selection. Got any helpful hints
")
thanks for your time.
Well, I will try a couple of pointers. One is to make sure you are going the right way. You don't mention what grader you are learning on, but most will have more reach to the right than the left. Use that to your advantage.
Don't try to get all the dirt at once. If you get very much in front of the blade in a sharp corner, the force on the blade will keep you from turning as sharp as possible.
I am assuming you are using the wheel lean also. One more thing to get a few more inches at that spot thats just out of reach is to pull up close to it, lean the wheels the wrong way, which will shift the front end over, as well as the blade, then as you inch forward, lean them back into the turn.
You can also drive to the point you can never make the turn in order to get the toe of the blade all the way into the corner then stop and work the center shift, circle, and side shift at the same time to pull the blade through the turn while the machine is sitting still, then reposition and do it again. It is slow, but a little at a time still gets it done.
The advanced way to get the corner out can get you in a bad spot if you don't have enough experience, and 2 weeks is not enough. It involves blocking the axle so you can put one front tire off of the pad and stay level. Probably best not to try it in a class setting.
Repairing the center shift so it will unpin and move will help the most.
Hopefully we can get some more good insight for you as well. Anybody else??
Good luck.