
northriver
Member
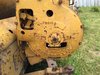
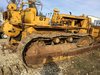
Bought a Cat dozer last year, a 1954 Caterpillar D7, S/N 3T26330. The biggest problem my worthless service manual can't help me with is with the cable unit: the controls will raise the blade, but no brake is in place to keep the blade up.
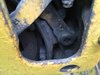
My current problem started with the former owner (I bought it thinking I would convert it to hydraulic). He reported that the blade couldn't be raised or lowered but that he adjusted it so the blade could be raised; I assume that what he adjusted was the brake. I assume the brake prevents the cable from going backward when the control is in the 'neutral' position, and that pushing the control the other way simply releases the brake, allowing gravity to pull the blade down. Am I correct?
I know nothing about these units and have nothing to go on. Can anyone tell me more about the cable unit, have any schematics or provide me with anything else that might be helpful?
")