• Thank you for visiting HeavyEquipmentForums.com! Our objective is to provide industry professionals a place to gather to exchange questions, answers and ideas. We welcome you to register using the "Register" icon at the top of the page. We'd appreciate any help you can offer in spreading the word of our new site. The more members that join, the bigger resource for all to enjoy. Thank you!

case 580b overhaul and transmission

Phil

Senior Member
Joined
May 2, 2005
Messages
1,067
Location
Southeastern Ontario
Occupation
retired operator and mechanic
Unfortunately, I don't think cleaning the 580B tanks is possible, and as I recall the drain plugs are not quite at the bottom of the tanks either. Phil
 

Tinkerer

Senior Member
Joined
May 21, 2009
Messages
9,367
Location
The shore of the illinois river USA
It has been a long time since I ran a Case 580 of any model but,I was pretty sure the 580B didn't have a tank. I was explaining why I was able to clean mine. To clean a confined area,many times I have used used a wet/dry shop vacuum. I reduce the size of the shop vacuum hose by duct taping either a PVC pipe or if it needs to be flexible,a length of rubber hose (heater hose) to the big hose on the vac. Perhaps after draining the reservoir on the 580B a person could put diesel fuel in it and then vacuum that out. I don't think there would be a fire hazard but I would certainly do it outside and not in a building.
 

willie59

Administrator
Joined
Dec 21, 2008
Messages
13,392
Location
Knoxville TN
Occupation
Service Manager
Quote: Tinkerer
To clean a confined area,many times I have used used a wet/dry shop vacuum.


No comments from me on repairing a B, never worked on one. But I've seen using a shop vac to clean oil and fuel tanks mentioned several times on the forum. One slight twist I would add to using one is making a "suck bucket". Take an empty 5 gal pail with lid in place. Drill a hole in the bucket opposite the pouring spout that will allow inserting clear vinyl hose snugly in hole. Now you can place the vac hose over the pour spout and use the vinyl hose to vac confined spaces with all the oily liquid going into the suck bucket instead of your shop vac. ;)
 

willie59

Administrator
Joined
Dec 21, 2008
Messages
13,392
Location
Knoxville TN
Occupation
Service Manager
ATCOEQUIP; The bucket idea is excellent. I hadn't thought of vacuuming through one. It would sure keep the shop vac from getting all fouled up and stinky!

That it does, brother, that it does.

I came up with this idea changing HEUI injectors in Powerstroke engines. Even if you drain the injector oil and fuel galleys, when you pull the injector, you still drop some fuel and motor oil down injector tube into the cylinders, not good for engine restart. I could insert a small diameter vinyl tube into the hole at the bottom of injector tubes and use the suck bucket to evacuate the oil and fuel on top of the cylinders without making a black mess out of the shop vac. I've used it for many projects since. Just thought I'd pass it on. ;)
 
Joined
Oct 19, 2009
Messages
7
Location
canada
580c

Hi there, I'm a new member making my first 3 posts ...I am looking for someone to help me with my Diff Lock I'm a new operator of a 580 c and can seem to get this unlocked and get rolling seems like the e-brake is on or something...I feel a bit useless i think it must be a floor pedal?
 

Papa Goose

Well-Known Member
Joined
Sep 29, 2009
Messages
45
Location
Pennsylvania
ATCOEQUIP, I agree - the bucket idea is a winner. I use something similar for bleeding hydraulic brakes on cars - a jar with two lines, one connected to a hand operated vacuum pump. Wish I had read your post before I sucked all the differential goo into my shop vac!

On the other hand, my idea for using air pressure to flush the hydraulic system was only a partial success. I was able to get a lot of the old oil out, but only some of the cylinders would move at 100 psi, so I wasn't able to get all of them cleared. I do think it helped with cleaning the "tank" (which of course is the loader frame), by agitating it. My shop manual suggested flushing the tank with diesel fuel, so I put a gallon or two in the tank and then gave it a good mix with the air before draining. Hopefully that got most of the crud.

Now that I've done it, I'm not sure I'd recommend compressed air, since you end up spending at least 10x as much labor as the cost of the oil, but if anyone else wants to try it, the trick is to disconnect the high pressure line (from the pump) at the base of the frame and then clamp a short length of 1 1/4 rubber tubing on the fitting, which you can then adapt to an airline fitting by reducing down from a hose barb (which will probably cost you as much as the oil you saved, unless you already have the fittings).

Last thing I did today was refill the tank with fresh oil, so tomorrow I hope to fire up the engine and complete the flushing procedure with the remaining cylinders. I'll also get a chance to test the shuttle - hopefully there will be a good report on that front!!

PG
 

willie59

Administrator
Joined
Dec 21, 2008
Messages
13,392
Location
Knoxville TN
Occupation
Service Manager
ATCOEQUIP, I agree - the bucket idea is a winner. I use something similar for bleeding hydraulic brakes on cars - a jar with two lines, one connected to a hand operated vacuum pump. Wish I had read your post before I sucked all the differential goo into my shop vac!


Sorry you got it late. I've used "the suck bucket" on so many jobs, it sure keeps the "differential goo" out of the shop vac. :D

I hope everything works well with your repairs. ;)
 

Papa Goose

Well-Known Member
Joined
Sep 29, 2009
Messages
45
Location
Pennsylvania
Hey gang, it works!! I fired her up this morning and sure enough, the old girl still has what it takes - she will even start off in fourth gear at idle - not bad for a 35 year old.

As for the hydraulic system, I did end up doing the power flush with the engine running - taking the line off one end of a cylinder while pressuring the other end, then switching and doing it again. That seemed to get a lot of the old gunk out the system. I have yet to finish all the cylinders in the hoe, but the loader is done.

ATCOEQUIP, you didn't tell me it would turn my shop into a skating rink - even with plastic hoses clamped on the open lines, I still managed to spray hyd fluid on pretty much every square inch of the floor. I think I'm going to take it outside to finish the hoe - some of those fittings are up pretty high and I'd probably end up of coating the walls to match the floor. Got any slick ways (analogous to your suck bucket) to avoid making such a mess? Not that I plan to do this again any time soon.

Anyway, I'm really, really pleased that it moves - after reading so many threads about these old 580B's having problems moving, I was worried about that. I'm indebted to you guys for all your great advice!!

PG
 

willie59

Administrator
Joined
Dec 21, 2008
Messages
13,392
Location
Knoxville TN
Occupation
Service Manager
ATCOEQUIP, you didn't tell me it would turn my shop into a skating rink - even with plastic hoses clamped on the open lines, I still managed to spray hyd fluid on pretty much every square inch of the floor. I think I'm going to take it outside to finish the hoe - some of those fittings are up pretty high and I'd probably end up of coating the walls to match the floor. Got any slick ways (analogous to your suck bucket) to avoid making such a mess? Not that I plan to do this again any time soon.PG


Wait a minute...it wasn't I that suggested you take lines loose and pressurize them to flush crud. :D

So you have the loader oil cleaned, now you need to do the hoe. Exactly what position is the hoe and outriggers at present?
 

Papa Goose

Well-Known Member
Joined
Sep 29, 2009
Messages
45
Location
Pennsylvania
Ooops! Sorry Atcoequip, it was Tinkerer who posted the pressure flush procedure. I was just kidding around anyway - it isn't anyone's fault but mine that I made a mess. Still, I'd rather clean up a mess than rebuild the hydraulic pump! Actually the hardest cylinder to flush was the dipper - I had to pull the bottom pin and retract it to get at the bottom connection. This job was a lot like going to the dentist - not much fun, but good to do for the long term.

Mathman, no I didn't have a garage queen in range, but I did manage to nail my shop manual - I guess it's baptized now.

PG
 

Papa Goose

Well-Known Member
Joined
Sep 29, 2009
Messages
45
Location
Pennsylvania
OK, the hydraulic system is flushed and working fine now. Next I need to look at the brakes. Phil, on a post you made a couple of weeks ago (on a "580B brakes" thread) you said: "It's a good idea to reseal both sides, including the carrier o-rings and the 2 differential lock seals." Does this mean that there are two seals on the diff lock side? I only see one on the exploded view (#20) - total of two if you do both sides. Just want to be sure I've got everything when I order the parts.
 

Phil

Senior Member
Joined
May 2, 2005
Messages
1,067
Location
Southeastern Ontario
Occupation
retired operator and mechanic
Papa,
I don't believe you can replace the 2 diff lock shaft seals without going deeper into differential disassembly, now that I think about it. I don't remember them being prone to leakage. I have added a picture of the right side gear to show the location anyway.

Just 2 o-rings and 2 housing seals are needed. I would be more concerned with any end play or up and down movement of the carrier side gears, indicating worn tapered bearings or worn/broken thrust washers. The older CK's and B's used a fiber thrust washer between the side gears and the carrier. If not updated, it can eventually break and fall out leaving the carrier loose as a goose. Soon the pinion fails as the crown is not where it should be. Even the newer C, D,and E with steel thrust washers, will get a loose carrier eventually, especially if roaded a lot. Phil
 

Attachments

  • diff lock seals.JPG
    diff lock seals.JPG
    25.6 KB · Views: 1,207

Papa Goose

Well-Known Member
Joined
Sep 29, 2009
Messages
45
Location
Pennsylvania
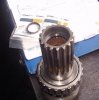
OK, I'll skip the inner shaft seals. Checked the play today - there is just a tiny amount of end play in the right side - maybe a thousandth or two? Left side seems tight. Are the thrust washers hard to replace?

Another question - I was planning on getting brake lining kits and doing the riveting myself - any trick to this? I've done aircraft (solid) rivets, with a pneumatic hammer and bucking bar - how are these set?

Unrelated issue - I'm just finishing up rebuilding the three electronic instruments (fuel, ammeter, and H2O temp). If anyone needs any help doing this, I'll be glad to answer questions. Looks like a common failure on the fuel and H2O is to lose the ground (no pun intended) connection, which comes through the case. Notice that the U bracket on these instruments has a spring clip on the side - this is part of the ground path. The internal ground connection has to go through a brass plate that presses against the inside of the case. Unfortunately, this can corrode and break that connection, and the only way to fix that is to open up the case (more on this later). The two long screws coming out the back are of course the other two connections, one to 12 volts and the other to the sensor, which is a resistor to ground. These screws make connections internally to ring terminals, which also have a way of getting corroded and lose their connections. Fortunately, the screws are brass, so they will take solder if you get them hot enough. Clean a small area with a sharp knife or dremel so the solder has good metal to bond with. Of course, all this assumes you're inside the instrument, which requires that you peel back the lip on the front cover. This can be done with a small jewelers screwdriver. Leave the last two nuts on the brass screws while you're doing this so the insides don't bounce around.

If all that sounds like too much trouble, I guess you can get a new one for maybe $80?

PG
 

Phil

Senior Member
Joined
May 2, 2005
Messages
1,067
Location
Southeastern Ontario
Occupation
retired operator and mechanic
Papa,
Thrust washer replacement involves taking the top cover off the differential and removing the 'bull' gears, after pulling the axles. I can't think of the proper name of that gear. Quite easy to do. Replacing those thrust washers should not require resetting the preload, but only if the new ones were the same thickness as the original, and the original shim packs were in place. The shims under the covers set the preload on the 2 tapered bearings that hold the carrier, same as a wheel bearing on a truck. I think your probably best to leave it as is, if movement is barely noticeable. I have in the past removed shims, but that was with the diff cover off, so the backlash could be checked. There is a certain risk to this as the preload on the carrier cannot be accurately set without the pinion removed, and the tooth contact pattern is now changed. In summary, taking your diff cover off for an inspection is probably the best preventative maintenance you can do on a B, and it allows you to work comfortably on your brake assemblies, with the seat and floor boards removed.

I have riveted these brake linings on myself, at considerable savings, however a proper tool is required to roll to rivet head.

I think that's great that you have posted your in-depth findings on gauge restoration. Phil:)
 
Last edited:

Papa Goose

Well-Known Member
Joined
Sep 29, 2009
Messages
45
Location
Pennsylvania
I started a new thread called "Rebuilding the 580B instrument gauges" that gives more details and adds a few pictures.
 

Phil

Senior Member
Joined
May 2, 2005
Messages
1,067
Location
Southeastern Ontario
Occupation
retired operator and mechanic
Nice new thread Papa Goose, I'm hoping more info will be added to it, such as cab to engine grounding and sensor resistances. Not that there is an inherent problem with grounding on the B, as the engine is bolted solid to the frame, but if you love a B that doesn't matter:).

I forgot to mention about protecting the bearing housing seal from shaft damage when installing the housing on the left side. There is a very sharp ledge on the left side gear. Some use a plastic sleeve, I use a smooth plastic section of a coke bottle. One knowledgeable Case mechanic here(Melben) used electrical tape wound round the shaft. Phil
 

Papa Goose

Well-Known Member
Joined
Sep 29, 2009
Messages
45
Location
Pennsylvania
OK, here's a challenging question for you Phil - I've got a Trans Oil Temp light, but no sensor - the wires were cut and I can't find any evidence of the probe (actually a switch to ground, I believe). So, my first question is, where was the sensor supposed to be? There are several plugs in the power valve, so maybe one of those was originally a temp sensor? Second question (this is the hard one) - at what temp was the switch supposed to close? I'm thinking I can wire in a temp-controlled switch rather than paying $28 for a new Case sensor.
 

Phil

Senior Member
Joined
May 2, 2005
Messages
1,067
Location
Southeastern Ontario
Occupation
retired operator and mechanic
Papa,
The converter oil temp sender is located on top of the converter pressure regulator valve, and mounted in a vertical position. I believe the thread size is 3/8"NPT. It may still be there. The original wire colour is black.

I am at a loss to find a reference to the temperature at which point this sender becomes 'true'. I would be tempted to pay the $28 if you want it working as original. There is lots of info out there on maximum recommended oil temperature in automatic transmissions, a similar application. Of course there is a time element, so how Case engineering would spec it I do not know. Phil
 

Attachments

  • Electrical 580B.jpg
    Electrical 580B.jpg
    51.1 KB · Views: 1,127
  • convertor valve.JPG
    convertor valve.JPG
    24.4 KB · Views: 1,349
Top