• Thank you for visiting HeavyEquipmentForums.com! Our objective is to provide industry professionals a place to gather to exchange questions, answers and ideas. We welcome you to register using the "Register" icon at the top of the page. We'd appreciate any help you can offer in spreading the word of our new site. The more members that join, the bigger resource for all to enjoy. Thank you!

Need help with control valve rebuild on my Bobcat

Joined
Jun 21, 2009
Messages
16
Location
NC
Hey ya'll, I made three posts so now I can finally start a thread and hopefully get some help.

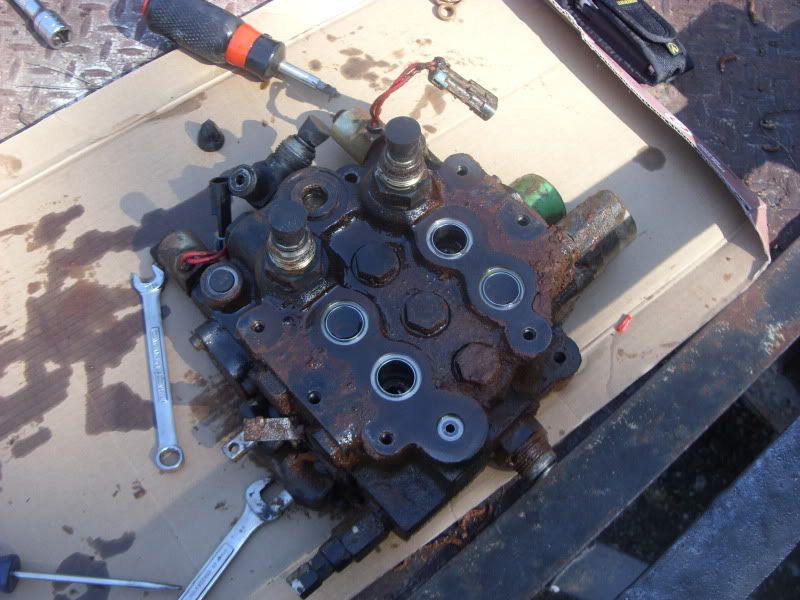
I have a 2000 Bobcat 753, and I'm currently rebuilding the control valve on it.

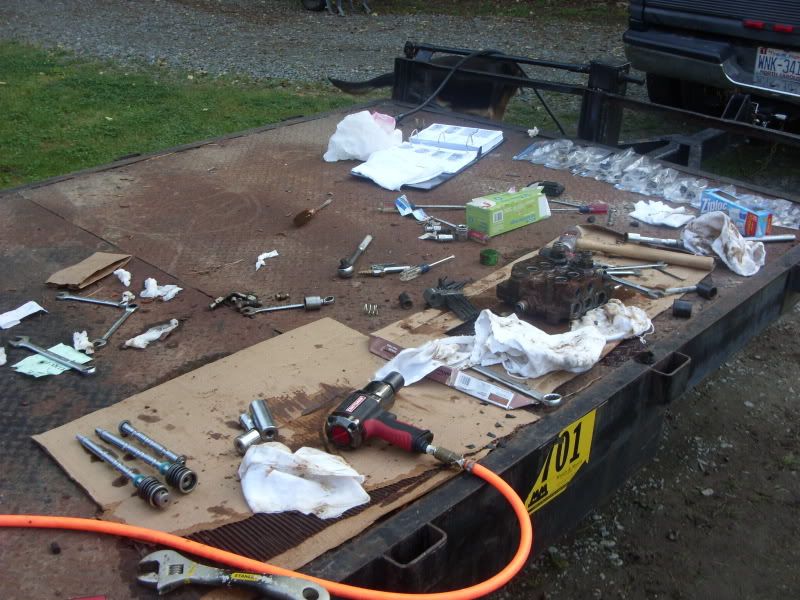
I bought a service manual and followed the procedures in it and removed the entire control valve/BICS valve assembly. What a pain.

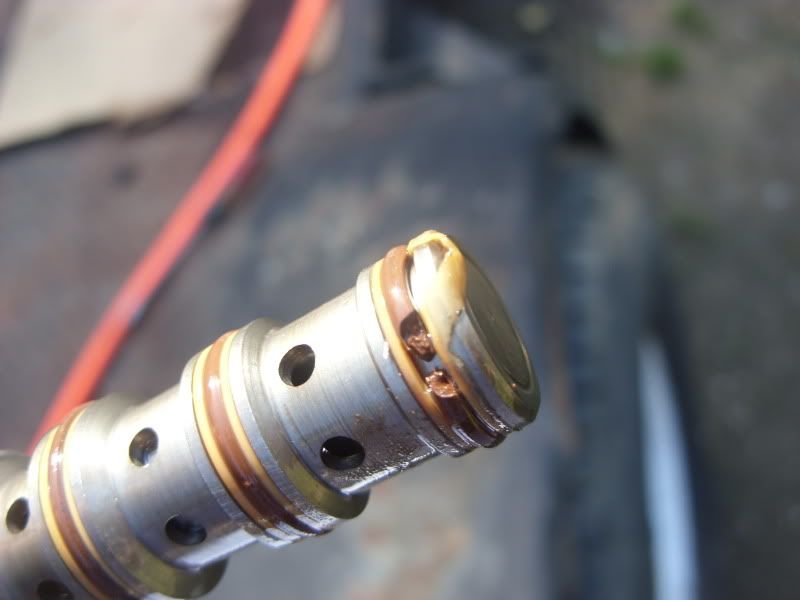
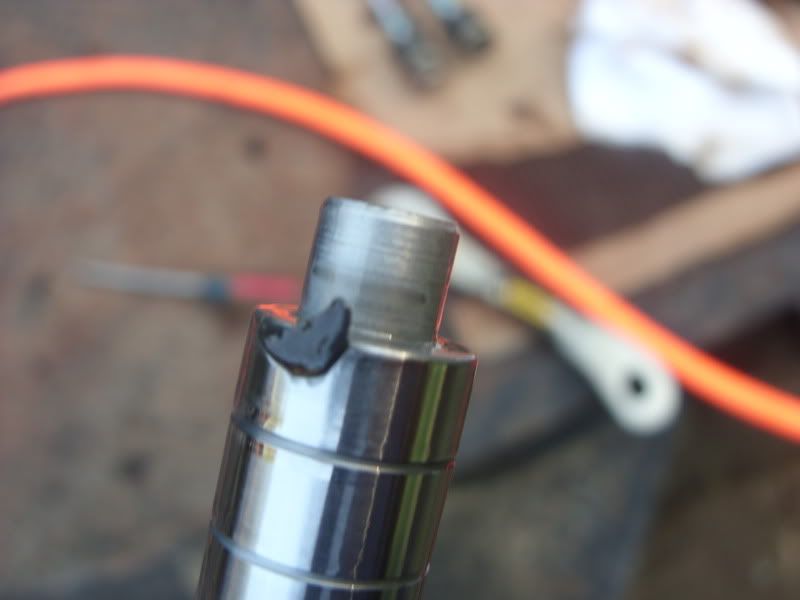
My machine was very dirty on the inside and was impossible to clean everything off when I removed the control valve - so I'm worried that if I don't clean out the control valve blocks, that there is some mud, grit, etc. that might have fallen into the passages that will undo all the work I'm doing to rebuild it.

I need some ideas on how to clean the passages out to make sure that they are very clean when I put the parts back together.

If anyone would be willing to share some ideas or suggestions it would be greatly appreciated. Thanks.

Here are a couple pictures.

SN850970.jpg

SN850972.jpg

SN850988.jpg

SN850990.jpg

SN850991.jpg


_____

Dennis
 
Last edited:

TALLRICK

Well-Known Member
Joined
Apr 28, 2007
Messages
195
Location
florida
Were you getting leaks from the control valve? I will be doing the same in my 763 which has a leak from its control valve. Generally I don't worry too much about getting dirt in as I am going to disassemble totally and rebuild. I clean parts with diesel and/or degrease with lye first. Rusted parts get submerged in a solution of lye, washing soda or baking soda and water and connected to a battery charger for electrolysis. Final cleaning of castings is usually by pressure washer. Once cleaned I simply drop part in diesel and let the water seperate. During assembly I use generous amounts of hydraulic oil and then tape up or cap inlets. After a brushdown with paint thinner and the part dries I paint it. Last but not least, I install it on the machine. My 863 is still all apart so every piece gets cleaned, rebuilt and painted seperately. Once assembled it's like new.
 
Joined
Jun 21, 2009
Messages
16
Location
NC
Yeah, it was leaking pretty bad. I checked the fluid one day before I started it up and noticed it was barely touching the bottom of the dipstick. First thought was that it was a motor seal and it had drained into the chaincase. I removed the chaincase plug expecting to see all the missing fluid coming out, but nope, in fact, it was low on fluid as well. Finally, I found the fluid all sitting in the bottom of the machine. Apparently the previous owner operated the thing in some nasty clay and it completely clogged the drain holes, and continued its way into the machine. I have a feeling it was a spool valve that was leaking, but there were lots of other bad seals that I've discovered as well. All the leaking fluid just pooled up inside the machine.

Thank you for the tips.
 

willie59

Administrator
Joined
Dec 21, 2008
Messages
13,396
Location
Knoxville TN
Occupation
Service Manager
Oh yeah...this will muck up a hyd system's operation!

Bobcat cartridge.jpg


As for cleaning it; drop it in a 5 gal bucket with some mineral spirits and clean the oil/grime off of it. Then dry it down with compressed air. For general "spot cleaning", like when you go to install a spool and want to make sure the bore is clear of debris; a can of starting fluid. Starting fluid is a mechanics best friend, not so much for starting engines, but for cleaning. It cleans oils great and evaporates really quick. Spray a good bit inside the bore, blow it out with air, and it will be clean and dry. Then spray some WD40 into the bore to give a light lube for installing the spool. ;)
 
Joined
Jun 21, 2009
Messages
16
Location
NC
what is this costing you if you dont mind me asking?

$109.05 for the seal kit for the control valve, a lot time and frustration and several layers of skin off my knuckles. I figured I might as well rebuild the BICS valve while its off as well. The problem is there isn't a kit available for the BICS valve, so everything will have to be ordered separately, and the dealer didn't have any of it in stock. All the parts to reseal the BICS valve will cost less than 50 bucks. So I still need to order and pick up all of those. I sure wish there was a place you could order and have it shipped to your address, because my dealer is about an hour away.

The only other thing is the manual shows a special tool that is used to install the detent balls (which by the way, be sure to wrap a cloth around them, the manual isn't kidding, the spring sent one of mine into orbit but thankfully it landed on my trailer bed).

I asked the lady behind the parts counter how much that tool cost, and I think it was around $120!! So... I haven't figured out what I'm going to do when I get to that step yet.

Thanks everyone for all the great advice, and please keep it coming.

Is there a way I can make my pictures from PhotoBucket show up like the one above, or do I have to upload it to this site?
 
Last edited:

willie59

Administrator
Joined
Dec 21, 2008
Messages
13,396
Location
Knoxville TN
Occupation
Service Manager
I don't take apart those Bobcat detents unless I'm forced to kickin' and screamin'! It's been a while since I've had one apart and I don't have it in my head of what you need to do to re-assemble it, sorry 'bout that. As for pics? Yes, there's a handy little feature to do this. Go to the top of the page and click the FAQ link. Click on Reading and Posting Messages. Then click on Attachments and Images. This will give you the steps to take. ;)
 
Joined
Jun 21, 2009
Messages
16
Location
NC
Thank you. Let me see if this works.

SN850956.jpg


Well, guess it didn't :(. Maybe I can't link an image from a different site and instead it has to be uploaded as an attachment here?
 
Last edited:

willie59

Administrator
Joined
Dec 21, 2008
Messages
13,396
Location
Knoxville TN
Occupation
Service Manager
I haven't tried to upload an image from another site, I just upload images I've saved on my computer. That's what I did with your image; opened it, saved it, then upload. There may be a way to do it from other sites, I just haven't tried. Try saving one of your images on your computer, then upload it, just to see how it works. ;)
 
Joined
Jun 21, 2009
Messages
16
Location
NC
Thanks for the helpful advice everyone. I started with the BICS valve since its smaller and let it soak in a tub of mineral spirits overnight. Then I cleaned off as much of the dirty grime as i could with a toothbrush in a laundry sink in my garage. Then I hosed everything out and *think* I got any extra dirt/grime that could possibly be inside the passages of the BICS valve out. Now its been soaking in diesel fuel for a while, haven't had time to work on it over the past day or so. It appears that all the water has settled on the bottom.

Should I soak it in mineral spirits one more time, then let it dry out?
 

mrfixitpaul

Well-Known Member
Joined
Mar 26, 2009
Messages
109
Location
maine
I don't take apart those Bobcat detents unless I'm forced to kickin' and screamin'! It's been a while since I've had one apart and I don't have it in my head of what you need to do to re-assemble it, sorry 'bout that. As for pics? Yes, there's a handy little feature to do this. Go to the top of the page and click the FAQ link. Click on Reading and Posting Messages. Then click on Attachments and Images. This will give you the steps to take. ;)


One of the old mechanics at the dealer where I worked had made a simple but effective tool for installing the balls & spring. It was a c-shaped piece of plate about 3/8"thick, the 'c' was sized to go around the denent holes, had one hole drilled and tapped to 1/4 x 20 that you lined up over the hole, insert the parts, and hold in place with an allen screw. then push detent cap into place, pushing tool off the balls at the same time. Looked fairly simple to make and worked with the valve still in the machine. Wish I had 'borrowed' one when I retired from there but will definitely make something when the need arises.

sorry no pictures either, I'll try and draw a picture and post it.
 

willie59

Administrator
Joined
Dec 21, 2008
Messages
13,396
Location
Knoxville TN
Occupation
Service Manager
One of the old mechanics at the dealer where I worked had made a simple but effective tool for installing the balls & spring. It was a c-shaped piece of plate about 3/8"thick, the 'c' was sized to go around the denent holes, had one hole drilled and tapped to 1/4 x 20 that you lined up over the hole, insert the parts, and hold in place with an allen screw. then push detent cap into place, pushing tool off the balls at the same time. Looked fairly simple to make and worked with the valve still in the machine. Wish I had 'borrowed' one when I retired from there but will definitely make something when the need arises.

sorry no pictures either, I'll try and draw a picture and post it.

Sounds like a pretty slick trick! I learned on the first 743 that I changed valve seals with the valve installed, that it's not wise to pull the detent cage apart. Those little balls disappeared in the belly of that machine. :eek: I learned to remove the screws that hold the centering spring cap on and pluck the whole spool out of them, then slide new seal on the spool. I don't mess with the detent unless it has a problem. :)
 

AndyGrevis

Well-Known Member
Joined
Jul 25, 2008
Messages
52
Location
Lettland
Occupation
Bobcat 863; Case CS150; Belarus 82; Claas
Hi
doesnt want to hijack the thread, so will post here. right, after reading this and some earlier posts about resealing control box on BC, and knowing that mine leaks some oil, went to the dealer and ordered a reseal kit for my 863 BC. on friday got this one delivered:
Photo0018.jpg
now i wonder if thats the right kit, doesnt looks like it has all o-rings etc, and there is only one rubber cap. so now, before i tear the control box out, can someone confirm if its the right sealing package? just want to avoid extra downtime, if it will turn out its not the one. thanks!
 

bustedknuckle

Active Member
Joined
Apr 11, 2009
Messages
40
Location
Oakwood, Ga
You've got the kit to reseal one spool. A lot of the control valve leaks come from the spools leaking, not the fittings, etc. Do both spools at once and you'll be trouble free. If you only try to do one spool, say the lift spool, your tilt spool will start leaking soon there after, and vice versa.
 

bobcatmechanic

Senior Member
Joined
Mar 26, 2008
Messages
429
Location
kansas
Occupation
bobcat mechanic
there should be three difrent kinds of seals in there a black quad ring the orange seals and the green seals the black quad rings where on the old 743 843 853 and the orange seals i have only come acrossed one set and they where on a 7753 the green are on all about all of the newer g series and above machines. the kits just come with new bolts and boots but unless you strip out the bolts you dont need them the factory recommends that you replace them any time you take them out but then again they recommend people do alot of stuff to prolong the life and assembly of things but you dont see that getting done on alot of guys tuff run er till she blows then gripe about the bill pay me now or pay me later as my old instructor used to say. don't take the four to six hours to remove and reseal the control valve it can be done in the machine and should cost about 25 dollars or so in parts around here in missouri just get the seals balls spring and stud and call it good take it apart before you go to the dealer to see if you are going to need new allen bolts because occasionally the do strip out dont loock tight them back in because the next time you go to pull it apart you will wish you had not done that tighten the bolts evenly on the caps to keep them from binding up in the cap and bore
 
Joined
Jun 1, 2009
Messages
24
Location
Riverside Ca
Yep, like BCmec said, I have a 763F and I replaced the seals in my control valve while the unit was in the machine. It took about 2 or 3 hours (I never did one before) and the parts were cheep also from the dealer, I don't think it was much more than the above quote.

Good luck!
 

AndyGrevis

Well-Known Member
Joined
Jul 25, 2008
Messages
52
Location
Lettland
Occupation
Bobcat 863; Case CS150; Belarus 82; Claas
Thanks pals! makes sense though i am a bit confused about "balls, spring and stud", local dealer gives me that weird "what do you want" expression on the face when asked for them :D
Bobcatmec, maybe you could help me out, i could PM you s/n and paypal you the amount for seals/balls/springs/stud + shipping + 6 pack of beer? that way i would save a lot of time running arround town to and from the local, which is an hour away anyways
 

wmshooke

Active Member
Joined
Jul 17, 2009
Messages
40
Location
Georgia
Occupation
Mechanic
I'm replacing the seals on the tilt spool of a 763 this weekend.
From the posts I'm guessing if I'm careful, I can take out the 2 allen's holding the detent cap on the lift spool, and pushing the spool from the link end - push it out of the valve body and just leave the end cap/detents in place?
I left the valve attached, and thus far pulled out the tilt spool (it was leaking a stream out the little hole in the end cap)
 
Top